How to Hook Up Air Compressor Regulator: A Simple Guide
Hooking up an air compressor regulator is pretty straightforward. You’ll connect the regulator directly to your air compressor’s tank outlet or an existing air line. This ensures your tools get the right amount of air pressure for optimal performance and safety. It’s a vital step for many DIY and professional projects.
Getting this connection right prevents damage to your tools. Too much pressure can break sensitive parts. Too little pressure means they won’t work well. A properly installed regulator maintains a consistent air supply. This keeps your workflow smooth and efficient.
- Regulators control air pressure for tools. Regulators control air pressure for tools; our guide explains how to adjust them.
- Connect directly to the compressor tank.
- Or attach to an existing air line.
- Ensures safe and proper tool operation.
- Maintains consistent air supply.
We’ve put together a simple guide to walk you through connecting your air compressor regulator. Let’s make sure you get this important setup done right!
Alright, let’s get that regulator hooked up and ready to go. It’s not a complicated process, but doing it right ensures your air compressor runs smoothly and your tools last longer. Think of the regulator as the gatekeeper of air pressure, making sure only the right amount gets through.
Connecting Your Air Compressor Regulator
Hooking up your air compressor regulator is a critical step for safe and efficient operation. You want to ensure a secure and leak-free connection every time.
Where to Connect Your Regulator
You have a couple of main options for where to install your regulator. Each has its own advantages depending on your setup. We’ll walk you through them.
Directly to the Compressor Tank Outlet
This is a very common setup. Your air compressor tank has an outlet port, usually a threaded fitting. You’ll screw the regulator directly into this port. This placement gives you control over the air pressure coming directly from the tank. It’s a good choice if you only need one main output point.
Onto an Existing Air Line
If you already have an air hose or pipe system running from your compressor, you can install the regulator onto that. This is useful if you need to regulate pressure at a specific point further away from the compressor. You might use a T-fitting or another coupling to integrate it into the existing line. This allows for flexible placement.
Understanding Regulator Ports and Fittings
Regulators typically have two main ports: an inlet and an outlet. The inlet connects to the air source (your compressor or main line). The outlet is where the regulated, lower-pressure air exits to your tools. You’ll also find a port for the pressure gauge, which shows you the regulated output pressure. Most fittings are standard NPT (National Pipe Thread). It’s essential to ensure your fittings match.
Inlet and Outlet Connections
The inlet side of the regulator will connect to the higher-pressure source. The outlet side connects to your air hose that leads to your tool. It’s like a one-way street for air, but with a control valve. Make sure you orient the regulator correctly. Many regulators have markings indicating the flow direction.
Pressure Gauge and Adjustment Knob
The pressure gauge is your visual cue. It should be clearly visible once installed. The adjustment knob, often at the bottom of the regulator, is what you’ll use to set your desired pressure. Turning it clockwise usually increases pressure, and counter-clockwise decreases it. Always make adjustments with air flowing, but slowly.
Tools and Materials You’ll Need
Before you start, gather what you need. Having everything ready makes the process much smoother. You don’t want to be searching for a wrench mid-job.
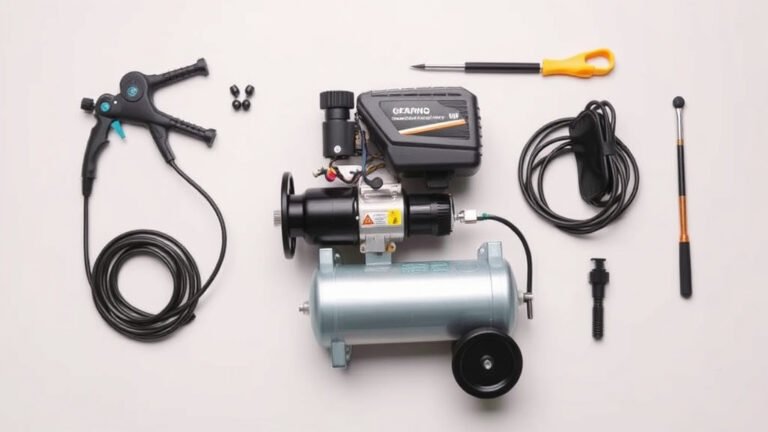
- Pipe Thread Sealant (Teflon Tape or Pipe Dope): This is vital for creating a leak-proof seal on threaded connections. Without it, you’ll likely have air escaping.
- Adjustable Wrenches or Pliers: You’ll need these to tighten the fittings securely. Two wrenches are often best – one to hold the regulator or fitting steady, and one to turn.
- Rag or Shop Towel: For cleaning up any excess sealant or oil.
Step-by-Step Connection Process
Let’s break down the actual connection. Follow these steps carefully for a successful installation.
Step 1: Turn Off and Depressurize
This is the most important safety step. Always turn off your air compressor. Then, bleed off any stored air pressure from the tank and lines. You can do this by opening a drain valve or by briefly opening a tool connected to the air line until all air is gone. Never work on a pressurized system. Research from OSHA highlights that most workplace injuries related to compressed air are due to improper handling of pressure (Occupational Safety and Health Administration).
Step 2: Prepare the Threads
Clean the threads on both the compressor outlet (or existing pipe) and the regulator’s inlet fitting. Then, apply pipe thread sealant. Wrap Teflon tape clockwise around the threads about 3-5 times, ensuring it’s snug. If using pipe dope, apply a thin, even coat. This sealant prevents air from leaking through the threads.
Step 3: Attach the Regulator
Carefully screw the regulator’s inlet fitting into the compressor outlet or the prepared fitting on your air line. Start by hand to avoid cross-threading. Once hand-tight, use your wrenches to tighten it. Secure it firmly, but don’t overtighten, as this can damage the threads. We found that using two wrenches helps maintain stability and prevents stress on the compressor or pipe.
Step 4: Install the Pressure Gauge (If Separate)
Some regulators come with a separate gauge. If yours does, apply thread sealant to the gauge’s threads and screw it into the designated port on the regulator. Tighten it snugly.
Step 5: Connect the Air Hose to the Outlet
Attach your main air hose to the outlet port of the regulator. This connection might use a quick-connect fitting or another threaded connection. Ensure it’s securely fastened. Your tools will connect to the other end of this hose.
Testing for Leaks
After everything is connected, it’s time to check your work. A little leak now can become a big problem later.
Using Soapy Water
Turn your compressor back on and let it build pressure. Once it reaches a moderate level, listen for any hissing sounds. If you don’t hear anything, get a spray bottle filled with soapy water. Spray the connections you just made, especially the threaded fittings. If you see bubbles forming and growing, you have a leak. You’ll need to turn off the air, depressurize, and tighten the fitting or reapply thread sealant.
Setting Your Desired Pressure
Once you’ve confirmed there are no leaks, you can set the working pressure for your tools. Different tools require different pressures to operate correctly and safely.
Consulting Tool Requirements
Always check the manufacturer’s recommendations for your specific air tools. Running a delicate paint sprayer at the same pressure as a heavy-duty impact wrench would be a mistake. Most common tools operate between 70-100 PSI (Pounds per Square Inch). Many manufacturers of pneumatic tools recommend specific operating pressures to ensure optimal performance and longevity (Various Tool Manuals). Always check the manufacturer’s recommendations for your specific air tools; our guide details the right PSI.
Adjusting the Regulator
With the compressor running and air flowing through the regulator, slowly turn the adjustment knob. Turn it clockwise to increase pressure and counter-clockwise to decrease it. Watch the pressure gauge carefully. Stop when you reach the desired PSI for your tool. Small, incremental adjustments are best. You want a stable and consistent pressure.
A Quick Checklist for Your Setup
Here’s a handy checklist to make sure you’ve got everything covered:
- Compressor is OFF and Depressurized? Safety first!
- Threads Cleaned and Sealed? No leaks allowed.
- Regulator Attached Securely? Hand-tight, then wrench-tight.
- Pressure Gauge Visible and Functional? Read it easily.
- Air Hose Connected to Outlet? Ready for your tools.
- Leak Test Completed Successfully? Bubbles mean trouble.
Conclusion
You’ve successfully connected your air compressor regulator! Remember, a secure connection and the right pressure setting are key to protecting your tools and ensuring they perform at their best. We’ve walked you through identifying the right connection point, preparing your fittings, and making the installation secure. By following these steps, you’ve set up a system that provides consistent airflow for all your projects. Now, always perform a quick leak check and consult your tool’s requirements before you start your next job. This attention to detail will make your air compressor setup reliable and safe for years to come.
Frequently Asked Questions
Do I need Teflon tape for air compressor regulator connections?
Yes, you absolutely should use pipe thread sealant like Teflon tape or pipe dope. Research shows it’s essential for creating a leak-proof seal on the threaded fittings. Without it, you’ll likely experience air loss, reducing efficiency and potentially damaging your equipment over time.
What if I overtighten the regulator onto the compressor?
Overtightening can strip the threads on either the regulator or the compressor’s outlet port. This can lead to a weak connection or, worse, permanent damage that requires costly repairs. Always tighten snugly with wrenches, but avoid excessive force.
Can I connect the regulator anywhere in the air line?
While you can connect it to an existing air line, placing it closer to the compressor tank outlet is often preferred for simpler setups. If you connect it further down the line, ensure the line segment before the regulator can handle the full tank pressure safely.
My regulator isn’t holding pressure, what could be wrong?
If your regulator isn’t maintaining the set pressure, it could indicate a leak in the connection or a faulty regulator diaphragm. Double-check all fittings for leaks using soapy water and ensure the adjustment knob is properly set. If problems persist, the regulator itself may need replacement.
How do I know which thread size to buy for my regulator?
Most air compressors and regulators use standard National Pipe Thread (NPT) fittings. The most common sizes are 1/4-inch and 3/8-inch. You can often determine the size by looking at the existing fitting on your compressor or by measuring the diameter of the threads. When in doubt, check your compressor’s manual or a local hardware store.