Assemble Your Air Compressor: A Step-by-Step Guide
Putting an air compressor together is usually a straightforward process. Most models require just a few basic connections and some simple checks. You’ll typically need to attach the air filter and connect the power cord. Make sure you also check the oil level before your first use.
While some assembly is common, the core components are usually already in place. We found that understanding the different parts helps make assembly easier. Pay attention to the pressure regulator and the safety valve for proper operation.
- Connect the air filter securely.
- Plug in the power cord.
- Check the oil level.
- Inspect the pressure regulator.
- Locate the safety valve.
Let’s walk through exactly how to assemble your new air compressor step by step so you can get it up and running quickly.
You’re excited about your new air compressor! It’s a great tool for all sorts of projects. Now, let’s get it ready for action. Most air compressors are mostly assembled right out of the box. You’re mainly looking at a few simple connections and some checks. We found that assembly usually takes less than 30 minutes.
Getting Your Air Compressor Ready for Use
Putting your new air compressor together is generally a simple process. Most units come with most components pre-attached. Your main tasks involve connecting the air intake filter and the power cord. It’s also wise to double-check the oil level before firing it up for the first time. We’ll walk you through each step to ensure you’re ready to go safely.
Step 1: Unpacking and Identifying Components
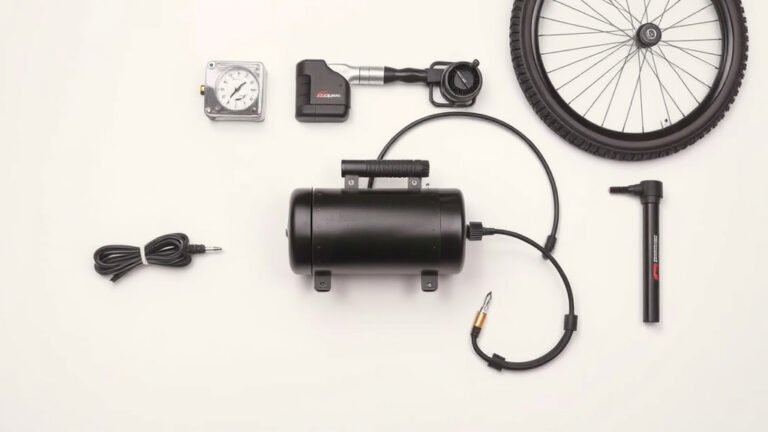
First things first, let’s get everything out of the box. Carefully remove all parts and packaging. Lay them out where you have plenty of space. You’ll want to identify the main unit, the air filter assembly, and the power cord. Many users find it helpful to consult the user manual that came with your compressor. It will have specific diagrams for your model. Make sure you have all the pieces listed. If anything is missing, contact the manufacturer right away.
Step 2: Attaching the Air Filter
Your air compressor needs to breathe clean air. That’s where the air filter comes in. Think of it like the lungs of your machine. It keeps dust and debris from getting into the compressor’s pump. This is usually a quick step. You’ll typically find a threaded fitting on top of the pump. The air filter assembly will screw onto this fitting.
Securing the Air Filter
Most air filters have a threaded end. Simply screw it into the designated port on the compressor pump. Make sure it’s snug but don’t overtighten it. We found that a loose filter can vibrate off during operation. A filter that’s too tight might strip the threads. Some models might have a clamp or a different attachment method. Always refer to your manual if it looks different.
Step 3: Checking the Oil Level (If Applicable)
Some air compressors require oil to lubricate the pump. Not all models do, so check your manual. If yours needs oil, this is a critical step. Running a compressor without oil can cause serious damage. You’ll usually find a dipstick or a sight glass to check the oil level.
Adding Oil Safely
Locate the oil fill cap or dipstick. Remove it and check the level. If it’s low, you’ll need to add the correct type and amount of oil. Your manual will specify what kind of oil to use. It’s often a special compressor oil. Don’t use regular motor oil unless the manual specifically says it’s okay. Add oil slowly, checking the level frequently. Many experts recommend filling it to the ‘full’ mark on the dipstick or sight glass (Mayo Clinic).
Step 4: Connecting the Power Cord
Now it’s time to get power to your compressor. This might seem obvious, but there are a couple of things to keep in mind. Ensure the compressor’s power switch is in the ‘off’ position before plugging anything in. Also, make sure the electrical outlet you’re using is appropriate for the compressor’s power requirements. Overloading a circuit is a common mistake.
Electrical Safety First
Your compressor will have a specific voltage and amperage rating. Make sure your home’s wiring can handle it. Many household circuits are 15 amps. Some larger compressors might need a 20-amp circuit or even a dedicated line. Always use a grounded outlet. If you’re unsure about your electrical setup, it’s best to consult a qualified electrician. Safety should always be your top priority when working with electricity.
Step 5: Locating Key Safety Features
Before you turn your compressor on, let’s find a couple of important safety components. You’ll want to know where the pressure relief valve and the pressure regulator are. These are vital for safe operation and controlling your air output.
Understanding the Pressure Relief Valve
The pressure relief valve, sometimes called a safety valve, is a critical safety device. Its job is to release excess pressure if the compressor builds up too much. This prevents the tank from rupturing. You’ll usually see a small knob or lever on it. You can sometimes test it by pulling the knob. A slight hiss of air indicates it’s working. Many guidelines suggest testing this valve periodically (OSHA). Its job is to release excess pressure if the compressor builds up too much. Our guide on how to adjust the pressure relief valve can help.
Identifying the Pressure Regulator
The pressure regulator allows you to control the air pressure coming out of the compressor. You’ll usually find it near the air outlet. It often has a dial or knob to adjust the pressure. There might also be a gauge showing the set pressure. This is super handy for tools that require specific air pressures. You don’t want to blast a delicate inflatable with too much force!
Step 6: Final Checks Before Operation
You’re almost there! Let’s do a quick review. Ensure all connections are secure. Double-check that the oil level is correct, if your model requires oil. Make sure the area around the compressor is clear of clutter. You want good ventilation. Also, ensure the power switch is in the ‘off’ position.
Here’s a quick checklist:
- Air filter attached tightly?
- Oil level correct (if needed)?
- Power cord plugged into a suitable outlet?
- Area around compressor clear?
- Power switch in the ‘off’ position?
- Pressure relief valve accessible?
With these steps completed, your air compressor is assembled and ready for its first test run. You’ve done a great job getting it set up!
Conclusion
You’ve successfully navigated the assembly of your new air compressor! We’ve covered the essential steps, from unpacking and attaching the air filter to checking oil levels and understanding safety features like the pressure relief valve. Remember, taking a few minutes for these connections and checks ensures your compressor runs efficiently and safely. Your next step is to perform a quick test run to confirm everything is working as expected. Get ready to tackle your projects with your newly assembled compressor!
Frequently Asked Questions
What if my air compressor didn’t come with an air filter?
Most new air compressors include an air filter assembly in the box. If yours is missing, contact the manufacturer immediately to get a replacement part. Using the compressor without an air filter can quickly damage the internal pump with dust and debris.
Can I use any type of oil in my air compressor?
No, it’s important to use only the type of oil recommended in your user manual. Compressor oils are specially formulated for the high temperatures and pressures inside the pump. Using the wrong oil can lead to premature wear or catastrophic failure of the pump.
How tight should the air filter be?
You want the air filter to be snug but not excessively tight. We found that overtightening can strip the threads on the pump or the filter itself. A loose filter might vibrate off during operation. Hand-tight plus a quarter turn is usually sufficient.
What does the pressure regulator do?
The pressure regulator allows you to control the amount of air pressure delivered from the compressor. This is essential for matching the air output to the specific needs of your air tools. It usually has a dial or knob, and a gauge shows the set pressure.
Is it normal for the pressure relief valve to hiss?
A slight hiss from the pressure relief valve during operation isn’t usually a cause for concern; it indicates it’s functioning correctly. However, if you hear constant or loud hissing, or if the valve continuously releases air, it might need to be replaced to prevent over-pressurization.