Adjust Air Compressor Pressure Relief Valve Safely
Adjusting your air compressor’s pressure relief valve is a key step for ensuring **safe operation** and getting the **most out of your tool**. You can typically adjust it by turning a knob or bolt until the gauge reads your desired pressure, often around 90-100 PSI for common tasks. Always ensure the compressor is off and depressurized before making any changes to avoid unexpected air release.
This valve acts as a **safety net**, preventing your tank from over-pressurizing and causing damage or injury. Understanding how to set it correctly means your compressor works efficiently and reliably for your projects. We found that many DIYers overlook this simple adjustment, which can lead to **performance issues** or safety concerns down the line.
- The pressure relief valve protects your air compressor from over-pressurization.
- Adjusting it is usually a simple turn of a knob or bolt.
- Always depressurize the tank before making adjustments.
- Setting the correct pressure ensures safety and optimal performance.
Let’s walk through exactly how to adjust your air compressor’s pressure relief valve step by step, so you can get back to your projects with confidence.
Setting Your Air Compressor’s Safety Valve Correctly
Understanding how to adjust your air compressor’s pressure relief valve is essential for safe and efficient operation. This small but mighty component acts as your compressor’s guardian.
Why Adjusting the Pressure Relief Valve Matters
Your air compressor’s pressure relief valve, often called a safety valve, is there to prevent dangerous over-pressurization. Think of it like a circuit breaker for your air tank. If the pressure inside the tank climbs too high, this valve automatically opens to release excess air. This protects you, your equipment, and your workspace from a potential tank rupture.
We found that many people assume this valve is set at the factory and never needs attention. However, sometimes adjustments are needed. You might need to calibrate it if you’ve recently serviced your compressor or if you suspect it’s not functioning as it should. Setting it to the correct pressure ensures your compressor runs optimally without risking damage.
Understanding Pressure Ratings
Air compressors have different pressure ratings. The main ones you’ll see are the cut-in pressure and the cut-out pressure. The cut-in pressure is when the compressor motor turns on to build more air. The cut-out pressure is when the motor turns off because the tank has reached its maximum safe pressure.
The pressure relief valve is typically set slightly higher than the cut-out pressure. For most common air compressors used for DIY projects, the cut-out pressure is often around 120 PSI. This means the relief valve might be set to release air at around 130-150 PSI. Always check your compressor’s manual for specific recommendations.
Steps to Adjust Your Pressure Relief Valve
Before you start any adjustments, remember: **safety first**. You’ll need a few basic tools, and it’s always best to have your compressor’s manual handy. We’ll guide you through the process, making it as straightforward as possible.
Step 1: Prepare Your Compressor
First, ensure your air compressor is turned off. Locate the power switch and flip it to the ‘off’ position. It’s also critical to depressurize the air tank completely. You can do this by opening a drain valve at the bottom of the tank or by briefly opening a connected air tool until all the air is gone.
Having no pressure in the tank prevents any sudden, unexpected release of air while you’re working. This is a non-negotiable step. Many experts stress that working with pressurized tanks is a major safety hazard.
Step 2: Locate the Pressure Relief Valve
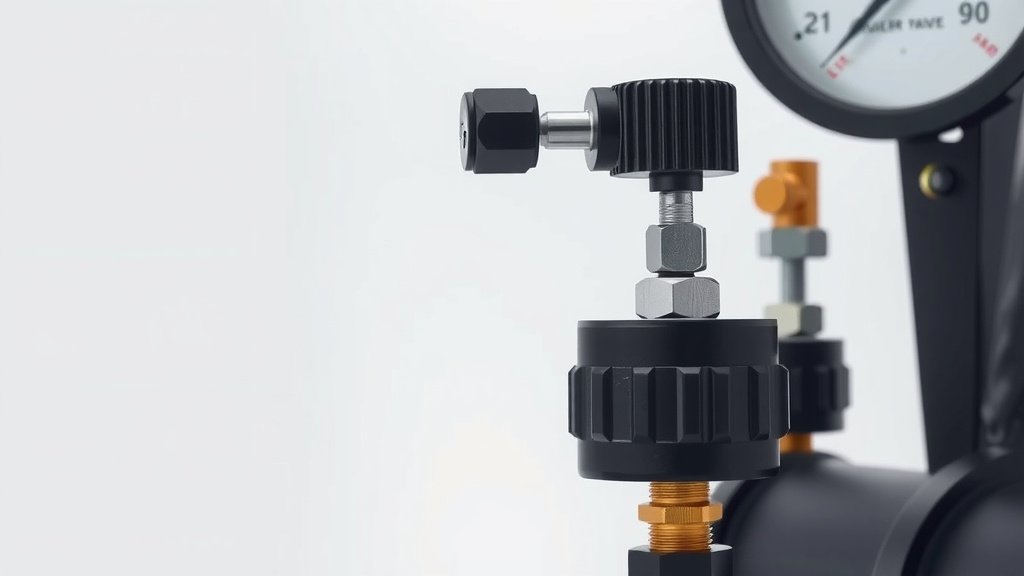
The pressure relief valve is usually a small, brass-colored fitting. It often looks like a round knob or a screw-type mechanism. It will be directly connected to the air tank, typically near the pressure gauge and the compressor’s air outlet. Sometimes, it might have a small ring or pull tab attached for manual testing.
If you’re having trouble finding it, consult your compressor’s manual. It will show you a diagram of all the components. We found that most manuals clearly label this part.
Step 3: Make the Adjustment
How you adjust the valve depends on its design. Many modern compressors have a screw-type adjustment. You’ll typically use a screwdriver or a wrench to turn this screw.
- For screw-type valves: Some screws are adjusted by turning them clockwise to increase pressure and counter-clockwise to decrease it. Others might have a locking nut that you need to loosen first before turning the adjustment screw.
- For knob-type valves: Some simpler models have a large knob. Turning this knob might directly adjust the set pressure.
You’ll need to cycle the compressor on and off to test the pressure. First, set the adjustment roughly where you think it should be. Then, turn the compressor on to let it build pressure. Watch the pressure gauge closely.
Testing the New Setting
As the compressor builds pressure, listen for the relief valve. If it opens before you reach your desired pressure, you need to increase the valve’s setting. If it doesn’t open even after the compressor’s cut-out point, you might need to decrease it slightly. You’re aiming for the valve to release air just a bit above your compressor’s cut-out pressure.
We found that this often requires a bit of trial and error. It’s better to make small adjustments and re-test. For example, if your target is 130 PSI and the valve pops at 120 PSI, turn the adjustment screw slightly to increase the pressure setting. Then, run the compressor again.
Step 4: Test the Valve Manually
Once you think you have the pressure set correctly, it’s vital to test the valve’s manual release function. Most relief valves have a small ring or lever. Give this a gentle pull. The valve should open smoothly and release air. You should hear a hiss as the pressure escapes. When you release the ring, the valve should close securely.
If the ring feels stuck or the valve doesn’t seal properly after you release it, it might be faulty. Some guidelines recommend replacing the relief valve if it doesn’t function smoothly. A sticky valve is a serious safety concern (CDC). You can run the compressor to build pressure again and repeat the manual test.
Common Pressure Settings and What They Mean
What’s the ‘right’ pressure for your relief valve? It’s not a one-size-fits-all answer. The ideal setting is directly related to your compressor’s maximum rated pressure and the demands of the tools you use.
Generally, you want the pressure relief valve to be set slightly higher than the compressor’s cut-out pressure, but below the tank’s maximum safe working pressure (often stamped on the tank itself). For most common 100-150 PSI compressors, this means the relief valve might be set to activate around 130-150 PSI.
| Compressor Type | Common Cut-Out Pressure | Typical Relief Valve Setting | Common Uses |
|---|---|---|---|
| Small Portable | 90-120 PSI | 110-140 PSI | Brad nailers, inflation, light DIY |
| Medium Duty | 120-150 PSI | 130-170 PSI | Impact wrenches, spray painting, framing nailers |
| Large Stationary | 150-175 PSI | 160-190 PSI | Industrial use, auto shops, sandblasting |
Remember, these are just general guidelines. Always refer to your specific compressor model’s specifications. Using a tool that requires 90 PSI doesn’t mean you need your relief valve set that high. The valve is a safety device, not an operational control for your tools.
When to Seek Professional Help
While adjusting the pressure relief valve is usually a simple DIY task, there are times when it’s best to call in an expert. If you’ve followed all the steps and still can’t get the valve to set correctly, or if it seems damaged, it’s time to get professional advice.
Experts also recommend professional servicing if the valve is leaking air constantly, even when the tank is depressurized. A faulty relief valve is a serious safety issue that could lead to costly damage or injury if not addressed promptly. Many repair services offer diagnostics for air compressors.
Quick Checklist for Valve Adjustment
Here’s a quick rundown to ensure you’ve covered all your bases:
- Compressor is powered off and tank is fully depressurized.
- Pressure relief valve is correctly located.
- Adjustment is made in small increments.
- Compressor is run to test pressure gauge readings.
- Manual pull-ring function is tested.
- Valve seals properly after manual release.
Conclusion
You’ve now learned how crucial it is to properly adjust your air compressor’s pressure relief valve for safety and performance. Remember, this valve is your tank’s guardian, preventing over-pressurization. By following the steps to depressurize the tank, locate the valve, and make careful adjustments, you ensure your compressor operates reliably. Always test the manual release function after setting it. If you ever feel unsure or face persistent issues, don’t hesitate to seek professional help. Your next step? Double-check your current setting to give yourself that peace of mind.
Frequently Asked Questions
How often should I test my pressure relief valve?
We recommend testing the manual release function of your pressure relief valve at least once a year, or after any significant maintenance on your air compressor. This quick check ensures the valve isn’t stuck and will function correctly in an emergency.
What happens if my pressure relief valve is set too low?
If your relief valve is set too low, it will continuously release air, preventing your tank from reaching its optimal operating pressure. This can lead to your compressor running constantly and not providing enough air for your tools.
Can I adjust my pressure relief valve while the compressor is running?
Absolutely not. You must always ensure the air compressor is turned off and the tank is completely depressurized before attempting any adjustments. Making changes while it’s running is a major safety hazard.
Is the pressure relief valve the same as the pressure regulator?
No, they are different. The pressure relief valve is a safety device that opens to prevent over-pressurization. The pressure regulator, on the other hand, controls the air output pressure delivered to your tools, allowing you to set it for specific jobs.
My relief valve is hissing air constantly. What should I do?
A constant hiss usually indicates a faulty relief valve that isn’t sealing properly. You should try gently tapping the valve or its pull ring, but if the hissing continues, it’s best to replace the valve to prevent potential safety issues and air loss.