Spray Painting with Air Compressor: A Complete Guide
You can definitely spray paint using an air compressor for a smooth, professional finish. It’s a fantastic way to get results that look great on everything from furniture to car parts. Getting the right setup means achieving even coverage without those frustrating drips.
Using an air compressor for spray painting is more than just blowing paint around. It involves understanding your paint consistency and how to adjust your compressor’s air pressure. This combination is key to preventing common issues and ensuring your project looks its best.
- Prep your workspace thoroughly.
- Choose the right spray gun for your paint.
- Adjust air pressure and paint flow correctly.
- Maintain consistent movement for even coats.
Ready to get that flawless spray paint job? Let’s walk through exactly how to use your air compressor for painting, step by step.
Getting Started with Air Compressor Spray Painting
Spray painting with an air compressor can seem a bit daunting at first, but it’s surprisingly straightforward once you understand the basic steps. We found that the biggest hurdle for most people is just getting over the initial learning curve. This method offers a professional-looking finish that you just can’t get with rattle cans. It’s all about controlling the paint and the air.
Choosing Your Spray Gun
The first step is selecting the right tool for the job. You’ll need a spray gun that’s compatible with your air compressor. There are a few main types, and understanding them helps you make the best choice. The first step is selecting the right spray gun for your air compressor.
Types of Spray Guns
- Gravity Feed Guns: These are popular because they use gravity to feed paint, meaning less waste. They are great for smaller jobs and offer good control.
- Siphon Feed Guns: Paint is drawn up into the gun from a cup below. They are good for larger projects but can sometimes use more paint.
- Pressure Feed Guns: These use pressurized air to push paint from a cup or tank. They are often used in professional settings for high production.
We found that for most DIY projects, a gravity feed spray gun is an excellent starting point. It’s versatile and efficient.
Preparing Your Workspace and Materials
Before you even think about spraying, proper preparation is key. This is where many mistakes happen. Think of it like getting ready for surgery; everything needs to be clean and in its right place.
Workspace Safety and Setup
Your workspace needs to be well-ventilated. Paint fumes can be harmful, and you don’t want to breathe them in. Open windows or doors, or set up fans to move the air away from you. Many guidelines suggest working outdoors if possible or in a dedicated spray booth (OSHA).
Protecting surrounding areas is also vital. Use drop cloths or old sheets to cover floors, furniture, or anything you don’t want painted. Masking tape is your best friend here, especially for sharp edges on your project piece.
Paint and Primer Preparation
The type of paint you use matters. Most standard paints will work, but you might need to thin them out. Check the paint manufacturer’s recommendations for thinning ratios. We found that using the wrong thinning ratio is a common cause of poor spray results.
Priming is often an essential step for a smooth finish. It helps the paint adhere better and can cover up imperfections. Apply primer just like you would paint, using thin coats.
Setting Up Your Air Compressor and Spray Gun
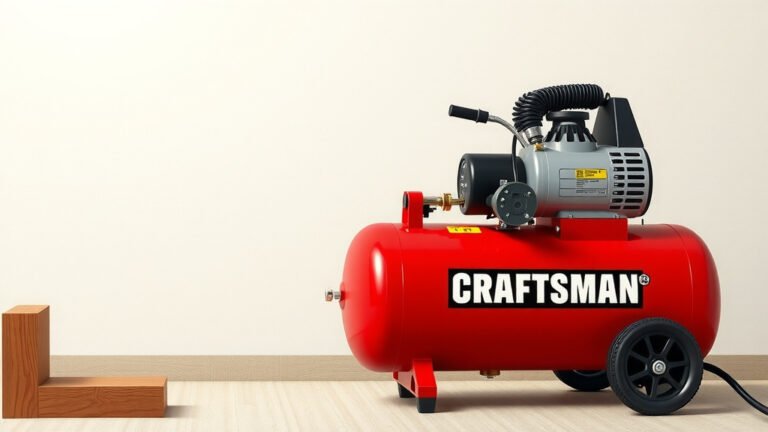
Now, let’s get your equipment ready. This is where the magic of compressed air comes into play. It atomizes the paint, turning it into a fine mist.
Connecting the Compressor and Gun
You’ll need an air hose that’s long enough to give you plenty of reach but not so long that it restricts airflow. Connect one end to your compressor’s output and the other to your spray gun. Ensure all connections are secure to prevent leaks.
Adjusting Air Pressure
This is perhaps the most critical setting. Too much pressure can cause overspray and an uneven finish. Too little, and the paint won’t atomize properly, leading to splatters. The ideal pressure varies based on your paint, spray gun, and project. This is perhaps the most critical setting: air pressure.
We found that many experts recommend starting with a lower pressure and gradually increasing it until you achieve a fine, consistent spray pattern. A good starting point for many paints and guns is between 25-40 PSI (pounds per square inch). Always check your spray gun and paint manufacturer’s recommendations.
Your air compressor likely has a regulator that allows you to control this pressure precisely. You want to see a steady, consistent output without pulsing.
Setting the Paint Flow
Most spray guns have a control for how much paint is released. This is adjusted separately from the air pressure. You want enough paint to cover the surface without leaving thick, drippy lines.
To test this, point the gun at a piece of cardboard. Pull the trigger. You should see a nice, even spray pattern. If it looks like a thick line or drips, adjust the paint flow. If it looks wispy and weak, you might need slightly more paint or air.
The Spray Painting Process
With everything prepped and set up, you’re ready to start spraying. Remember, patience and a steady hand are key here.
Technique for Even Coverage
Always move your arm, not just your wrist, when spraying. Start your spray stroke before you pull the trigger and release the trigger after your stroke ends. This prevents blobs of paint at the beginning and end of each pass.
Hold the spray gun about 6-10 inches away from the surface. Keep the gun perpendicular to the surface you are painting. Overlap each pass by about 50% to ensure you don’t miss any spots and get uniform coverage. We found that a consistent distance and speed make a huge difference in the final look.
Applying Thin Coats
It’s much better to apply multiple thin coats than one thick one. Thin coats dry faster and are less likely to drip or run. You can always add another coat if needed, but you can’t easily remove a run. Let each coat dry according to the paint manufacturer’s instructions before applying the next.
Troubleshooting Common Issues
Even with preparation, you might run into problems. Don’t get discouraged; they are usually easy to fix.
| Problem | Cause | Solution |
|---|---|---|
| Runs or Drips | Too much paint flow, holding gun too close, moving too slowly. | Reduce paint flow, increase distance, speed up passes, or reduce air pressure slightly. |
| Splatters or Orange Peel | Paint too thick, not enough air pressure, gun too far away. | Thin paint more, increase air pressure, move gun closer, or ensure paint is mixed well. |
| Uneven Pattern | Clogged nozzle, insufficient air pressure, or bent spray fan. | Clean nozzle and air cap, adjust air pressure, or inspect gun for damage. |
Cleaning Your Equipment
After you’re finished, cleaning your spray gun and air compressor is vital. If you don’t clean it properly, dried paint can clog the gun and ruin it for future use. Follow the manufacturer’s instructions for cleaning. Most water-based paints can be cleaned with soap and water, while solvent-based paints will require a specific thinner.
A quick checklist to help you remember the key steps:
- Ensure your workspace is well-ventilated and protected.
- Check paint consistency and thin if necessary.
- Set air pressure between 25-40 PSI as a starting point.
- Test spray pattern on scrap material.
- Maintain consistent distance and speed while spraying.
- Clean your spray gun immediately after use.
Conclusion
You’ve learned how to achieve a professional spray paint finish using your air compressor. Proper preparation, selecting the right spray gun, and precise adjustments are your keys to success. Remember to always prioritize ventilation and protecting your workspace. By mastering air pressure and paint flow, and practicing a consistent technique, you’ll avoid common pitfalls like drips and uneven coats. Don’t forget the essential step of cleaning your equipment thoroughly after each use. Your next step is to gather your supplies and practice on a scrap piece of material to build your confidence before tackling your main project.
Frequently Asked Questions
What kind of paint can I use with an air compressor?
You can use most types of paint with an air compressor, including latex, oil-based paints, lacquers, and enamels. The key is to ensure the paint is thinned to the correct consistency for your spray gun. Always check the paint manufacturer’s recommendations for thinning ratios.
How much air pressure do I really need?
The ideal air pressure typically ranges between 25-40 PSI for most DIY projects, but this can vary. Too little pressure results in poor atomization, while too much causes overspray. It’s best to start at the lower end and gradually increase it while testing on scrap material until you achieve a fine, consistent spray pattern.
How far away should I hold the spray gun?
You should hold your spray gun about 6 to 10 inches away from the surface you are painting. Maintaining this consistent distance is vital for achieving even coverage and preventing runs or drips. Keep the gun perpendicular to the surface throughout your spraying pass.
What’s the best way to avoid drips and runs?
To avoid drips and runs, apply paint in multiple thin coats rather than one thick one. Ensure your paint flow and air pressure are set correctly, and maintain a steady, consistent speed with your arm movement. If you do get a run, don’t try to wipe it while wet; let it dry, then gently sand it smooth before applying another thin coat.
How often should I clean my spray gun?
You should clean your spray gun immediately after each use. Dried paint can quickly clog the nozzle and air cap, making it unusable for future projects. Following the manufacturer’s cleaning instructions, using appropriate thinners or soapy water, will keep your equipment in good working order.