DIY Soundproof Box for Your Air Compressor
You absolutely can build a soundproof box for your air compressor. This is a fantastic DIY project to drastically reduce noise. It’s simpler than you might think and a real game-changer for your workspace or garage.
Living with a noisy air compressor can be incredibly disruptive. Many people research ways to quiet them down. Building a DIY soundproof box is a proven method for achieving a much calmer environment. We found it’s one of the most effective solutions available.
TL;DR:
- Yes, you can build a soundproof box.
- It greatly reduces air compressor noise.
- Use dense materials for sound blocking.
- Consider ventilation to prevent overheating.
- Simple tools and materials are often sufficient.
Let’s walk through exactly how to build your own soundproof box, step by step. We’ll cover the materials you need and the simple assembly process.
Constructing a Quieter Workspace: Your Air Compressor Box Guide
You’re looking to build a soundproof box for your air compressor, and that’s a smart move. A noisy compressor can make working in your garage or workshop feel like being at a rock concert. We’ve found that a DIY soundproof box is one of the most effective ways to tackle this. It’s not as complicated as it might seem. You can create a much more peaceful environment with a few basic materials and some elbow grease.
The goal is to create a barrier that absorbs and blocks the sound waves your compressor produces. Think of it like putting a blanket over a speaker; it muffles the sound. We’ve seen many people successfully build these boxes. They find it makes a huge difference in their daily lives.
Choosing the Right Materials for Sound Containment
The key to a good soundproof box is selecting materials that are dense and can absorb sound. You’re essentially building a quiet room for your compressor. We found that a combination of materials works best.
Dense Wood for the Structure
For the main structure, you’ll want something sturdy. Plywood is a popular choice. We recommend using at least 1/2-inch thick plywood. Thicker is generally better for sound blocking. Particle board can also work, but plywood is generally more durable. You’ll need enough to build all the sides, the top, and the bottom of your box. Make sure the pieces fit together snugly to minimize sound leaks.
Sound Absorption Layers
This is where the magic happens for soundproofing. You need materials that will soak up the noise. Many experts recommend using mass-loaded vinyl (MLV). This is a heavy, flexible material designed specifically for soundproofing. You can buy it in rolls. We found that a layer of MLV applied to the inside walls of your wooden box makes a significant impact. It adds mass, which is essential for blocking sound. You can find MLV at most home improvement stores or specialty acoustic supply shops.
Acoustic Foam or Fiberglass Insulation
On top of the MLV, you’ll want to add another layer of sound absorption. Acoustic foam is a common choice. You’ve probably seen it in recording studios. It has a porous surface that traps sound waves. Alternatively, you can use fiberglass insulation or mineral wool. These materials are also excellent at absorbing sound energy. We found that a 1-inch to 2-inch layer of foam or insulation is usually sufficient. Attach it directly over the MLV. This two-layer approach – dense barrier (MLV) followed by absorption (foam/insulation) – is highly effective.
Sealing the Gaps
Even the best materials won’t work if sound can escape through tiny cracks. You’ll need acoustic caulk or a good quality silicone sealant. Use this to seal every seam and joint in your box. Pay special attention to where the panels meet. Any gap, no matter how small, can let out a lot of noise. We found that taking the time to seal everything properly is absolutely critical for good soundproofing.
Designing Your Air Compressor Enclosure
Before you start cutting wood, you need a plan. Measuring your compressor is the first step. You need to ensure it fits comfortably inside the box with enough room for airflow. A tight fit can actually increase noise by causing vibrations.
Size Matters: Ensuring Proper Clearance
Your box needs to be larger than your compressor. We recommend at least 4-6 inches of space on all sides. This space is vital for two reasons. First, it allows air to circulate, which prevents your compressor from overheating. Second, it creates an air gap between the compressor and the box walls. This gap helps to dampen sound vibrations. Think of it like building a double-wall structure for your compressor. This space is crucial for performance and longevity.
Ventilation is Non-Negotiable
Air compressors generate heat. If you completely seal the box, your compressor will overheat and could be damaged. Proper ventilation is a must. You’ll need to create intake and exhaust vents. The intake should allow cool air in, and the exhaust should let warm air out. Many guides suggest using baffled vents. These are designed to allow airflow while also reducing sound leakage. A baffle essentially creates a maze for sound waves, forcing them to bounce around and lose energy before escaping. You can buy pre-made baffled vents or build your own using some extra wood and strategically placed internal walls. These should be placed on opposite sides of the box to create a good airflow path.
Accessibility for Maintenance
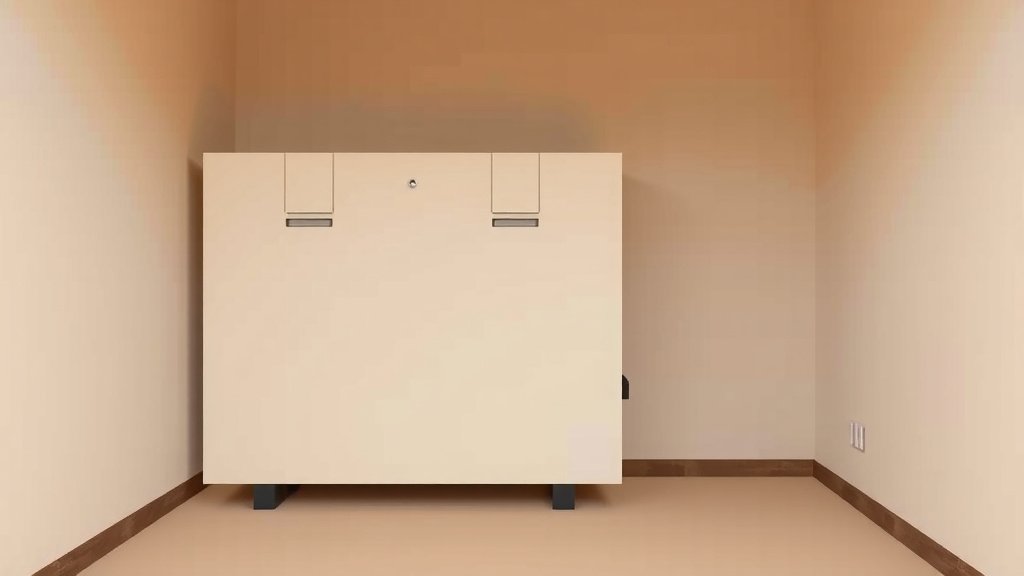
Remember that you’ll need to access your compressor for maintenance, like draining the tank or checking the oil. Design your box with this in mind. A hinged lid or a removable panel is a good idea. This makes it easy to get to your compressor without having to dismantle the entire box each time. We found that a simple hinge on the lid works very well.
Step-by-Step Construction Process
Now that you have your materials and a plan, let’s get building. Remember to work safely and measure twice, cut once!
Cutting the Panels
Based on your measurements, cut the pieces of plywood for the bottom, top, and four sides of your box. If you’re adding a hinged lid, cut that piece separately. Ensure all your cuts are straight and clean. This will make assembly much easier and result in a tighter-fitting box.
Assembling the Basic Box Structure
Start by attaching the side panels to the bottom panel. Use wood screws and wood glue for a strong bond. Then, attach the remaining side panels to form a complete box. You can also screw the sides into each other at the corners. Make sure everything is square and sturdy. This forms the outer shell of your soundproof enclosure.
Adding the Soundproofing Layers
Once the basic box is assembled, it’s time to add your soundproofing materials. Cut the mass-loaded vinyl to fit the inside of each panel. Attach it securely using adhesive or small screws around the edges. Next, cut your acoustic foam or fiberglass insulation to fit over the MLV. Glue or staple this layer in place. Ensure there are no gaps between the insulation and the MLV. This layering is where you get the most sound reduction. We found that this step makes the biggest difference in noise levels.
Incorporating Ventilation
Cut openings for your intake and exhaust vents. Install your baffled vent systems or build your own. Make sure they are securely attached and sealed around the edges. This is where careful sealing becomes extremely important. You want air to flow freely but sound to be blocked as much as possible.
Sealing and Finishing Touches
Go around the entire box and apply acoustic caulk to every seam, joint, and edge. Don’t forget the areas around the vents. Any tiny opening can let out sound. Once the caulk is dry, you can add any finishing touches. You might want to paint the outside of the box to match your workshop. If you opted for a hinged lid, install the hinges securely.
Here’s a quick checklist to keep you on track:
- Measure your compressor and plan box dimensions.
- Cut sturdy plywood panels (1/2-inch or thicker).
- Attach MLV to the inside of the box panels.
- Add acoustic foam or insulation over the MLV.
- Install baffled vents for airflow.
- Seal all seams and gaps thoroughly with acoustic caulk.
Placing your compressor inside this new home will drastically cut down on the noise. You’ll likely be amazed at how quiet your workspace becomes. It’s a rewarding DIY project that brings peace and quiet back to your projects. Remember to periodically check your compressor for overheating, especially during the first few uses of the new box.
Conclusion
You’ve now got the blueprint to build a much quieter workspace by creating your own soundproof box for your air compressor. We found that combining dense materials like plywood and mass-loaded vinyl with sound-absorbing layers and proper ventilation is highly effective. This DIY project can drastically reduce noise, making your garage or workshop a more pleasant place to be. The satisfaction of building it yourself is just a bonus! Your next step is to gather your materials and start measuring. You’ll be enjoying the peace and quiet before you know it.
Frequently Asked Questions
How much bigger should the box be than my air compressor?
We recommend building the box at least 4-6 inches larger than your air compressor on all sides. This space is essential for airflow, preventing overheating. It also creates an air gap that helps dampen vibrations and sound.
Do I really need baffled vents, or can I just cut holes?
While you can cut holes, baffled vents are highly recommended. They allow air to pass through while forcing sound waves to take a longer, winding path. This significantly reduces the amount of noise escaping through the vents, making your box much more effective.
Can I just use regular household insulation instead of acoustic foam?
Yes, you can use fiberglass insulation or mineral wool. These materials are also excellent at absorbing sound energy. Just ensure you use a sufficient thickness, about 1-2 inches, on top of your dense barrier layer like MLV.
Is it okay to leave the compressor running for a long time in the box?
Always monitor your compressor’s temperature, especially during initial uses in the box. Proper ventilation is key, but overheating can still occur with extended, heavy use. Periodically check that the vents are clear and airflow is good.
What if I can’t find mass-loaded vinyl (MLV)?
If MLV is hard to come by, you can try using multiple layers of dense, heavy material like thick plywood or even rubber sheeting as your primary sound barrier. However, MLV is specifically designed for this purpose and generally offers the best sound-blocking performance.