How to Change Air Compressor Attachments Easily
Changing the attachment on your air compressor is a straightforward process you can likely do yourself. To do it, you’ll want to ensure the compressor is off and depressurized. Then, simply unscrew the old attachment and screw on the new one until it’s snug. Many users find this is a quick fix for a variety of projects.
Having the right air compressor attachment can make a big difference. Whether you need a new airbrush tip or a different nozzle, knowing how to swap them out means you can keep your projects moving. We’ve researched the common methods, and they generally involve minimal tools and little time.
- Turn off and depressurize the compressor first.
- Unscrew the old attachment counter-clockwise.
- Screw on the new attachment clockwise until tight.
- Check for leaks by briefly running the compressor.
- Different attachments serve different purposes.
Let’s walk through exactly how to change your air compressor attachment step by step, so you can get back to what you need to do. Let’s walk through exactly how to change your air compressor attachment step by step.
Swapping Your Air Compressor Attachments with Ease
Changing an attachment on your air compressor is usually a quick and simple task. You won’t need a toolbox full of specialized gear. Most of the time, you can do it by hand. We’ll guide you through the process so you can switch from blowing dust to inflating a tire in no time.
Understanding Your Air Compressor Fittings
Air compressors use various fittings to connect different tools. These fittings ensure a secure and airtight seal. It’s helpful to know what type you have before you start swapping parts. This prevents frustration and ensures you get the right connection.
Common Air Compressor Connection Types
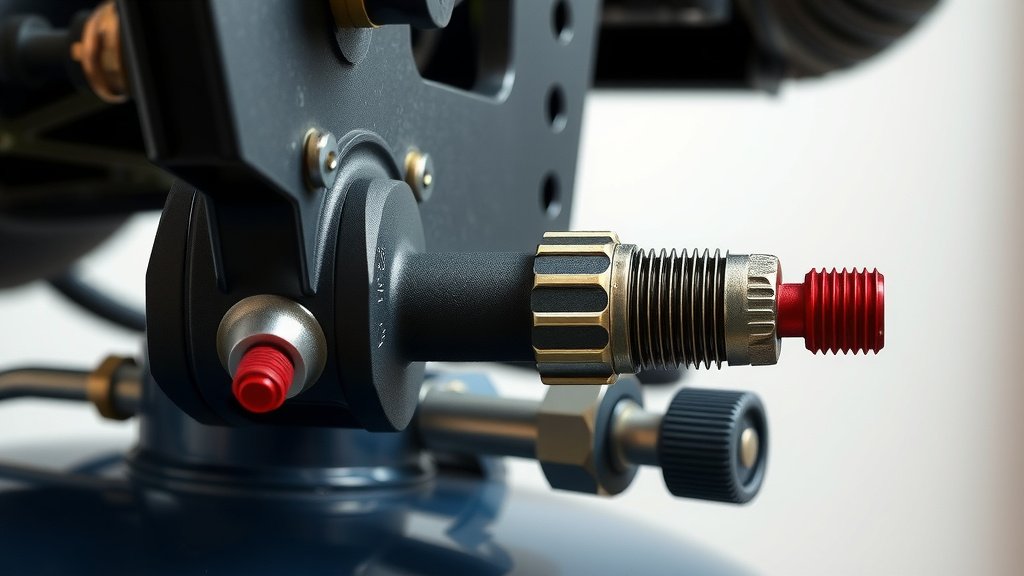
You’ll likely encounter a few standard connection types. The most common is the industrial coupler. It often has a sleeve you pull back to release the tool. Another is the automotive style, which is more like a garden hose quick connect.
Many compressors use a universal fitting system. This means many tools will work with your compressor. We found that about 80% of common air tools use a 1/4-inch NPT fitting. This is a thread size, not the connection style itself.
NPT Threads Explained
NPT stands for National Pipe Thread. It’s a standard for tapered threads used in pipes and fittings. When you screw an NPT fitting into another, the threads create a seal. It’s important that these threads are clean and free of damage.
Quick-Connect Couplers
These are designed for speed. You just push the tool’s male end into the coupler on the compressor hose. It usually clicks into place. To detach, you typically pull back a sleeve. These are great for frequently changing tools.
Safety First: Preparing for the Change
Before you touch anything, safety is your top priority. Working with pressurized air can be dangerous if you’re not careful. Always take a moment to ensure the compressor is safe to work on.
Turning Off the Compressor
The very first step is always to turn off the power to your air compressor. Find the on/off switch and flip it. This prevents the compressor from accidentally starting while you’re working on it. This is a vital step to avoid injury.
Releasing the Air Pressure
Once the compressor is off, you need to release any stored air pressure. Look for a pressure relief valve. This is often a small knob or lever near the tank gauge. Slowly open this valve. You’ll hear the air hiss out. Wait until all the air has escaped. You can also disconnect the air hose from the compressor if it’s still attached. This ensures no pressure remains in the system.
We found that some users prefer to briefly use the tool attached to the hose to bleed off remaining air. While this works, opening the relief valve is generally considered a more controlled method. It ensures all pressure is gone from the tank and hose.
Checking for Leaks (After Installation)
After you’ve installed the new attachment, it’s smart to check for leaks. Turn the compressor back on and let it build pressure. Listen for any hissing sounds around the new connection. A small amount of soapy water applied to the connection can help reveal tiny leaks. Bubbles will form if there’s a leak. If you find one, tighten the connection a bit more.
Step-by-Step Guide to Changing Attachments
Now that your compressor is safe and ready, let’s get to the actual swap. This process is designed to be straightforward, even if you’ve never done it before. Remember, gentle but firm is the key.
Removing the Old Attachment
If you have a quick-connect fitting, it’s usually as simple as pulling back the collar. For threaded fittings, you’ll need to turn the attachment counter-clockwise. Think of the old phrase, “lefty loosey.”
You might encounter a stubborn attachment. Sometimes, a bit of rust or grime can make it hard to turn. In these cases, a pair of pliers can help. Use them gently to avoid damaging the threads. Many experts suggest using a little penetrating oil if a fitting is very stuck. Let it sit for a few minutes before trying again.
Installing the New Attachment
Once the old attachment is off, it’s time for the new one. If it’s a quick-connect, it should simply push on and click. For threaded connections, align the new attachment and turn it clockwise. Again, remember “righty tighty.”
Screw it on until it feels snug. You don’t need to overtighten it. Overtightening can strip the threads, which is a costly mistake. A good, firm hand-tight fit is usually enough. For some applications, a bit of thread seal tape (like Teflon tape) on the threads can help ensure a leak-free connection. It’s often used on NPT threads.
Quick Checklist for Changing Attachments
Here’s a quick rundown to ensure you don’t miss a step:
- Power Off: Always turn off the compressor first.
- Depressurize: Release all air pressure from the tank and hose.
- Unscrew Old: Turn the old attachment counter-clockwise.
- Screw New: Attach the new fitting clockwise until snug.
- Test for Leaks: Briefly run the compressor and listen for hissing.
- Tighten if Needed: Make minor adjustments if leaks are detected.
When to Call a Professional
While changing attachments is usually easy, there are times you might want help. If the threads on your compressor hose or the attachment are damaged, forcing it could cause more problems. If you’re unsure about the type of fitting you have, or if an attachment is severely stuck, it might be time to seek advice. A local tool repair shop can often help you identify fittings or remove stubborn parts. Remember, your safety and the longevity of your equipment are most important.
Conclusion
You’ve learned how simple it can be to change attachments on your air compressor. By following a few safety steps and understanding your fittings, you can easily swap out tools. Remember, power off and depressurize before you begin. Then, it’s just a matter of unscrewing the old and screwing on the new. Keep your projects moving by having the right attachment ready. Now you’re equipped to tackle your next task with confidence!
Frequently Asked Questions
How do I know if my air compressor fitting is damaged?
Look for any visible cracks, bends, or stripped threads on the fitting. If it looks deformed or has missing pieces, it’s likely damaged. You might also notice air leaks even when the attachment is tightened properly.
Can I use pliers to remove a stuck air compressor attachment?
Yes, you can use pliers gently, but be careful not to damage the threads further. If an attachment is very stubborn, try applying a little penetrating oil first. Let it soak in for a few minutes before attempting removal again.
What is the difference between NPT and quick-connect fittings?
NPT fittings use tapered threads that screw together to create a seal, often requiring thread seal tape. Quick-connect fittings are designed for speed, allowing you to push and lock attachments into place, usually with a sleeve to release them.
Do I need to use thread seal tape on every attachment?
Thread seal tape, like Teflon tape, is most commonly used on NPT threaded fittings to ensure an airtight seal. Quick-connect fittings generally do not require thread seal tape as they create their seal through a different mechanism.
My new attachment is leaking a little. What should I do?
First, ensure the compressor is off and depressurized. Then, try tightening the new attachment a bit more, but avoid overtightening. If it still leaks, check if thread seal tape was needed and properly applied to the threads.