Clean NuWave Air Purifier Filter: Step-by-Step Guide
The easiest way to clean your NuWave air purifier filter is by vacuuming it gently with a soft brush attachment. You can also rinse the filter under cool running water and let it air dry completely. This simple maintenance will help your air purifier run its best.
Keeping your air purifier’s filter clean is essential for maintaining good air quality in your home. A dirty filter can trap less dust and allergens. We found that regular filter cleaning can also help extend the life of your appliance. It’s a small task with big benefits.
- Vacuuming with a soft brush is the best first step.
- Rinsing under cool water and letting it air dry is also effective.
- Allow the filter to dry completely before reinserting.
- Cleaning regularly helps your purifier work better.
Ready to get your NuWave air purifier sparkling and breathing fresh air again? Let’s walk through exactly how to clean your filter step by step.
Your NuWave air purifier is a fantastic tool for improving your home’s air quality. To keep it working like a champ, regular filter maintenance is key. Think of it like changing the oil in your car; a little upkeep goes a long way!
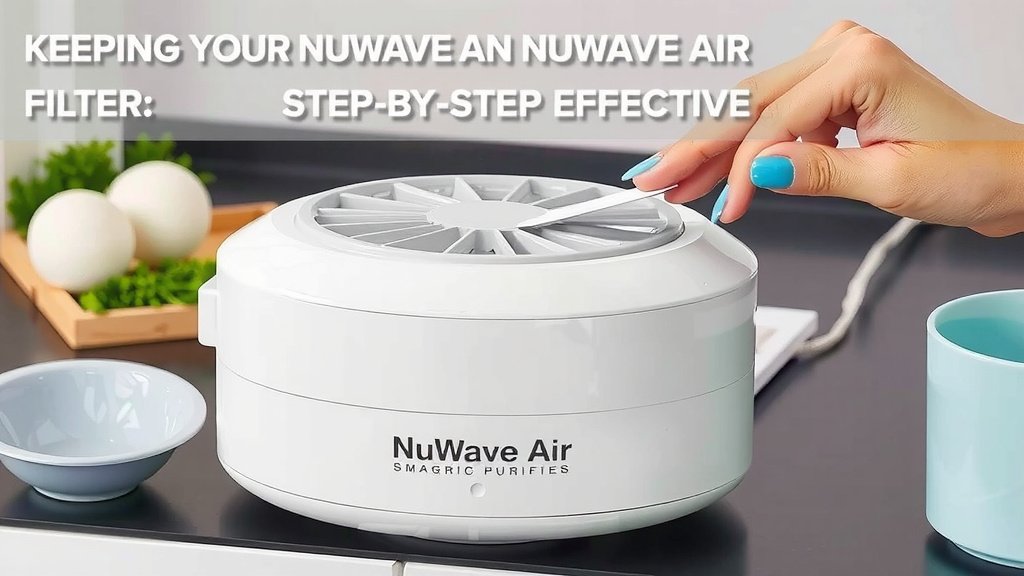
Keeping Your NuWave Air Purifier Filter Clean and Effective
Regularly cleaning your NuWave air purifier’s filter is one of the most important things you can do. It helps the device capture more pollutants. A clean filter also means your purifier doesn’t have to work as hard. We found this can even help extend the unit’s lifespan.
Why Filter Cleaning Matters
You might be wondering why you even need to clean the filter. Well, over time, dust, pet dander, pollen, and other tiny particles get trapped. When the filter is clogged, it can’t effectively pull these things out of the air. This means your air quality suffers. Many health organizations stress the importance of clean air, especially for those with allergies or asthma (CDC). A dirty filter can also recirculate dust, making your home feel less fresh.
Understanding Your NuWave Filter Type
Most NuWave air purifiers use a combination of filters. There’s often a pre-filter, an activated carbon filter, and a HEPA filter. The pre-filter is usually washable. The activated carbon filter typically needs replacement, not cleaning. The HEPA filter can often be cleaned to some extent, but it also has a lifespan. Always check your specific NuWave model’s manual for the exact filter types and recommended cleaning schedules. It’s like knowing the instructions for your favorite recipe; it makes everything easier!
Step-by-Step Guide to Cleaning Your NuWave Air Purifier Filter
Step 1: Safety First – Unplug Your Purifier
Before you do anything, always unplug your NuWave air purifier from the wall outlet. This is a simple but vital safety step. We want to avoid any accidental shocks or damage to the unit. Just like you wouldn’t try to fix a toaster while it’s plugged in, the same rule applies here. Your safety is our top priority!
Step 2: Locate and Remove the Filter
Next, you’ll need to access the filter. This usually involves opening up the back or bottom panel of your air purifier. Most NuWave models have a simple latch or screw system for easy access. Once you find the panel, gently open it. You should see the filter(s) inside. Carefully slide or lift the filter out. Some models might have more than one filter, so take note of their positions. We found that taking a quick photo with your phone can be helpful if you’re unsure about reassembly.
Step 3: Cleaning the Pre-Filter (The Washable One!)
Your pre-filter is designed to catch larger particles like hair and large dust bunnies. It’s typically made of a mesh material and is washable.
Option A: Gentle Vacuuming
For light dust, using your vacuum cleaner with a soft brush attachment is often the easiest and most effective method. Gently vacuum the surface of the pre-filter. Work in one direction to avoid pushing dust deeper into the filter. We found this method works wonders for everyday cleaning.
Option B: Rinsing Under Cool Water
If the pre-filter is more heavily soiled, you can rinse it. Take the filter to a sink and run it under cool, clean tap water. Don’t use hot water, as it can damage the filter material. Gently agitate the water with your hands to help dislodge the dirt. You might need to rinse both sides. Many experts suggest this as a good way to remove stubborn debris (Environmental Protection Agency).
Step 4: Handling the HEPA and Carbon Filters
Now, let’s talk about the other filters.
HEPA Filter Maintenance
HEPA filters are designed to capture very fine particles. They are not typically meant to be washed. Instead, you can often use a vacuum cleaner with a soft brush attachment to gently clean the surface. Be very careful not to press too hard, as this can damage the delicate HEPA fibers. We found that light vacuuming helps to prolong its effectiveness between replacements. Remember, a HEPA filter has a lifespan, and it will eventually need to be replaced according to the manufacturer’s recommendations.
Activated Carbon Filter Care
Activated carbon filters are great for absorbing odors and gases. These filters usually cannot be cleaned and must be replaced periodically. Trying to wash them can actually ruin their porous structure, making them less effective at trapping odors. Always refer to your manual to see if your carbon filter is replaceable or if it’s integrated with another filter.
Step 5: Drying is Crucial!
This step is absolutely critical, especially if you chose to rinse any filters. They must be completely dry before you put them back into your NuWave air purifier. Even a small amount of moisture can lead to mold or mildew growth. This would defeat the purpose of having an air purifier and could even harm your air quality.
Air Drying Best Practices
The best way to dry your filters is to let them air dry naturally. Place them in a well-ventilated area, away from direct sunlight or heat. You can prop them up so air circulates around them. Avoid using a hairdryer or putting them in a clothes dryer, as high heat can warp or damage the filter materials. We found that it usually takes at least 24 hours for a filter to dry completely, depending on humidity levels.
Step 6: Reassemble Your Air Purifier
Once all cleaned filters are bone dry, it’s time to put everything back together. Carefully place the filters back into their correct positions within the air purifier. Make sure they are seated properly. Close the access panel securely. Finally, plug your NuWave air purifier back into the power outlet. You’re all set!
Quick Filter Cleaning Checklist
- Unplug your NuWave air purifier before starting.
- Locate and remove the filter(s) from the unit.
- Gently vacuum the pre-filter and HEPA filter surfaces.
- Rinse the pre-filter with cool water if needed.
- Ensure all filters are completely dry before reassembly.
- Reinstall filters and close the unit securely.
Conclusion
You’ve now learned the simple steps to clean your NuWave air purifier filter and keep your home’s air fresh. Remember, gentle vacuuming or a cool water rinse for the pre-filter, combined with careful surface cleaning for the HEPA filter, makes a big difference. Always ensure filters are completely dry before reassembly to prevent any moisture issues. By incorporating this routine maintenance, you’re ensuring your NuWave purifier runs efficiently and effectively for longer.
Ready to breathe easier? Take a moment this week to check your filter and give it the quick clean it deserves!
Frequently Asked Questions
How often should I clean my NuWave air purifier filter?
We recommend cleaning your NuWave air purifier filter about once every two weeks. This frequency can vary based on your home’s air quality and how often you run the unit. Checking your filter visually each week will help you determine if it needs cleaning sooner.
Can I use soap or detergent when rinsing the filter?
No, it’s best to avoid soap or detergent when rinsing your NuWave air purifier filter. For the washable pre-filter, cool, clean tap water is usually sufficient. Detergents can leave behind residues that may affect the filter’s performance or even damage its material.
What if my NuWave model has multiple filters?
If your NuWave model has multiple filters, always consult your user manual. Generally, you’ll clean the washable pre-filter as described, gently vacuum the HEPA filter’s surface, and replace the activated carbon filter when it’s no longer effective. Never attempt to wash the carbon filter.
How do I know when it’s time to replace a filter instead of cleaning it?
You’ll know it’s time to replace a filter when cleaning no longer improves its appearance or the unit’s performance. HEPA filters have a lifespan, typically 6-12 months, and should be replaced even with regular cleaning. Activated carbon filters also need regular replacement, usually every 3-6 months, to maintain odor absorption. Your manual will have specific guidelines.
My filter still looks dirty after vacuuming. Is that okay?
It’s common for filters, especially HEPA filters, to retain some discoloration even after cleaning. The important thing is that you’ve removed loose dust and debris. If the filter appears significantly damaged, torn, or excessively clogged, it’s likely time for a replacement rather than further cleaning attempts.