

How to Clean Your Sharp Air Purifier Easily
The easiest way to clean your Sharp air purifier is by regularly dusting the exterior and cleaning or replacing the filters as recommended. A clean air purifier works best to keep your home’s air fresh and healthy. We found that consistent maintenance is key to its performance.
Keeping your Sharp air purifier in top shape means more than just occasional attention. It involves understanding its parts and what they need to function efficiently. Many experts agree that a well-maintained unit can significantly improve your indoor air quality and extend the life of your appliance. Think of it as giving your air purifier a spa day!
- Dust the outside regularly.
- Clean or swap out filters on time.
- Check your model’s manual for specifics.
- A clean unit means cleaner air for you.
Ready to get your Sharp air purifier sparkling? Let’s walk through exactly how to do it, step by step, so you can breathe easier.
You’ve got your Sharp air purifier, and you want it to keep running smoothly. That’s smart! A little bit of care goes a long way. We found that the best way to keep your unit working at its best is by understanding its components and giving them the attention they need. Think of it like taking care of your car; regular check-ups prevent bigger problems.
Maintaining Your Sharp Air Purifier for Peak Performance
Keeping your Sharp air purifier clean is essential for ensuring it can effectively remove allergens, dust, and other pollutants from your home. Research indicates that regularly cleaned air purifiers perform much better (Cleveland Clinic). This means healthier air for you and your family to breathe. You might be surprised how much better your air can feel with a little effort.
Understanding Your Air Purifier’s Parts
Before you start cleaning, it’s helpful to know what you’re dealing with. Most Sharp air purifiers have a few key components that require regular attention. These are typically the exterior casing, the pre-filter, the HEPA filter, and the activated carbon filter. Knowing these parts will make the cleaning process much smoother. We found that identifying these parts in your specific model’s manual is the first best step.
Safety First: Preparing for Cleaning
Your safety is important. Always unplug your Sharp air purifier before you begin any cleaning. This prevents any accidental power surges or starting up the unit while you’re working on it. You wouldn’t want to accidentally turn it on while your hand is inside! It’s a simple step that can prevent injury. Make sure it’s completely disconnected from the power source.
Step-by-Step Guide to Cleaning Your Sharp Air Purifier
Now, let’s get down to business. Cleaning your Sharp air purifier involves a few distinct steps. We’ve broken them down to make it easy for you to follow. Remember to consult your specific model’s manual for any unique instructions. Every model can have slight variations, and the manual is your best friend for those details.
Cleaning the Exterior Casing
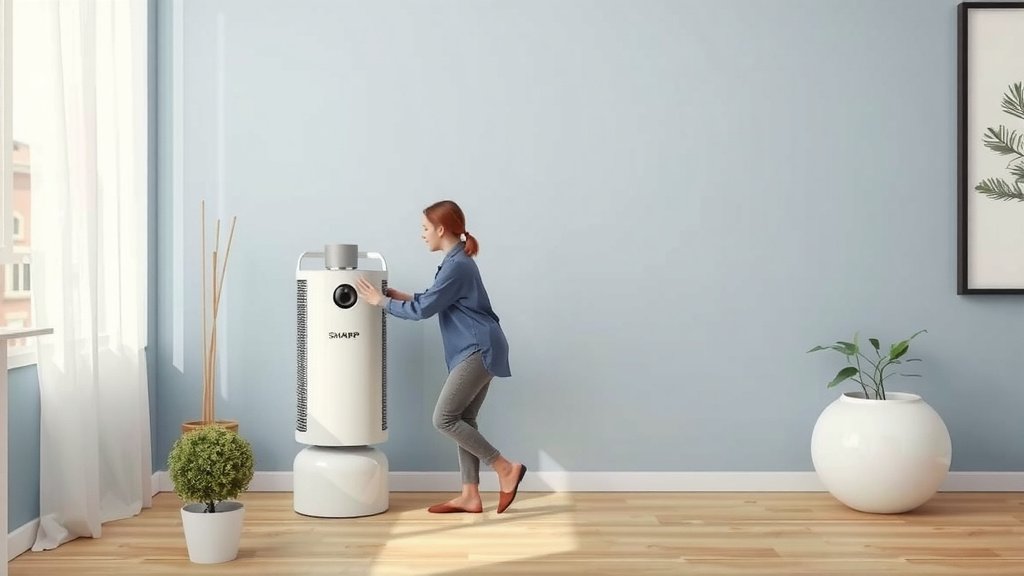
The outside of your air purifier likely collects dust just like any other surface in your home. A simple wipe-down will do the trick. Use a soft, dry cloth to remove dust. For more stubborn marks, you can slightly dampen the cloth with water. Avoid using harsh chemicals or abrasive cleaners, as these can damage the plastic. We found that a microfiber cloth works exceptionally well for this.
Caring for the Filters: The Heart of Your Purifier
The filters are where the magic happens. They trap all the unwanted particles. How you care for them depends on the type of filter. Some are washable, while others need to be replaced. Checking your manual will tell you exactly which is which for your Sharp model.
The Pre-Filter: Your First Line of Defense
Many Sharp air purifiers have a washable pre-filter. This is usually a mesh screen that catches larger particles like hair and pet dander. It’s often the first filter the air passes through. Cleaning this regularly is very important. Research shows that keeping the pre-filter clean helps protect the more sensitive filters behind it (CDC). To clean it, gently vacuum it or rinse it under cool running water. Make sure it’s completely dry before putting it back.
The HEPA and Activated Carbon Filters: What You Need to Know
These filters are typically not washable and require replacement. The HEPA filter captures microscopic particles like pollen and mold spores. The activated carbon filter absorbs odors and gases. These filters have a lifespan, and once they are full, they can’t effectively clean your air anymore. Many experts suggest checking these filters monthly and replacing them as recommended by the manufacturer. A common replacement schedule is every 1-2 years, but this can vary.
Putting It All Back Together
Once all the parts are clean and dry, you can reassemble your air purifier. Make sure you place the filters back in the correct order. The pre-filter usually goes on the outside, with the HEPA and carbon filters behind it. Double-check that all panels and covers are secured properly. An improperly assembled unit won’t work efficiently.
Frequency of Cleaning: When to Do What
Consistency is key. We found that a good schedule helps maintain optimal performance. Here’s a general guideline:
- Weekly: Dust the exterior casing.
- Monthly: Check the pre-filter. Vacuum or rinse if dirty.
- Every 1-2 Years (or as per manual): Replace the HEPA and activated carbon filters.
Your air purifier might also have a filter replacement indicator light. Don’t ignore it! It’s there to help you know when it’s time for a change. Think of it as a little reminder from your appliance.
When to Call for Professional Help
For most routine cleaning, you can handle it yourself. However, if you notice strange noises, a persistent burning smell, or if the unit simply isn’t performing as it should after cleaning, it might be time to contact Sharp customer support or a qualified technician. Sometimes, there are internal issues that require expert attention. You don’t want to risk damaging it further by trying to fix something you’re unsure about.
| Filter Type | Cleaning Method | Typical Replacement Frequency |
|---|---|---|
| Exterior Casing | Dust with dry cloth; damp cloth for marks | Weekly dusting |
| Pre-Filter | Vacuum or rinse with cool water | Monthly check, clean as needed |
| HEPA Filter | Replace only; do not wash | Every 1-2 years (or indicator light) |
| Activated Carbon Filter | Replace only; do not wash | Every 1-2 years (or indicator light) |
A Quick Checklist for Your Next Cleaning Day
Ready to make sure your Sharp air purifier is in tip-top shape? Here’s a handy checklist:
- Unplug the unit completely.
- Wipe down the exterior with a soft cloth.
- Vacuum or wash and dry the pre-filter.
- Check the HEPA and carbon filters for replacement needs.
- Ensure all parts are dry before reassembly.
- Plug it back in and power it on.
By following these steps, you’re ensuring your Sharp air purifier can continue to provide you with cleaner, fresher air. It’s a small investment of time that pays off in improved indoor air quality. Happy cleaning!
Conclusion
You’ve learned how simple it is to keep your Sharp air purifier in top working order. Regularly cleaning the exterior and properly maintaining your filters are the secrets to its peak performance. By following these steps, you ensure your appliance efficiently cleans your home’s air, contributing to a healthier living space for you and your family. Make this cleaning routine a habit, and you’ll both breathe easier and extend the life of your air purifier. Your next step? Schedule your next filter check!
Frequently Asked Questions
How often should I dust the exterior of my Sharp air purifier?
You should dust the exterior of your Sharp air purifier about once a week. This prevents dust buildup on the outside, which can eventually get pulled into the unit. A soft, dry cloth is usually all you need.
Can I wash the HEPA filter on my Sharp air purifier?
No, you generally cannot wash a HEPA filter. These filters are designed to capture very fine particles, and washing them can damage their delicate structure, making them less effective. Always check your manual, but replacement is the standard method.
My Sharp air purifier has an indicator light. What does it mean?
That indicator light is usually a filter replacement reminder. It signals that it’s time to check or replace your HEPA and activated carbon filters. Don’t ignore it, as it helps you maintain optimal air cleaning performance.
What’s the best way to clean a washable pre-filter?
For a washable pre-filter, you can typically vacuum it gently or rinse it under cool running water. Ensure it is completely dry before placing it back into the unit. This protects the more sensitive filters behind it.
When should I consider replacing my Sharp air purifier’s filters?
You should replace your HEPA and activated carbon filters every 1-2 years, or whenever the indicator light comes on. This frequency can vary based on usage and air quality, so consulting your owner’s manual is always recommended.
![5 Best Indoor Air Purifier for Smoke [In 2026]](https://homeunderstandable.com/wp-content/uploads/2025/05/best-indoor-air-purifier-for-smoke.jpg)