Plumb Two Air Compressors Together: A Step-by-Step Guide
Yes, you can absolutely plumb two air compressors together to increase your available air volume. This setup is often called “daisy-chaining” or “running in parallel”. It’s a great way to get more air when your single compressor just can’t keep up with demand, especially for tools that use a lot of air.
Connecting two compressors can feel like a big step, but it’s quite manageable. You’re essentially combining the storage capacity and airflow of two machines into one system. This means less waiting for your tank to fill and more consistent power for your tools. We’ve found this is a common solution for serious DIYers and small workshops. Adding a second tank is a common way to increase air volume, and our guide explains how to add a second tank.
- You can connect two air compressors to increase air volume.
- This is often called “daisy-chaining” or running in parallel.
- It helps power air-hungry tools without waiting.
- Proper plumbing and safety are key to a successful setup.
Let’s walk through exactly how this works step by step, so you can get your dual-compressor system up and running safely.
Linking Your Air Compressors for More Power
You absolutely can connect two air compressors. This setup effectively doubles your air storage and flow. We call this “daisy-chaining” or running them in parallel. It’s a fantastic way to handle tools that need a lot of air. Think of sandblasters or large spray guns. Your single compressor might struggle. This method provides a steadier, more robust air supply.
Why Connect Two Compressors?
The main reason is simple: more air volume. A single compressor can only pump and store so much air. When you use a tool that drains the tank quickly, you’re left waiting. This interrupts your workflow. Connecting two compressors increases the total cubic feet per minute (CFM) and the tank size. This means less downtime and more consistent tool performance.
Many DIYers and small shop owners face this issue. They start with one compressor. Soon, their projects demand more. Instead of buying a much larger, more expensive single unit, connecting two existing ones is a smart, cost-effective solution. We’ve found this is a very popular upgrade for automotive work and woodworking.
Essential Components for Your Dual Compressor Setup
To safely and effectively connect two compressors, you’ll need a few key parts. Gathering these before you start will make the process smooth. Don’t worry, they are generally available at most hardware or industrial supply stores.
What You’ll Need
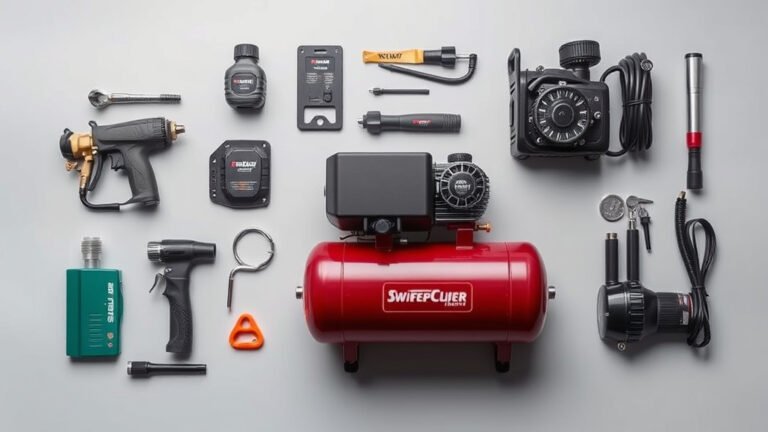
Here’s a list of the primary components you’ll want to have on hand:
- Two identical or similar air compressors: It’s best if they have similar tank sizes and pressure ratings.
- A connecting hose or pipe: This should be rated for the high pressure your compressors produce. Look for braided steel or reinforced rubber hoses.
- Fittings and adapters: You’ll need items like NPT fittings, elbows, and couplings to connect the hose to your compressors and potentially to a central manifold.
- A check valve: This is critical. It prevents air from flowing backward from one tank to the other.
- A pressure regulator: To control the output pressure to your tools.
- Safety relief valve: An essential safety device for overpressure protection.
Choosing the Right Hose and Fittings
The hose you use is very important. It must be able to handle the pressure. Many compressors operate between 90 and 175 PSI. You want a hose with a burst pressure well above that. A common choice is a high-pressure air hose. Make sure it’s also resistant to oil and heat, as compressors can generate both.
For fittings, NPT (National Pipe Thread) is the standard in the US. You’ll likely need male and female NPT adapters to connect your hose to the compressor outlets. If you’re connecting the compressors directly, you might use a T-fitting or a manifold. Always ensure the fittings match the threads on your compressors and hose. Using the wrong size or type of fitting can lead to leaks or even blowouts.
Step-by-Step Guide to Connecting Your Compressors
Now that you have your parts, let’s get them connected. Safety first, always! Ensure both compressors are unplugged before you begin any plumbing work.
Step 1: Prepare Your Compressors
First, locate the air outlet port on each compressor. These are usually found near the pressure gauge or the regulator knob. Some compressors have a single outlet, while others might have a few. You’ll want to use the main tank outlet if possible. If your compressor has an unloader valve, note its location. You might need to connect upstream of that.
Step 2: Install the Check Valve
This is a non-negotiable safety step. The check valve goes between the two compressors or between the compressors and your distribution system. Its job is to allow air to flow in only one direction. This prevents the higher-pressure compressor from discharging into the lower-pressure one. Many experts recommend installing it on the outlet of the first compressor before it connects to the second or a manifold. You want to see an arrow on the valve indicating the direction of flow.
Step 3: Connect the Compressors
You have a couple of options here:
- Direct Connection: Connect the outlet of Compressor A directly to the inlet of Compressor B using a hose and fittings. In this setup, Compressor A fills its tank and then feeds air into Compressor B’s tank.
- Manifold Connection: Install a T-fitting or a small manifold on a single hose. Connect the outlet of each compressor to this manifold. Then, run a single hose from the manifold to your workshop air system or a larger storage tank. This method is often preferred for more balanced air delivery.
When connecting, make sure all threads are clean. Apply Teflon tape or pipe dope to the male threads to ensure a good seal. Tighten fittings snugly, but don’t overtighten, as this can damage the threads or fittings. We found that a good quality Teflon tape makes a big difference in preventing leaks.
Step 4: Add a Pressure Regulator and Safety Valve
If you don’t already have a regulator on each compressor, or if you’re using a manifold, you’ll need to install one. This is where you set the desired working pressure for your tools. Connect the regulator after the point where the air from both compressors is combined. You’ll also need a safety relief valve. This should be installed on the main line or a shared tank, set slightly higher than your regulator’s maximum pressure. It’s a critical backup in case the primary regulator fails.
Many building codes and safety guidelines (OSHA) require pressure vessels to have a safety relief valve. This prevents catastrophic failure due to over-pressurization. It’s a simple, inexpensive part that can save you from serious injury or damage.
Step 5: Test for Leaks
Once everything is connected, plug in one compressor at a time. Let it build pressure. Listen carefully for any hissing sounds. You can also use a spray bottle filled with soapy water. Spray it on all the connections. If you see bubbles forming, you have a leak. Turn off the compressor, let the air out, and tighten the offending fitting. Repeat this process for the second compressor.
Safety Considerations and Best Practices
Running two compressors can increase risk if not done correctly. Always prioritize safety. The ASME Boiler and Pressure Vessel Code provides guidelines for pressure systems, and while this might not be a “boiler,” the principles of safe pressure management apply (ASME). Here are some key points to remember:
Key Safety Checklist
- Always unplug compressors before plumbing.
- Use a check valve to prevent backflow.
- Install a safety relief valve set above your working pressure.
- Use hoses and fittings rated for the maximum pressure.
- Regularly check for air leaks.
- Ensure proper ventilation in your workspace.
When to Consider a Professional
If you’re not comfortable with plumbing or unsure about any part of the process, it’s always best to consult with someone experienced. A qualified mechanic or industrial plumbing specialist can ensure your setup is safe and efficient. They can also help you choose the right components for your specific compressors and needs.
Conclusion
You’ve learned how to effectively plumb two air compressors together, essentially creating a more robust air system for your workshop. Remember, the key steps involve gathering the right components like a check valve and high-pressure hose, connecting them securely, and always prioritizing safety with a safety relief valve. We’ve found that a properly set up dual compressor system can significantly reduce downtime and power your most demanding tools. Take your time with the installation, double-check your connections, and you’ll soon enjoy the benefits of increased air volume. Your next step is to gather your parts and start plumbing!
Frequently Asked Questions
Do I need identical air compressors to plumb them together?
While using identical compressors is ideal for balanced performance, it’s not strictly necessary. You can connect compressors with different tank sizes or CFM ratings. However, ensure their pressure ratings are compatible, and always use a check valve to prevent air from flowing backward from the higher-pressure unit.
What is the best way to connect the hoses between compressors?
The best method depends on your setup. A manifold with a T-fitting allows for a more balanced air draw from both compressors. Directly connecting one compressor’s outlet to the other’s inlet is simpler but can lead to one compressor working harder. We recommend a manifold for more even air delivery.
How important is the check valve, and where should it be placed?
The check valve is absolutely critical. It prevents air from flowing back from one compressor tank to the other, which could damage the compressors or cause safety hazards. It should be installed in the line leading from one compressor’s outlet to the other, or to your central manifold, with an arrow indicating the correct direction of airflow.
Can I just use a regular garden hose to connect my compressors?
No, you absolutely cannot. Standard garden hoses are not designed to handle the high pressures generated by air compressors. Using one is a serious safety risk and could lead to a dangerous rupture. Always use a high-pressure air hose specifically rated for your compressor’s maximum output PSI.
How do I know if my connections are properly sealed and leak-free?
The best way to check for leaks is by using a soapy water solution. After pressurizing the system, spray connections with the solution. Any bubbling indicates an air leak. You can also listen for hissing sounds. Small leaks can significantly reduce your system’s efficiency and lead to longer run times for your compressors.