Husky Air Compressor Belt Replacement Guide
Replacing the belt on your Husky air compressor is a manageable DIY task. You’ll need a few basic tools and about 30 minutes to get your compressor running smoothly again. This is a common maintenance job that prevents bigger issues.
A worn or broken belt can cause your compressor to lose power or stop working altogether. It’s important to address this promptly to avoid unnecessary wear on other parts. Keeping your compressor in good shape means you’ll have the air you need when you need it.
- Safety first: Always unplug the compressor.
- Gather your tools: You’ll need wrenches and a new belt.
- Locate the belt guard and remove it.
- Loosen the motor to slide off the old belt.
- Install the new belt and reassemble.
Ready to get started? Let’s walk through exactly how to replace that belt step by step so you can get back to your projects.
Swapping Out Your Husky Air Compressor Belt
You’ve noticed your Husky air compressor isn’t performing like it used to. Maybe it’s taking longer to build pressure, or perhaps there’s an odd squealing sound. These are classic signs your compressor’s belt might be worn out or even broken. Don’t worry, replacing it is a straightforward fix you can handle yourself. We’ll guide you through the process.
Why Belt Replacement is Key for Your Compressor
Think of the belt as the vital link between your compressor’s motor and the pump. It transfers power, allowing the pump to do its job of compressing air. When this belt starts to slip, crack, or break, that power transfer is interrupted. This can lead to a noticeable drop in performance or a complete shutdown.
Regularly checking and replacing the belt when needed is a smart maintenance strategy. It prevents unnecessary strain on the motor and pump. We found that a failing belt can sometimes cause overheating of the motor, leading to more expensive repairs down the line. Keeping your compressor in top shape ensures you have air when you need it for all your projects.
Gathering Your Tools and Supplies
Before you dive in, let’s make sure you have everything you need. Having your tools ready means you can complete the job without interruption. You won’t need a workshop full of fancy equipment for this.
Essential Tools You’ll Need
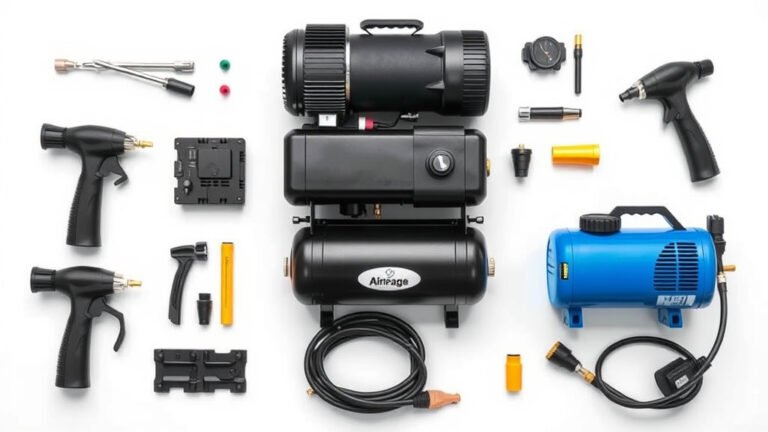
- Wrench Set: You’ll likely need a few different sizes, often a 1/2-inch and 7/16-inch wrench, to loosen bolts and adjust the motor mount.
- New Belt: This is the most critical part! Make sure you have the correct replacement belt for your specific Husky air compressor model. Check your owner’s manual or the old belt for part numbers.
- Gloves: Protect your hands from grease and sharp edges.
- Rag or Shop Towels: For wiping away any dust or old lubricant.
- Flashlight: To help you see into tight spots.
Finding the Right Replacement Belt
Getting the exact belt is crucial. Using a belt that’s too long or too short won’t work. It could slip off or put too much tension on the components. You can usually find the belt part number printed on the old belt itself. If not, your compressor’s owner’s manual is the best place to look. Many people also find success by searching online using their compressor’s model number. We found that purchasing directly from the manufacturer or a reputable parts supplier ensures you get the right fit.
Safely Preparing Your Air Compressor
Safety is always the top priority. Air compressors have moving parts and can store pressurized air. Taking a few precautions will keep you safe and prevent accidental damage.
Step 1: Power Down and Depressurize
This is a non-negotiable first step. You absolutely must unplug the air compressor from the electrical outlet. Never work on a plugged-in machine. After unplugging, you’ll want to release any air pressure stored in the tank. Open the drain valve at the bottom of the tank slowly. Let all the air escape. You should hear it hissing out. This prevents any sudden release of air while you’re working.
Step 2: Locate the Belt Guard
Most Husky air compressors have a protective cover, called a belt guard, that shields the belt and pulleys. This guard is usually made of metal or sturdy plastic. It’s there to prevent accidental contact with the moving belt and pulleys. You’ll need to find where this guard is attached. It’s typically held in place by a few screws or bolts.
Removing the Old Belt and Accessing the Pulleys
Now that the compressor is safe and you’ve located the guard, it’s time to get to the belt itself. This part involves a bit of careful disassembly.
Step 3: Removing the Belt Guard
Using your wrench, carefully unscrew the bolts or screws holding the belt guard in place. Keep these screws in a safe spot, maybe in a small cup or a magnetic dish, so you don’t lose them. Once all the fasteners are removed, gently lift the belt guard off the compressor. Set it aside. You might want to give it a quick wipe down if it’s dusty.
Step 4: Loosening the Motor Mount
Your air compressor’s motor is usually mounted on a sliding bracket. This allows you to adjust the belt tension. To remove the old belt, you’ll need to create some slack. Find the bolts that secure the motor to its mount. Often, there’s a pivot bolt and a tension adjustment bolt. You’ll need to loosen these bolts. You don’t need to remove them completely, just loosen them enough so the motor can be moved towards the pump. This will allow the belt to slip off the pulleys.
Once the motor is loose, gently push the motor assembly towards the pump. This should give the belt enough slack to be easily removed from both the motor pulley and the pump pulley. Don’t force it; it should come off with moderate effort.
Installing the New Belt and Reassembly
With the old belt off and the new one ready, you’re on the home stretch! This is where your new belt comes into play.
Step 5: Installing the New Belt
Start by placing the new belt onto the motor pulley. Then, carefully guide the belt onto the pump pulley. You might need to slightly adjust the motor’s position to get the belt onto the second pulley. Once the belt is on both pulleys, you can start to adjust the motor’s position.
Step 6: Adjusting Belt Tension
Now, you need to apply the correct tension to the new belt. Pull the motor assembly away from the pump. You’re looking for a slight give in the belt, about 1/2 inch of deflection when you press down on the middle of the belt. Too tight, and you’ll wear out the belt and bearings prematurely. Too loose, and it will slip and not transfer power effectively. Once you’ve found the right tension, tighten the motor mount bolts securely. A belt that’s too loose can lead to slipping, squealing, and poor compression (National Safety Council guidelines often recommend proper tension to prevent accidents).
Step 7: Reattaching the Belt Guard
With the new belt installed and tensioned correctly, it’s time to put the belt guard back on. Align the guard with its mounting holes and reinsert the screws or bolts you removed earlier. Tighten them snugly. This protective cover is important for safety.
Final Checks and Testing
Almost done! A few quick checks will ensure everything is in order.
Step 8: The Moment of Truth
Double-check that all bolts are tight and the belt guard is securely in place. Then, you can plug your air compressor back into the electrical outlet. Turn it on and listen carefully. You should hear a smooth running sound, and the compressor should start building pressure normally. If you hear any squealing or grinding, immediately turn it off and recheck the belt tension and alignment.
Quick Belt Replacement Checklist:
- Unplug compressor and release all air pressure.
- Remove the belt guard screws.
- Loosen motor mount bolts to create slack.
- Remove the old belt from pulleys.
- Install the new belt onto both pulleys.
- Adjust motor to achieve proper belt tension.
Conclusion
You’ve successfully replaced the belt on your Husky air compressor! By following these steps, you’ve saved time and money, ensuring your compressor runs reliably. Remember, regular maintenance like this is key to preventing bigger headaches down the road. You’ve taken a practical step to keep your tools ready for action. Now, you can confidently get back to your projects, knowing your compressor is in good working order. Just plug it in and power up – you’ve earned it!
Frequently Asked Questions
How often should I check my Husky air compressor belt?
It’s a good idea to visually inspect your Husky air compressor belt at least once a year, or more often if you use the compressor frequently. Look for any signs of cracking, fraying, or excessive wear. Catching a problem early can prevent unexpected downtime.
What happens if my air compressor belt breaks while it’s running?
If the belt breaks while your compressor is running, it will likely stop compressing air immediately. You might also hear a sudden noise or notice the motor spinning freely without driving the pump. For safety, always unplug the compressor immediately if you suspect a broken belt.
Can I use a generic belt if I can’t find the exact Husky model?
While you might be tempted to use a generic belt, it’s best to find the exact replacement specified for your Husky model. The wrong size or type of belt can slip, not create enough tension, or even damage the pulleys and motor bearings. Always try to get the correct part number for optimal performance and longevity.
My new belt seems too tight. How do I adjust it?
Proper belt tension is crucial. You’re looking for about 1/2 inch of deflection when you press down on the middle of the belt. If it’s too tight, loosen the motor mount bolts slightly and push the motor closer to the pump. If it’s too loose, pull the motor away from the pump before tightening the bolts again.
Is it normal for the new belt to make a slight noise at first?
Sometimes, a new belt might make a faint squealing sound for the first few minutes of operation as it seats itself properly on the pulleys. However, if the noise is loud, grinding, or persists, immediately turn off the compressor and recheck the belt tension, alignment, and ensure it’s correctly seated on both pulleys.