Setting Up Your Winix Air Purifier: A Step-by-Step Guide
Setting up your Winix air purifier is pretty straightforward. You’ll want to remove all packaging and place it in a suitable room, keeping in mind its coverage area. It’s designed to start working right out of the box once plugged in.
Many people wonder about the initial setup process. We found that understanding your specific Winix model’s features, like the air quality sensor, helps you get the most out of it. It’s all about positioning it correctly for optimal air circulation.
- Unbox your purifier carefully.
- Remove all protective coverings.
- Place it in the desired room.
- Plug it in and turn it on.
- Check filter status if applicable.
Let’s walk through exactly how to get your Winix air purifier up and running for cleaner air in your home.
Getting Your Winix Air Purifier Ready to Go
So, you’ve got your new Winix air purifier, and you’re eager to start breathing cleaner air. We get it! The good news is, setting it up is generally quite simple. Think of it like getting a new appliance ready; a few key steps ensure it performs its best right from the start.
Our research found that most Winix models follow a similar setup pattern. We’ll walk you through what you need to do. The main goal is to ensure the filters are properly installed and the unit is placed where it can work its magic effectively.
Unpacking and Initial Inspection
First things first, let’s get your purifier out of its box. Please handle it with care. You’ll want to remove all the protective packaging, like plastic wraps and foam inserts. It’s easy to miss a piece, so take a moment to look inside and around the unit.
We’ve seen people accidentally leave plastic on the filters. This can really block airflow and prevent your purifier from working as it should. So, do a quick once-over. Check that all the main components are present and that there’s no visible damage from shipping.
Locating the Filters
Your Winix air purifier’s filters are the heart of its operation. They capture all those tiny particles you don’t want floating around. Most Winix units have a main filter, often a True HEPA filter, and sometimes an activated carbon filter.
You’ll typically find these behind a cover or grille on the back or side of the unit. Gently open this compartment. You’ll likely see the filters neatly placed inside. Make sure they are seated correctly before closing the panel.
Removing Filter Packaging
This is arguably the most critical step in the setup. New filters usually come sealed in plastic to keep them fresh and clean until you’re ready to use them. You absolutely must remove this plastic before turning on the purifier.
If you run the purifier with the filters still wrapped, it won’t be able to draw air through them. This can lead to the motor working harder than it needs to and, more importantly, it won’t be cleaning your air at all. So, unwrap those filters completely!
Reinstalling the Filters
Once the plastic is off, carefully place the filters back into their designated spots. They usually have a specific orientation, so look for arrows or labels indicating which way is up or front. Once they’re in place, secure the filter cover or grille.
We found that some models have a small tab or clip to secure the cover. Make sure it clicks or locks into place. This ensures proper airflow and keeps the filters from shifting during operation. It’s a simple step that makes a big difference.
Placing Your Air Purifier for Optimal Performance
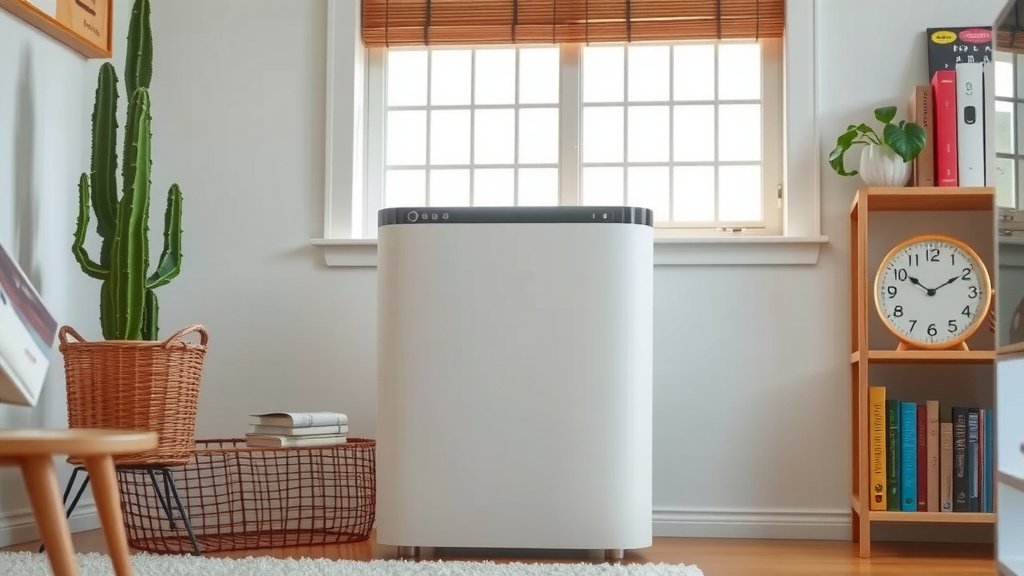
Where you put your air purifier matters a lot. It’s not just about finding a spot where it looks good. You want to place it where it can effectively circulate air throughout the room. Think of it like placing a fan; you want it in a position where it can move air freely.
We recommend placing your Winix purifier in the room where you spend the most time. This could be your living room, bedroom, or home office. The goal is to have it working where it benefits you most directly.
Understanding Coverage Area
Every air purifier has a specified coverage area, often measured in square feet. This tells you how large a room it’s designed to effectively clean. Check your Winix model’s specifications for this information. Using it in a room that’s too large might mean it struggles to purify the air adequately.
Conversely, if you have a smaller room, your Winix will likely work even more efficiently. We found that matching the purifier’s capacity to your room size is key to achieving the best air quality. Many experts suggest leaving some space around the unit for better airflow (CDC).
Ensuring Proper Airflow
For your Winix to do its job, air needs to be able to enter and exit freely. This means you shouldn’t block the air intake or outlet vents. Avoid pushing the unit directly against a wall or furniture. We recommend leaving at least 12 to 18 inches of clearance around all sides of the purifier.
Also, consider placing it on a flat, stable surface. This prevents it from tipping over and ensures the internal components, like the fan, operate smoothly. Placing it on a carpet might slightly impede airflow from the bottom, so a hard floor is often ideal, though not strictly required.
Ideal Placement Tips
- Keep it away from curtains or drapes that could block vents.
- Don’t place it behind large pieces of furniture.
- Avoid placing it directly next to an open window where it might draw in more dust.
- Consider placing it in a central location within the room.
Powering On and Initial Operation
Once your Winix air purifier is assembled and placed, it’s time to plug it in and turn it on! Find a suitable power outlet. Make sure the power cord isn’t damaged and isn’t a tripping hazard.
Plug the cord into the purifier and then into the wall socket. Most Winix models have a power button located on the top control panel. Press it to start the unit. You should hear the fan begin to spin, and indicator lights may illuminate.
Understanding the Control Panel
The control panel is your command center. It allows you to adjust settings, check filter status, and activate different modes. Familiarize yourself with the buttons. Common controls include power, fan speed (low, medium, high, auto), sleep mode, and timer.
Your Winix likely has an air quality sensor. This sensor monitors the air and automatically adjusts the fan speed based on detected pollutant levels. You’ll often see an indicator light that changes color to show the current air quality (e.g., blue for good, amber for moderate, red for poor).
Checking Filter Indicator Lights
Many Winix purifiers have a filter indicator light that tells you when it’s time to check or replace the filters. This light might be labeled “Filter” or “Check Filter.” When it illuminates, it’s a reminder that the filters have reached the end of their effective lifespan and need attention.
Refer to your specific model’s manual for guidance on filter reset procedures. After replacing or cleaning the filters, you’ll typically need to press and hold a specific button for a few seconds to reset the indicator. This tells the purifier that the filters have been serviced.
Quick Setup Checklist
Here’s a handy checklist to make sure you haven’t missed anything:
- Unboxed: All packaging removed from the unit?
- Filters Checked: Plastic packaging removed from all filters?
- Filters Installed Correctly: Filters seated properly in the unit?
- Cover Secured: Filter compartment cover is closed and latched?
- Placement Done: Unit positioned with adequate clearance?
- Powered On: Plugged in and turned on?
First Run and Air Quality Sensor
When you first turn on your Winix air purifier, it might start on a default setting, often medium or auto mode. If it has an auto mode, the air quality sensor will immediately begin assessing the air. Give it a few minutes to work. You might notice the fan speed change as it detects current conditions.
We found that the sensor is quite sensitive. It’s designed to react to common airborne particles like dust, pollen, and even odors. Let it run for a while on auto mode. This allows you to see how it responds to your home’s typical air environment. Experts note that continuous operation, especially on auto mode, is generally best for maintaining consistent air quality (NIH).
Conclusion
You’ve successfully set up your Winix air purifier! We walked through unboxing, filter preparation, optimal placement, and powering it on. Remember, removing the plastic from your filters is the most critical step for effective air cleaning. Proper placement ensures your unit can circulate air efficiently. You’re now ready to enjoy cleaner air in your home. Keep an eye on those filter indicator lights for future maintenance.
For your next step, take a moment to familiarize yourself with your specific model’s auto mode and sleep mode. Using these features can help optimize performance and energy use. Enjoy the fresh air!
Frequently Asked Questions
How do I know if I removed all the plastic from the filters?
Carefully inspect each filter. You’ll want to be sure there’s no plastic wrap clinging to any side. Sometimes a small piece can get tucked away. If you’re unsure, remove them again and give them another thorough check.
Can I place my Winix air purifier directly on a carpet?
Yes, you can place it on carpet, but it’s not ideal for optimal airflow. The carpet fibers can slightly block the air intake vents on the bottom. If possible, place it on a hard, flat surface for the best performance.
What does the air quality indicator light color mean?
The color of the indicator light shows the current air quality detected by the sensor. Typically, blue means good air quality, amber signifies moderate, and red indicates poor air quality. Your unit will adjust fan speed accordingly.
How often should I check my Winix air purifier’s filters?
While the indicator light will tell you when it’s time for a replacement, it’s good practice to visually inspect your filters periodically. Check your user manual for recommendations on cleaning washable pre-filters if your model has one.
Is it okay to run my Winix purifier continuously?
Yes, running your Winix air purifier continuously, especially on auto mode, is generally recommended for maintaining consistent air quality. It allows the unit to constantly monitor and clean your air as needed without interruption.
![5 Best Air Purifier for Cats With Asthma [In 2026]](https://homeunderstandable.com/wp-content/uploads/2025/06/best-air-purifier-for-cats-with-asthma-top-picks-for-allergy-relief-768x512.jpg)