Your First Air Compressor: A Beginner’s Guide
Getting started with your first air compressor can seem a little daunting, but it’s actually quite straightforward. To use an air compressor for the first time, you’ll need to set it up safely, connect your tool, and then gradually turn on the air supply.
Understanding a few basic concepts makes the whole process much easier and safer. We found that knowing how to check the oil levels (if applicable) and ensuring the pressure regulator is set correctly are key steps. It’s also smart to understand what PSI means for your project.
- Always ensure the compressor is on a stable surface.
- Check the oil level before your first use (if required).
- Connect your air tool securely to the hose.
- Set the regulator to the correct PSI for your tool.
- Turn the compressor on and let it build pressure.
Let’s walk through exactly how to use your air compressor for the first time, step by step, so you can get those projects done with confidence.
Getting Your New Air Compressor Ready for Action
So, you’ve got a brand-new air compressor. Exciting! Using it for the first time might feel like a big step, but we’ve broken it down to make it super easy. Think of it like learning to ride a bike – a little wobbly at first, but you’ll get the hang of it quickly. If you’re wondering about tank size, our guide to 1 gallon vs 2 gallon air compressors can help you decide.
Safety First: Setting Up Your Compressor Properly
Before you even think about plugging it in, let’s talk safety. This is the most important part, and we want you to feel totally confident. A few simple checks can prevent a lot of headaches.
Choosing the Right Spot
Your compressor needs a good home. It should be on a stable, level surface. This prevents it from vibrating too much and moving around. A concrete floor is ideal. Avoid placing it on soft ground or anything that can easily tip over.
Make sure there’s plenty of space around it for air circulation. Most compressors need about 18 inches of clearance on all sides and the top. Good airflow helps prevent overheating. We found that a well-ventilated area is key for long-term performance.
Checking the Oil Level (If Your Compressor Needs It)
Some air compressors are oil-lubricated, while others are oil-free. If yours requires oil, this is a vital check before your first use. Refer to your owner’s manual – it’s your best friend here. It will tell you exactly what type of oil to use and how much.
You’ll usually find a sight glass or a dipstick. Simply open the cap and check the level. It should be between the “min” and “max” marks. Overfilling can cause problems, just like having too little. Many guides suggest topping it off if it’s low, using the specific oil recommended by the manufacturer.
Connecting the Power
Now for the power connection. Ensure your compressor’s power cord is in good condition – no frayed wires or damage. Plug it into a grounded outlet. If you’re using an extension cord, make sure it’s the correct gauge and rating for your compressor. A cord that’s too light can overheat and cause issues.
We found that using a heavy-duty extension cord rated for outdoor use is a good practice, even if you’re indoors. This ensures it can handle the electrical load without becoming a hazard. Always check your manual for specific cord recommendations.
Hooking Up Your Air Tool: The Next Step
With the compressor set up and ready to go, it’s time to connect your air tool. This is where the magic happens, turning your compressor into a powerhouse for various tasks.
Selecting the Right Hose and Fittings
You’ll need an air hose and fittings. Most compressors come with a standard connector, often called a “coupler” or “fitting.” Make sure your hose has a compatible end. If not, you can easily pick up the right adapter at your local hardware store. You’ll need an air hose and fittings; our guide to 1/4 vs 3/8 air compressor hose sizes can help you choose.
Check that all connections are tight and secure. Leaky fittings waste air and can make your compressor run longer than necessary. You can test for leaks later by listening for hissing sounds after the compressor builds pressure.
Attaching Your Air Tool
Once your hose is connected to the compressor, attach your air tool to the other end of the hose. Again, ensure the fitting is secure. For pneumatic tools like nail guns or impact wrenches, a quick-connect fitting is common. Just push the hose end into the tool’s port until it clicks or locks into place.
Many experts recommend giving the connection a gentle tug to make sure it’s seated properly. You don’t want your tool disconnecting mid-project! It’s a small step, but it prevents a lot of frustration.
Setting the Pressure: The Key to Success
This is arguably the most critical step. Too much pressure can damage your tool or workpiece, and too little won’t get the job done. Your compressor has a pressure regulator for this purpose.
Understanding PSI
PSI stands for “Pounds per Square Inch.” It’s how we measure air pressure. Different air tools require different PSI levels to operate correctly. Think of it like the water pressure from your faucet; too high and it splashes everywhere, too low and it’s just a trickle.
Your air tool’s manual will specify the recommended operating PSI. If you don’t have the manual, a quick online search for your tool model usually provides this information. Many common tools operate in the 70-100 PSI range (Tooling Pros Association).
Adjusting the Regulator
Most compressors have a regulator knob, usually located near the air outlet. There’s often a gauge that shows the current PSI. To adjust it, you’ll typically turn the knob. Turning it one way increases pressure, and the other way decreases it.
Here’s how we found the easiest way to set it: First, set the regulator to the desired PSI before turning the compressor on. Then, as the compressor builds pressure, watch the gauge. You’ll need to adjust the knob to keep the pressure steady at your target level. Some regulators have a locking mechanism; make sure it’s engaged once set.
A Quick PSI Guide (Examples)
Here’s a general idea, but always check your tool’s requirements:
- Brad Nailer: 70-100 PSI
- Impact Wrench: 90-120 PSI
- Air Sander: 90-100 PSI
- Paint Sprayer: 30-60 PSI (can vary greatly)
Powering On and Letting It Build Pressure
Now that everything is connected and set, it’s time to turn on your compressor. This is the moment of truth!
The Switch and the Sound
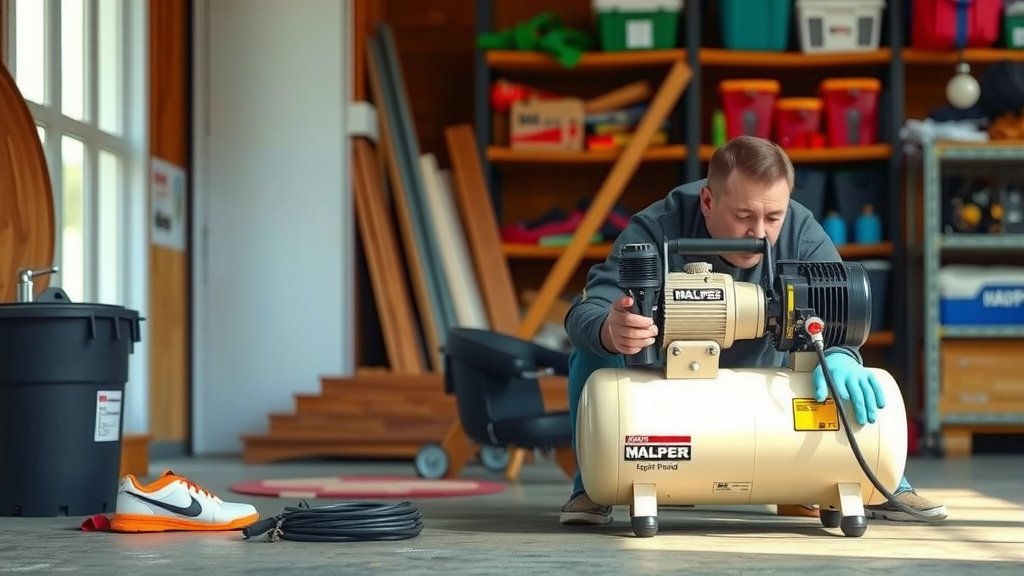
Locate the power switch on your compressor. Flip it to the “on” position. You should hear the motor start up, followed by the sound of the compressor pumping air into the tank. It will get progressively louder as the pressure builds.
Don’t be alarmed by the noise; that’s normal! Let the compressor run until it automatically shuts off. This means the tank has reached its maximum pressure capacity. Many manufacturers recommend letting the compressor run for a few minutes to cycle the air and ensure everything is working smoothly (Compressor Pro Tips).
Checking for Leaks
While the compressor is running or shortly after it shuts off, listen carefully. Do you hear any hissing sounds? If so, you likely have an air leak. This could be at the hose connection, tool fitting, or even a faulty valve.
A simple soap and water solution can help pinpoint leaks. Spray it on all the connections. Bubbles will form where air is escaping. Tighten connections or replace faulty parts as needed. We found that fixing leaks early saves you energy and prevents premature wear on your compressor.
Your First Use Checklist
Here’s a quick rundown to make sure you haven’t missed anything before you start using your tool:
- Ensure compressor is on a stable, level surface.
- Check oil level (if applicable) with the correct oil type.
- Verify power cord and outlet are safe and grounded.
- Connect air hose and tool with secure, tight fittings.
- Set the regulator to the specified PSI for your tool.
- Listen for any obvious air leaks after pressurizing.
Conclusion
You’ve successfully navigated the basics of using your air compressor for the first time! Remember, setting up on a stable surface, checking oil if needed, and securely connecting your tools are your foundational steps. Properly adjusting the pressure regulator to your tool’s specific PSI is key for performance and safety. We found that these simple checks greatly improve your experience.
Now you’re ready to put your air compressor to work on your projects. Don’t hesitate to consult your tool’s manual for any specific requirements. Happy compressing!
Frequently Asked Questions
What if my air compressor doesn’t build pressure?
If your compressor runs but doesn’t build pressure, first check for obvious air leaks at all connections, especially where the hose meets the compressor and the tool. Ensure the pressure regulator is set correctly and that the compressor isn’t running continuously without reaching its shut-off point.
How do I know if my air compressor needs oil?
Most oil-lubricated compressors have a sight glass or a dipstick near the motor. Oil-free compressors will explicitly state this in their manual and will not have an oil fill port. Always check your owner’s manual if you’re unsure about your specific model.
Can I use any extension cord with my air compressor?
No, you should use a heavy-duty extension cord with the correct gauge and rating recommended by your compressor’s manufacturer. Using an undersized cord can lead to overheating, poor performance, and potential damage to the compressor’s motor.
How tight should I make the air hose fittings?
Fittings should be snug and secure, but avoid overtightening, which can strip threads or damage the fittings. A good hand-tighten plus a quarter turn with a wrench is usually sufficient. Listen for hissing air after pressurizing; if you hear any, tighten a bit more or check the O-ring/seal.
What’s the difference between tank pressure and regulated pressure?
Tank pressure is the maximum air pressure stored in the compressor’s tank. Regulated pressure is the lower, adjustable air pressure that comes out of the regulator and goes to your air tool. You set the regulator to match the PSI your tool needs, which is always lower than the tank pressure.