How to Clean Miko Air Purifier Filter: Step-by-Step Guide
You can clean your Miko air purifier filter by gently vacuuming it and wiping it with a damp cloth. Always ensure the filter is completely dry before reinserting it. This simple maintenance helps keep your air fresh and clean.
Regularly cleaning your Miko air purifier filter is essential for its performance. It ensures you get the best air purification possible. Many users find that a clean filter significantly reduces allergens and dust in their homes.
- Vacuum the filter gently.
- Wipe with a damp cloth if needed.
- Allow it to air dry completely.
- Check your Miko manual for specific model advice.
Let’s walk through exactly how to get your Miko air purifier filter sparkling clean, step by step.
Keeping Your Miko Air Purifier Filter Clean
You’ve got your Miko air purifier, and it’s doing a great job. But how do you keep that filter working its best? It’s actually simpler than you might think. Proper filter maintenance means your Miko can keep breathing in all those dusty particles and allergens. It’s like giving your air purifier a little spa day. A clean filter works harder for you. It helps keep your home’s air feeling fresh and healthy.
Your Step-by-Step Guide to Filter Cleaning
Let’s get down to business. Cleaning your Miko air purifier filter is a straightforward process. You don’t need fancy tools or a degree in engineering. We’ll break it down into easy steps. Think of it as a routine tune-up for your air’s best friend.
Step 1: Gather Your Supplies
Before you start, make sure you have everything ready. This makes the process smooth. You’ll need a few basic items. A **soft brush attachment** for your vacuum cleaner is ideal. You might also want a **slightly damp cloth**. A **dry cloth** for a final wipe-down is also helpful. And of course, your **Miko air purifier** itself, ready for a filter reveal.
Step 2: Power Down and Disassemble
Safety first! Always start by **unplugging your Miko air purifier**. You don’t want any accidental power surges while you’re working. Next, you’ll need to access the filter. Most Miko models have a cover or a panel that easily opens. Consult your Miko’s user manual if you’re unsure how to open it. It usually just involves a simple latch or twist.
Step 3: Gentle Vacuuming is Key
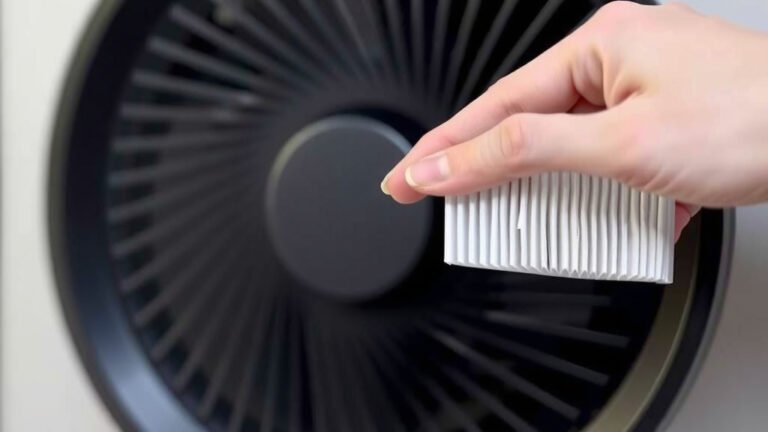
Once the filter is out, it’s time for the main cleaning event. Use your vacuum cleaner with the **soft brush attachment**. Gently go over the filter’s surface. The goal here is to **remove loose dust and debris**. Don’t press too hard. You’re not scrubbing a floor. You’re coaxing the dust away. Many experts suggest this is the most effective way to clean the pre-filter layer (Cleveland Clinic).
Think of it like brushing a pet. A gentle, consistent motion works best. You want to lift the dust off the filter material. Pay attention to the pleats or folds if your filter has them. Dust tends to settle in these areas. A thorough but gentle vacuuming helps restore airflow. Better airflow means better purification.
Step 4: Addressing Stubborn Grime (If Necessary)
Sometimes, you might find a little more than just dust. Perhaps some light grime has built up. If vacuuming alone isn’t enough, you can use a **slightly damp cloth**. Make sure the cloth is only **mildly moist**, not dripping wet. Lightly wipe down the filter surface. This can help lift away any sticky residue.
It’s important not to saturate the filter. Water can damage the filter material. It can also lead to mold or mildew growth. That’s the opposite of what you want! Many sources recommend avoiding harsh chemicals or detergents. Stick to water if you must use a cloth. If your filter is heavily soiled, it might be time for a replacement rather than cleaning.
Step 5: The Crucial Drying Phase
This is perhaps the **most important step**. Your Miko air purifier filter MUST be **completely dry** before you put it back. Putting a damp filter back into the unit is a recipe for disaster. It can lead to mold, mildew, and unpleasant odors. Plus, it won’t purify your air effectively.
The best way to dry it is to **air dry**. Find a spot with good air circulation. You can place the filter near an open window or in a well-ventilated room. Avoid direct sunlight or heat sources like hairdryers or ovens. These can warp or damage the filter. Give it **at least 24 hours** to dry. Patience here is key to a healthy filter and healthy air.
How do you know it’s dry? Touch it. Feel it. Is there any hint of moisture? If so, it needs more time. You can also use a dry cloth to gently pat it down after air drying. This helps absorb any lingering dampness. We want it bone dry, like a desert landscape!
Step 6: Reassembly and Power Up
Once you are absolutely certain the filter is **100% dry**, it’s time to put it back. Carefully place the filter back into your Miko air purifier. Make sure it’s seated correctly. Then, reattach any covers or panels you removed earlier. Ensure they click or latch securely.
With the filter back in place, you can **plug your Miko air purifier back in**. Turn it on and let it run. You should notice it sounds a little quieter. And your air will start feeling fresher again. It’s a small effort for a big reward in air quality.
When to Clean vs. When to Replace
It’s good to know when cleaning is sufficient and when it’s time for a new filter. Most Miko air purifiers have a washable pre-filter. This is the part you’ll clean regularly. However, they also often contain other filter layers, like HEPA and activated carbon filters.
The Washable Pre-Filter
This is the layer designed to catch larger particles like dust and pet hair. It’s usually made of a mesh or fabric material. Because it catches the big stuff, it needs frequent attention. We recommend **cleaning this pre-filter every 2-4 weeks**. This frequency can vary based on your home environment. If you have pets or live in a dusty area, you might need to clean it more often.
Other Filter Types
HEPA filters and activated carbon filters are typically **not washable**. They trap very fine particles and odors. Trying to wash them can damage their structure. This compromises their ability to filter your air effectively. These filters have a lifespan and need to be **replaced** periodically. Check your Miko user manual for the recommended replacement schedule for these specific filters. Often, it’s every 6-12 months, depending on usage and air quality.
| Filter Type | Cleaning Method | Frequency |
|---|---|---|
| Washable Pre-Filter | Gentle vacuuming, light damp cloth wipe if needed | Every 2-4 weeks |
| HEPA Filter | Replace only (do not wash) | Every 6-12 months (check manual) |
| Activated Carbon Filter | Replace only (do not wash) | Every 6-12 months (check manual) |
Quick Checklist for Filter Care
Here’s a handy list to keep your Miko filter in top shape:
- Unplug your air purifier before starting.
- Use a soft brush vacuum attachment.
- Gently vacuum all surfaces.
- Wipe with a barely damp cloth if needed for grime.
- Air dry completely – no shortcuts!
- Ensure filter is fully dry before reinstallation.
Conclusion
You’ve learned how to keep your Miko air purifier working at its best by cleaning its washable pre-filter. Remember, gentle vacuuming and a barely damp cloth are your main tools here. The most critical step is ensuring the filter is completely dry before putting it back. This simple maintenance routine will help ensure your home’s air stays fresh and clean. Ready to give your Miko a little TLC? Check your filter this week and start the cleaning process!
Frequently Asked Questions
How often should I clean my Miko air purifier filter?
You should aim to clean the washable pre-filter of your Miko air purifier every 2 to 4 weeks. If you have pets or notice a lot of dust, you might need to clean it more frequently. Regularly checking the filter will help you determine the best schedule for your home.
Can I use soap or detergent to clean my Miko air purifier filter?
No, it’s best to avoid soap or harsh detergents. Research suggests that using only water or a slightly damp cloth is sufficient for cleaning the washable pre-filter. Strong chemicals can damage the filter material and potentially harm your air quality.
What’s the best way to dry the Miko air purifier filter after cleaning?
The most effective method is to let the filter air dry completely in a well-ventilated area. Avoid using heat sources like hairdryers or direct sunlight, as these can damage the filter. Allow at least 24 hours for it to dry thoroughly.
My Miko air purifier filter still looks dirty after vacuuming, what should I do?
If light vacuuming doesn’t remove all the grime, you can use a barely damp cloth to gently wipe the surface. However, if the filter seems heavily soiled or damaged, it might be time to consider replacing it rather than trying to clean it further.
How do I know if I need to replace my Miko air purifier filter instead of cleaning it?
The washable pre-filter is designed for regular cleaning. However, HEPA and activated carbon filters are not washable and need periodic replacement, usually every 6-12 months. If your washable filter is torn, misshapen, or has persistent odors even after cleaning, it’s time for a new one.