DeWalt Air Compressor: Your Guide to Proper Use
Using your DeWalt air compressor is pretty straightforward once you know the steps. Essentially, you’ll want to connect your tool, set the correct pressure using the regulator, and then turn on the compressor. It’s designed to be user-friendly for DIYers and pros alike.
Many people wonder about the best way to get their air compressor ready for action. We found that following a simple checklist ensures you get the most out of your DeWalt tool. This includes checking the oil level and ensuring the tank is properly drained before operation for optimal performance and longevity.
- Connect your air-powered tool.
- Adjust the air pressure regulator.
- Turn on the compressor unit.
- Drain the air tank regularly.
- Check oil levels before starting.
Below, we’ll walk you through each step of using your DeWalt air compressor to get your projects done efficiently and safely. Let’s get started!
Getting Your DeWalt Air Compressor Ready for Action
So, you’ve got your DeWalt air compressor, and you’re ready to tackle some projects. That’s fantastic! Using it is simpler than you might think. We’ve found that a few key steps ensure you get the best performance and keep your compressor running smoothly for years to come. Let’s get it prepped.
A Quick Pre-Operation Checklist
Before you even plug it in, a quick check can save you headaches. Think of it like checking your oil before a road trip. We’ve put together a few essential steps. These are designed to make sure your compressor is in tip-top shape.
- Ensure the power switch is off.
- Check the oil level if your model requires it.
- Make sure the tank drain valve is closed.
- Connect any air hoses securely.
Understanding Your Compressor’s Components
DeWalt compressors are built with user-friendliness in mind. You’ll find a few main parts that are key to operation. Knowing what they do helps you use the machine safely and effectively.
The Air Tank
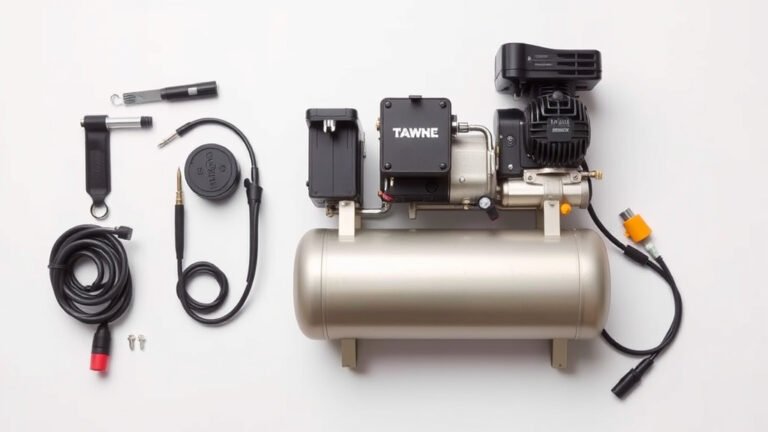
This is where the magic happens – compressed air is stored here. Think of it as the compressor’s “stomach.” It holds a reserve of air so you don’t have to run the motor constantly. Most tanks have a pressure gauge so you can see how much air is inside.
The Regulator and Gauges
You’ll see a dial or knob, often with a gauge next to it. This is your regulator. It lets you control the air pressure coming out of the compressor. There might be one gauge for the tank pressure and another for the regulated output pressure. We found this is super important for matching the tool you’re using.
The Drain Valve
Located at the bottom of the tank, this valve is your friend. It lets out water that builds up from condensation. Keeping this moisture out is vital for preventing rust and ensuring good air quality. Many experts say draining regularly is key to compressor longevity (National Air Warehouse).
Connecting Your Air-Powered Tools
This is where you link your compressor to whatever job you’re doing. Whether it’s a nail gun, impact wrench, or spray gun, the connection process is similar.
Choosing the Right Hose and Fittings
Make sure your air hose is rated for the pressure your compressor can deliver. A kinked or damaged hose can be a hazard. You’ll also need the correct fittings to connect the hose to the compressor’s outlet and your tool. You’ll also need the correct fittings to connect the hose to the compressor’s outlet and your tool; our guide explains hose sizes.
Securing the Connection
Most connections use quick-connect fittings. Simply push the fitting on the hose into the coupler on the compressor. You should hear a click, indicating it’s locked in place. Give it a gentle tug to ensure it’s secure. This prevents accidental disconnection.
Setting the Correct Air Pressure
This step is absolutely critical for both performance and safety. Different air tools require different air pressures to operate correctly. Running a tool at too high a pressure can damage it, and too low can make it perform poorly. Your tool likely has a recommended PSI (pounds per square inch) range listed on it or in its manual.
Understanding PSI Requirements
We’ve found that many common DIY tools, like finishing nailers, often operate around 70-90 PSI. Larger tools, such as impact wrenches or sanders, might require higher pressures. Always check your tool’s specifications first.
Adjusting the Regulator Dial
With the compressor turned on (we’ll get to that next!), you’ll see the pressure building. Slowly turn the regulator knob. Turning it clockwise usually increases the pressure, while counter-clockwise decreases it. Watch the output pressure gauge. Adjust it until it reaches the lower end of your tool’s recommended range. You can always tweak it slightly later if needed.
Turning On Your DeWalt Air Compressor
Now for the moment of truth! It’s pretty straightforward, but there are a couple of things to keep in mind for safety and efficiency.
Powering Up Safely
First, ensure all your connections are secure and the regulator is set correctly. Then, find the power switch. Flip it on. You’ll hear the motor start up. The compressor will begin filling the tank with air. A red light might illuminate while it’s running.
Monitoring the Pressure Cut-Out
Your compressor has a built-in safety feature. It will automatically shut off once the air tank reaches its maximum preset pressure. This prevents over-pressurization. You’ll usually see the pressure gauge hit its peak, and the motor will go quiet. It will then cycle back on when the pressure drops.
Using Your Tool and Maintaining Performance
Once the compressor has built up enough pressure, you’re ready to use your tool. As you use it, the compressor will kick on and off as needed to maintain pressure. It’s normal for the motor to cycle. This is how it keeps the tank topped up.
Draining Condensation Regularly
This is one of the most important maintenance steps. After each use, or at least daily, you should drain the tank. Open the drain valve slowly. You might hear a hiss of air escaping. Let it drain until no more air or water comes out. We found that doing this prevents rust and keeps your air supply clean.
Checking Oil Levels (if applicable)
Some DeWalt air compressors are oil-lubricated. If yours is, you’ll need to check the oil level regularly, usually before each use. There’s typically a sight glass or a dipstick. Ensure the oil is between the minimum and maximum marks. This is crucial for the motor’s lubrication and lifespan.
Troubleshooting Common Issues
Even with the best tools, things can sometimes go awry. Don’t panic if you encounter a small issue. Many problems have simple fixes.
Low Air Pressure
If you’re not getting enough air, check your regulator setting first. Ensure it’s turned up sufficiently. Also, check for any leaks in your hose or connections. Even a small leak can significantly reduce output pressure.
Compressor Not Starting
Is it plugged in? That sounds silly, but we’ve all done it! Check the circuit breaker if it’s connected to a dedicated line. If it’s an oil-lubricated model, low oil levels can sometimes prevent it from starting. Consult your manual for model-specific troubleshooting tips.
A Quick Summary for On-the-Go
To recap, here’s a super quick rundown:
- Connect your tool securely.
- Set the correct pressure with the regulator.
- Turn on the compressor.
- Listen for the motor to shut off at full pressure.
- Drain the tank after use to prevent moisture buildup.
- Check oil levels if your model requires it.

Conclusion
You’re now ready to use your DeWalt air compressor with confidence. We’ve covered everything from your pre-operation checklist to setting the right pressure for your tools. Remember, consistent maintenance, like draining the tank after each use, is key to its longevity. By following these steps, you’ll ensure efficient operation and get the most out of your investment. So, grab your tool, connect it up, and get those projects finished!
Frequently Asked Questions
How often should I drain my DeWalt air compressor tank?
It’s best to drain your DeWalt air compressor tank after each use, or at least once daily. This prevents moisture buildup, which can cause rust and affect air quality. A quick drain can save you a lot of hassle down the road.
What does the regulator on my DeWalt air compressor do?
The regulator on your DeWalt air compressor controls and stabilizes the air pressure delivered to your tool. You adjust it using a knob to match the PSI requirements of the specific air-powered tool you are using. This ensures both optimal tool performance and prevents damage.
My DeWalt compressor won’t turn on. What should I check?
First, double-check that it’s securely plugged into a working outlet. If it’s on a dedicated circuit, check your home’s circuit breaker. For oil-lubricated models, ensure the oil level is adequate, as low oil can sometimes prevent startup. Always consult your manual for specific model troubleshooting.
Can I use any air hose with my DeWalt compressor?
No, you should use an air hose rated for the maximum pressure your DeWalt compressor can produce. A hose that’s too weak can be a safety hazard. Also, ensure you have the correct fittings to securely connect the hose to both the compressor and your tool.
Why is checking the oil level important for some DeWalt compressors?
For oil-lubricated DeWalt air compressors, checking the oil level is vital for proper operation and motor longevity. The oil lubricates the internal components, reducing friction and wear. Running the compressor with insufficient oil can lead to overheating and serious damage.