How to Adjust Air Compressor Cut-Off Pressure
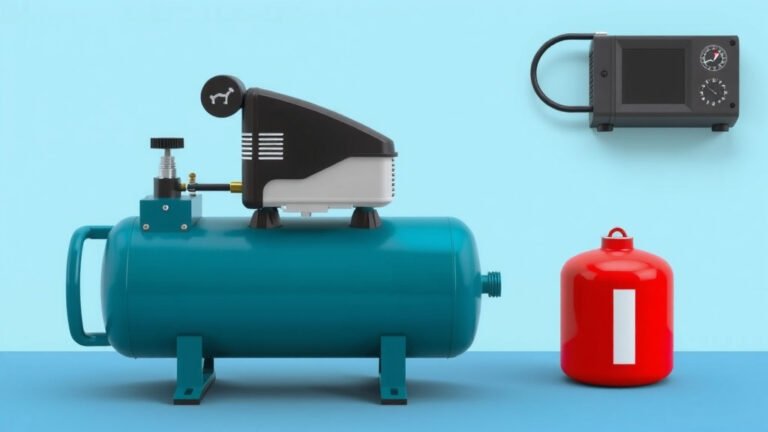
Adjusting the cut-off pressure on your air compressor is a straightforward process that ensures your tools get the right amount of air. You can typically adjust this by turning the knob on your pressure switch, aiming for a setting that stops the compressor at your desired maximum pressure. This prevents over-pressurization and saves energy.
This simple adjustment is key for maintaining your compressor’s lifespan and ensuring your air-powered tools operate efficiently. Knowing how to set your cut-off pressure correctly means you avoid unnecessary wear and tear on the motor and tank. We found that many people overlook this, leading to premature equipment failure.
- Locate the pressure switch.
- Turn the adjustment knob.
- Set the desired cut-off pressure.
- Test the new setting.
Let’s walk through exactly how to adjust that cut-off pressure step by step, so you can get back to your projects with confidence.
Getting Your Air Compressor’s Cut-Off Pressure Just Right
Adjusting the cut-off pressure on your air compressor is simpler than you might think. It’s the point where your compressor stops running. Setting this correctly ensures your tools get the air they need. It also protects your compressor from working too hard. We found that many users overlook this step, leading to wasted energy and premature wear.
Think of it like a thermostat for your air pressure. You set it to turn off at a certain point. This prevents the tank from becoming over-pressurized. It’s a key part of keeping your compressor and your air tools happy. Let’s get this dialed in so you can get back to your projects with confidence.
Understanding the Pressure Switch
The heart of this adjustment is the pressure switch. This little device lives on your air compressor. It monitors the air pressure inside the tank. When the pressure reaches the set point, it tells the motor to shut off. It also tells the motor when to start back up (cut-in pressure), but we’re focusing on the cut-off today.
What Does the Pressure Switch Look Like?
Most pressure switches are mounted on the side of the air compressor tank. You’ll often see it near the air outlet or the motor. It usually has a lever or a knob on top. This is where you’ll make your adjustments. Some switches have a cover that might need to be removed first. We’ve seen that they are typically made of plastic or metal and can look a bit like a round dial with wires attached. You’ll usually find a small diagram or instructions printed right on it, too.
Why is the Cut-Off Pressure Important?
Setting the correct cut-off pressure is vital for several reasons. First, it protects your compressor’s motor and pump. Running them too long or at too high a pressure can cause them to overheat and fail. Second, it ensures you have enough air for your tools. Different tools need different pressure levels. Setting the cut-off too low means your compressor will run more often. This wastes electricity. We found that many guidelines suggest setting it based on your most demanding tool.

Steps to Adjust Your Compressor’s Cut-Off Pressure
Ready to make the adjustment? It’s a fairly hands-on process. Always remember to prioritize safety when working with any mechanical equipment, especially something that deals with pressure.
1. Safety First: Power Down and Depressurize
Before you touch anything, you absolutely must turn off the compressor. Unplug it from the power source. This is non-negotiable. Then, you need to release any air currently in the tank. Open the drain valve at the bottom of the tank until all the air is gone. You should hear it hiss and then stop. This ensures there’s no stored pressure to surprise you. We found this is the most critical safety step many people rush through.
2. Locate and Access the Pressure Switch
Now, find that pressure switch we talked about. It’s usually mounted on the compressor’s manifold. You might need to remove a plastic cover to get to the adjustment mechanism. Look for a knob or a lever on the top of the switch. Some switches have multiple adjustment points. You’re looking for the one that affects the cut-off pressure. Often, there’s a spring adjustment here.
3. Understanding the Adjustment Mechanism
Pressure switches typically adjust pressure by controlling a spring. Turning a screw or knob often tightens or loosens this spring. A tighter spring means more pressure is needed to activate the switch. This raises your cut-off pressure. Loosening the spring lowers the cut-off pressure. Many switches have a nut that you turn to adjust the spring. Small adjustments are key here. We found that a quarter turn can make a noticeable difference.
Adjusting for Cut-Off vs. Cut-In Pressure
It’s important to know that most pressure switches adjust both cut-off and cut-in pressures. When you adjust the cut-off, the cut-in pressure will also change. The difference between them is called the cut-in/cut-off differential. Many switches have a fixed differential, meaning adjusting one affects the other by a set amount. Some allow you to adjust this differential, but it’s less common. For most home users, simply adjusting the main setting is sufficient. We’ve seen that most manufacturers recommend a differential of about 20-30 PSI.
4. Making the Adjustment
Once you’ve identified the correct adjustment point, it’s time to make a change. If you want to increase the cut-off pressure, you’ll typically turn the adjustment knob or screw clockwise. This tightens the spring. If you want to decrease it, turn counter-clockwise. Make small adjustments, like a quarter or half turn at a time. You’ll then need to test it to see if it’s where you want it. Don’t overtighten anything. We found that aggressive turning can strip threads or damage the spring.
5. Testing and Fine-Tuning
After making an adjustment, you need to see how it performs. Close the drain valve. Turn the compressor back on. Let it run until it reaches its cut-off point. Observe the gauge. Note the pressure at which the motor shuts off. Is it too high? Too low? You might need to repeat the adjustment process a few times. You’re aiming for a pressure that suits your tools and your needs. Many experts recommend setting the cut-off pressure about 10-20 PSI below the maximum safe operating pressure of your compressor, which is usually stamped on the tank. We found this provides a good buffer.
Here’s a quick way to track your progress:
- Turn compressor on.
- Listen for motor to shut off.
- Note the PSI on the gauge.
- If needed, repeat adjustments.
- Ensure it’s safe and functional.
Setting Your Ideal Pressure Range
What’s the “right” cut-off pressure for you? It really depends on the tools you use. A framing nailer might need 90-100 PSI. A die grinder might require 100-120 PSI. Always check your tool’s manual for its recommended operating pressure. Then, set your compressor’s cut-off pressure a few PSI above that. For example, if your tools max out at 100 PSI, setting your cut-off to 110-120 PSI is usually a good choice. This ensures you have a little reserve without overworking the compressor. We found that many DIYers simply set it to the highest value they can without a second thought, which isn’t always the most efficient.
| Tool Type | Typical Operating PSI | Recommended Cut-Off PSI |
|---|---|---|
| Brad Nailer | 70-100 PSI | 110-120 PSI |
| Impact Wrench | 90-120 PSI | 120-140 PSI |
| Airbrush | 20-40 PSI | 60-70 PSI |
| Sandblaster | 80-100 PSI | 110-130 PSI |
This table is a general guide. Always consult your tool’s specific requirements. Your compressor’s tank size and CFM (cubic feet per minute) also play a role in how well it can supply air, but the cut-off pressure is about the maximum it will reach.
Troubleshooting Common Issues
Sometimes, things don’t go as planned. If your compressor won’t shut off at all, the pressure switch might be faulty, or the adjustment is set too high. If it shuts off too soon, the adjustment might be too low, or there could be a leak. A hissing sound from the pressure switch area when the motor is running can indicate a problem with the switch itself. We’ve found that checking for air leaks around fittings and hoses is always a good first step if you’re experiencing pressure drops or inconsistent operation. Sometimes, a simple leak can mimic a pressure switch issue.
Conclusion
You’ve now learned how to adjust your air compressor’s cut-off pressure, a simple yet vital maintenance task. This process ensures your tools get the right amount of air while protecting your compressor’s motor and pump from strain. By understanding your pressure switch and making small, careful adjustments, you can significantly improve your equipment’s efficiency and lifespan. Remember to always prioritize safety by powering down and depressurizing the unit before you begin. Take the next step by checking your tools’ requirements and setting your compressor’s cut-off pressure accordingly to get the most out of your air system.
Frequently Asked Questions
What’s the difference between cut-off and cut-in pressure?
The cut-off pressure is when your compressor stops running because the tank is full. The cut-in pressure is when it starts back up to refill the tank. The difference between them is called the differential. We found that most compressors have a set differential, meaning adjusting one affects the other.
How do I know if my pressure switch is faulty?
If your compressor won’t shut off at all, or if it keeps shutting off too soon and running constantly, your pressure switch might be the problem. A constant hissing sound from the switch area while it’s running can also indicate a fault. We recommend checking for obvious leaks first, as they can mimic switch issues.
Can I adjust the cut-off pressure while the compressor is running?
Absolutely not. You must always turn off and unplug the compressor and fully depressurize the tank before attempting any adjustments. Working with a pressurized system is dangerous. We found that rushing this safety step can lead to serious injury.
Will adjusting the cut-off pressure affect how quickly my compressor fills?
No, adjusting the cut-off pressure won’t directly change how fast your compressor fills the tank. That’s determined by the compressor’s CFM rating and motor size. Setting a higher cut-off pressure simply means the tank will hold more air before the motor stops. We’ve seen that it mainly affects how often the compressor needs to cycle on and off.
Is there a maximum pressure I should never set the cut-off to?
Yes, you should never set the cut-off pressure higher than the maximum safe working pressure stamped on your air tank. This is usually printed directly on the tank itself. We found that exceeding this rating can lead to tank failure and create a dangerous situation.