Connect Your Blow Gun To Air Compressor: Easy Guide
Attaching a blow gun to your air compressor is usually a simple process. You’ll typically just need to screw the blow gun’s fitting into the compressor’s air hose. Make sure to get a good, tight seal so you don’t lose air pressure.
This connection is vital for tasks like clearing dust or debris. Knowing how to properly connect your blow gun ensures it works effectively and safely. Many common compressor hoses use a standard fitting size, making the connection quick and easy for most users.
- Connect the blow gun fitting to your air hose.
- Tighten it securely for a good seal.
- Ensure you have the right adapter if needed.
- Test for air leaks before using.
Let’s walk through exactly how this works step by step, so you can get your blow gun attached and ready for action in no time!
Connecting Your Blow Gun to an Air Compressor
So, you’ve got a new blow gun and you’re ready to blast away dust and debris. Great! Connecting it to your air compressor is usually a breeze, but getting it right ensures you’re not losing precious air pressure. We’ll walk you through the simple steps.
Understanding the Air Compressor Hose Connection
Most air compressors use a standard fitting for their hoses. This fitting is where you’ll attach your blow gun. Think of it like a screw thread – one piece has the male threads, and the other has the female threads. Your blow gun will have one of these, and your air hose will have the other.
Identifying Your Hose Fitting Type
Before you start, take a peek at your air compressor hose. You’ll likely see a fitting at the end. It might have a sleeve that you pull back to connect or disconnect tools. This is often called a “coupler.” Most standard couplers in the US are 1/4-inch industrial or automotive types. These are very common and widely compatible.
Checking Your Blow Gun Fitting
Now, look at the end of your blow gun where it’s supposed to connect. Does it look like it will screw directly into the fitting on your hose? If yes, you’re in luck! It’s probably a direct match.
If your blow gun fitting doesn’t seem to line up with your hose coupler, don’t worry. You might just need a simple adapter. These are readily available at hardware stores or auto parts shops. They’re small, inexpensive, and solve the problem quickly.
Step-by-Step Connection Guide
Step 1: Ensure Compressor is Off and Depressurized
Safety first, always! Before you connect anything, make sure your air compressor is turned OFF. Better yet, bleed any remaining air pressure from the hose. You can usually do this by pulling the trigger on whatever is currently attached to the hose (or just by letting some air out if nothing is attached). You don’t want any sudden bursts of air while you’re working.
Step 2: Prepare the Hose Fitting
Look at the coupler on your air hose. If it has a sleeve, gently pull it back. This opens up the gripping mechanism inside the coupler, preparing it to accept the blow gun’s fitting. If it’s a simple threaded connection without a sleeve, you’ll just be screwing the blow gun into it.
Step 3: Attach the Blow Gun
Now, take your blow gun’s fitting and align it with the opening of the hose coupler. If it’s a push-and-lock style, simply insert the blow gun fitting firmly into the coupler. The sleeve you pulled back should snap forward on its own, securing the connection.
If it’s a threaded connection, gently screw the blow gun fitting into the hose fitting. Turn it clockwise until it feels snug. You don’t need super-human strength here. Just get it nice and tight.
Step 4: Check for a Secure Fit
Give the blow gun a gentle wiggle. Does it feel solid? Is there any play or looseness? A secure connection is key to preventing air leaks. If it feels loose, try tightening it a bit more. For threaded connections, an extra half-turn might do the trick.
Troubleshooting Common Connection Issues
When Fittings Don’t Match
We’ve all been there. You think you’re ready to go, and the fittings just don’t work together. This is where adapters come in handy. You’ll want to know the size of your blow gun’s thread and the size of your air hose’s fitting. Most hardware stores have a display with various adapters. You can often find a simple “quick-disconnect” adapter that fits your hose and has the correct outlet for your blow gun.
Dealing with Leaks
After you’ve connected everything, it’s a good idea to test for leaks before you really get going. Turn on your air compressor and let it build pressure. Listen carefully around the connection point. Do you hear any hissing sounds? That’s air escaping!
If you hear a hiss, turn the compressor off again. Try tightening the connection a bit more. Sometimes, a small amount of plumber’s tape (PTFE tape) on the threads of your blow gun fitting can create a better seal. Just wrap a few layers around the threads before screwing it in.
Understanding Quick-Connect Couplers
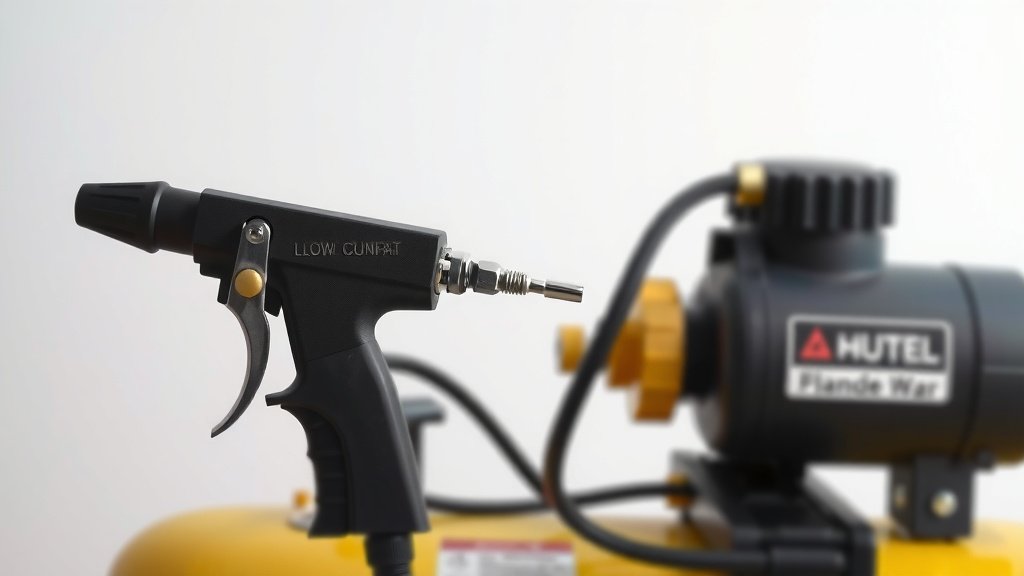
Many modern air compressor setups use “quick-connect” or “quick-disconnect” fittings. These are designed for speed and ease. The coupler on the hose has a sleeve. You pull the sleeve back, insert the tool’s plug, and release the sleeve. The tool is then locked in place.
Using a blow gun with a compatible quick-connect plug makes the whole process incredibly fast. We found that for frequent tool changes, a good set of quick-connect fittings is a real time-saver.
Essential Checklist for a Proper Connection
Before you blast off, quickly run through this checklist:
- Is the air compressor turned OFF?
- Is the air hose depressurized?
- Does the blow gun fitting match the hose coupler?
- Is the connection securely tightened?
- Did you test for air leaks?
Air Pressure Considerations
It’s also worth remembering that blow guns don’t typically require high air pressure to work effectively. Most can operate well between 30 to 90 PSI. Your air compressor likely has a regulator you can use to set the output pressure. Check the manufacturer’s recommendation for your specific blow gun. Over-pressurizing can be inefficient and potentially unsafe.
You’ll often find that a slight adjustment on the compressor’s regulator can make a big difference in the power of your blow gun’s air stream. Experimenting a little can help you find the sweet spot for your task.
| Fitting Type | Typical Use | Connection Method |
|---|---|---|
| 1/4-inch Industrial | General purpose, heavier duty | Push and lock sleeve |
| 1/4-inch Automotive | Lighter duty, often on smaller compressors | Push and lock sleeve or threaded |
| Threaded (e.g., NPT) | Older systems, specific tools | Screw-on (requires sealant) |
Conclusion
You’ve now learned the straightforward steps to connect your blow gun to your air compressor. Remember, a secure connection means efficient airflow and a safer workspace. By confirming your fittings match, ensuring a tight seal, and performing a quick leak test, you’re all set. Don’t forget to check your blow gun’s recommended pressure range and adjust your compressor’s regulator accordingly. Now, go ahead and tackle those dusty jobs with confidence!
Frequently Asked Questions
Do all blow guns and air compressors use the same fittings?
No, not all blow guns and air compressors use identical fittings. While 1/4-inch industrial and automotive types are very common in the US, variations exist. It’s always wise to check if your blow gun’s fitting directly matches your air hose’s coupler, or if you’ll need a simple adapter.
What should I do if my blow gun fitting doesn’t fit my air hose?
If your fittings don’t match, you’ll likely need an adapter. These are readily available at hardware or auto parts stores. You’ll need to identify the thread size on your blow gun and the type of coupler on your hose to find the correct adapter.
How tight should I make the connection?
You want the connection to be snug and secure, but you don’t need to overtighten it. For threaded connections, screw it in until it feels firm, then give it about a half-turn more. For quick-connect fittings, ensure the sleeve fully engages to lock it in place.
How can I tell if there’s an air leak after connecting?
The best way to check for leaks is to turn on your air compressor and let it build pressure. Then, carefully listen around the connection point for any hissing sounds. If you hear any, turn the compressor off and try tightening the connection or using plumber’s tape on the threads.
Can I use plumber’s tape (PTFE tape) on the threads?
Yes, plumber’s tape can be very helpful, especially for threaded connections. Wrapping a few layers of PTFE tape around the threads of your blow gun fitting before screwing it into the hose coupler can create a better seal and prevent air leaks.