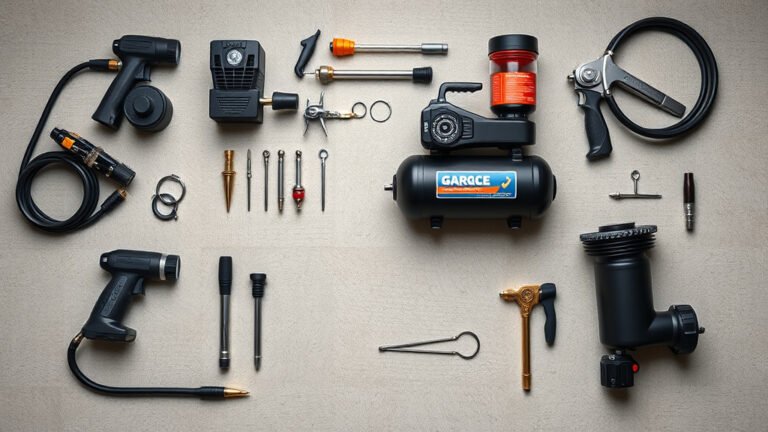
Install Air Compressor Lines in Your Garage: A Step-by-Step Guide
Installing air compressor lines in your garage is totally doable for most DIYers. You can get this done by following a few key steps for safe and effective air delivery. The main goal is to create a reliable air source for all your tools, ensuring they get the pressure they need to work properly. Think of it as building the plumbing for your workshop! Proper installation means long-term use without leaks or issues.
Setting up your air lines involves choosing the right materials and understanding how to connect them securely. We found that using copper or PEX tubing is a common and sturdy choice for garage setups. Deciding between a ring system or a straight run depends on your garage layout. It’s about making sure every tool has access to compressed air when and where you need it. This project can really boost your workshop’s functionality.
- Plan your air line layout.
- Choose the right tubing material (copper or PEX).
- Learn how to make secure connections.
- Test for leaks before full use.
Below, we’ll walk you through exactly how to install air compressor lines in your garage, step by step. Let’s get your workshop ready for action!
Setting Up Your Garage Air Compressor Lines
Getting your garage wired for compressed air is a smart move. You’ll have air power ready for all your tools. This project makes your workshop much more efficient. Let’s walk through how to get this done safely and correctly.
Planning Your Air Line System
Before you cut any pipes, you need a solid plan. Where will your compressor live? How many tools do you plan to run at once? Think about the layout of your garage. This helps you figure out the best way to route your air lines. A good plan avoids headaches later.
Deciding on Tubing Material
Most DIYers choose between two main materials for their air lines: copper or PEX tubing. Each has its own pros and cons. We found that understanding these differences helps you pick the right one for your needs.
Copper Tubing
Copper is a classic choice for a reason. It’s durable and has been used for plumbing for ages. It can handle high pressures well. Copper also resists corrosion. However, it can be more expensive than PEX. You’ll also need special tools to bend and connect it properly.
PEX Tubing
PEX tubing is a more modern option. It’s flexible, which makes it easier to run around corners. PEX is also generally less expensive than copper. It’s quite forgiving if you make a small mistake. The main drawback is its temperature limits. Make sure it can handle the air pressure and any potential heat from your compressor. Many experts say PEX is a great choice for DIY garage setups (This is a common recommendation among home improvement resources).
Choosing Your System Layout
How you run your lines matters. You can go with a simple straight run from the compressor. Or, you might prefer a ring system that circles your garage. A ring system offers more access points. It can also help maintain pressure to tools further away. Consider how you use your space and where you’ll need air the most.
Gathering Your Tools and Materials
Having everything ready makes the job go smoothly. You don’t want to stop halfway to run to the store. Here’s a list of things you’ll likely need.
Essential Tubing and Fittings
You’ll need your chosen tubing (copper or PEX). Make sure you get the right diameter for your compressor’s output. You’ll also need fittings: elbows, tees, couplings, and adapters. These connect the pipes and let you branch off. Don’t forget shut-off valves! These are super handy for maintenance.
Tools for the Job
The tools depend on your tubing choice. For copper, you’ll need a tubing cutter and a torch for soldering, or a PEX crimping tool if you use push-to-connect fittings. For PEX, you’ll typically need a PEX cutter and a crimping or expansion tool. You might also need a drill and screws for mounting lines. Always check the manufacturer’s recommendations for your fittings and tubing.
Installing the Air Lines: Step-by-Step
Now for the fun part! Let’s get these lines installed. Safety first, always. Wear safety glasses and gloves.
Mounting the Tubing
Start by measuring and cutting your tubing. Leave a little extra length for connections. You’ll want to secure the tubing to your garage walls or ceiling. Use pipe straps or clamps every few feet. This prevents sagging and stress on the joints. Try to keep runs as straight as possible. This reduces pressure drop.
Making Connections
This is where you connect your pieces together. If you’re using PEX with push-to-connect fittings, it’s pretty straightforward. Just push the tube firmly into the fitting until it seats. For other PEX systems, you’ll use your crimp or expansion tool. Copper usually involves soldering or using compression fittings. We found that careful, clean connections are key to preventing leaks (Many plumbing guides emphasize this point).
Connecting to the Compressor
You’ll need an adapter to connect your main air line to your compressor’s outlet. Make sure this connection is secure. Many compressors have a threaded outlet. You’ll need the correct fitting to match that thread. Use Teflon tape on threaded connections for a good seal. You’ll need an adapter to connect your main air line to your compressor’s outlet, and our guide explains how.
Adding Branch Lines and Outlets
Use tee fittings to create branches. This lets you run air to different parts of your garage. Install shut-off valves where needed. This lets you isolate sections of the line. Add air outlets (quick-connect couplers) where you plan to use your tools. Ensure these are rated for the pressure you’ll be running.
Testing for Leaks
Once everything is connected, it’s time for a leak test. Turn on your compressor and let it build pressure. Slowly go around every connection. Listen for hissing sounds. You can also use a spray bottle filled with soapy water. Spray it on the fittings. If you see bubbles forming, you have a leak. You’ll need to tighten or redo that connection. We found that a good leak test prevents wasted air and ensures your tools get full power (This is a common recommendation in DIY repair guides).
Your New Air System Checklist
Before you power up your tools, quickly review these points:
- Did you plan your layout carefully?
- Is your tubing material appropriate?
- Are all connections tight and secure?
- Did you install shut-off valves?
- Have you tested for leaks?
- Is your compressor ready to go?
Conclusion
You’ve now got a clear roadmap for installing air compressor lines in your garage. Remember, careful planning and secure connections are your best friends here. Choosing the right materials, like copper or PEX, and taking the time for a thorough leak test will pay off. You’re building a system that makes your workshop more efficient and enjoyable to use. Take that final step and power up your tools with confidence!
Frequently Asked Questions
What’s the biggest mistake people make when installing air lines?
One common oversight is not properly planning the layout. This can lead to long runs with significant pressure drops. Another mistake is rushing connections, which often results in leaks. Taking your time during installation prevents headaches later.
Can I use PVC pipe for my air compressor lines?
While PVC is common for water, it’s generally not recommended for compressed air. It can become brittle over time and may shatter under pressure, which is a serious safety hazard. Sticking to copper or PEX tubing is the safer choice for garage air lines.
How do I know what diameter tubing to buy?
The best diameter depends on your compressor’s CFM (cubic feet per minute) output and the length of your air line runs. For most typical garage setups with compressors up to 5-10 CFM, 1/2-inch tubing is often sufficient. Consult your compressor’s manual or online resources for specific recommendations based on your setup.
Is it worth running a ring system or is a straight run okay?
A ring system provides better air pressure to outlets further from the compressor and offers more flexibility for tool placement. A straight run might be simpler if you only need air in one main area. Consider your garage layout and how you use your tools when deciding.
How often should I check my air lines for leaks?
It’s a good practice to check for leaks periodically, especially after initial installation. A quick soapy water test every few months can catch small issues before they become major problems. Listening for hissing sounds when the system is pressurized is also a good habit.