Air Compressor Tubeless Tire Inflation: A Quick How-To
Yes, you can easily inflate tubeless tires with a standard air compressor. It’s a straightforward process that helps keep your bike rolling. You just need the right adapter and a bit of patience.
Many cyclists find tubeless setups offer a smoother ride and fewer flats. Knowing how to maintain them is key. This guide will show you how to get your tires topped off quickly.
TL;DR:
- Tubeless tires inflate with a regular air compressor.
- You’ll need a tubeless valve adapter.
- Listen for the bead seating into the rim.
- Don’t exceed the maximum PSI.
- It’s a quick process once you know how.
Let’s walk through exactly how to use your air compressor to get your tubeless tires inflated perfectly.
“`htmlInflating Your Tubeless Tires with an Air Compressor
Using a standard air compressor to inflate your tubeless bike tires is totally doable. You might have heard it can be tricky, but with the right technique, it’s quite simple. We’ll guide you through each step so you can get back on the road or trail in no time.
What You’ll Need for the Job
Before you start, gathering your supplies is key. Having everything ready makes the process smooth and efficient. Think of it like prepping ingredients before you cook – it saves headaches later.
The Essential Tubeless Valve Adapter
The most critical piece of equipment you’ll need is a tubeless valve adapter. These adapters are specifically designed to create a tight seal around your tubeless valve stem. This seal is essential for getting enough airflow quickly. Without it, air will just escape around the valve. Many bike shops carry them, or you can find them online. Make sure it fits Presta valves, as most tubeless bike setups use them.
Your Trusty Air Compressor
Your everyday air compressor, the kind you might use for car tires or power tools, will work just fine. You don’t need a specialized bike inflator for this. Just ensure your compressor can deliver a decent burst of air. We found that compressors with a pressure gauge are best. This helps you monitor the PSI accurately.
Tire Sealant (Optional, but Recommended)
While not strictly required for inflation, having tire sealant on hand is a good idea for tubeless setups. Sealant helps seal small punctures on the go. If you haven’t installed it yet, now might be a good time. We’ll cover the basics of using sealant later, but the primary goal here is inflation.
The Step-by-Step Inflation Process
Now let’s get down to business. Follow these steps carefully for a successful inflation. Patience is your friend here, especially on your first try.
Step 1: Prepare Your Tire and Valve
Start by ensuring your tire is properly seated on the rim. Sometimes, if a tire has been deflated for a while, it can sink into the rim. You might need to push the tire bead outwards towards the rim on both sides. Also, make sure your tubeless valve is clean and free of debris. A quick wipe with a rag usually does the trick.
Step 2: Attach the Tubeless Valve Adapter
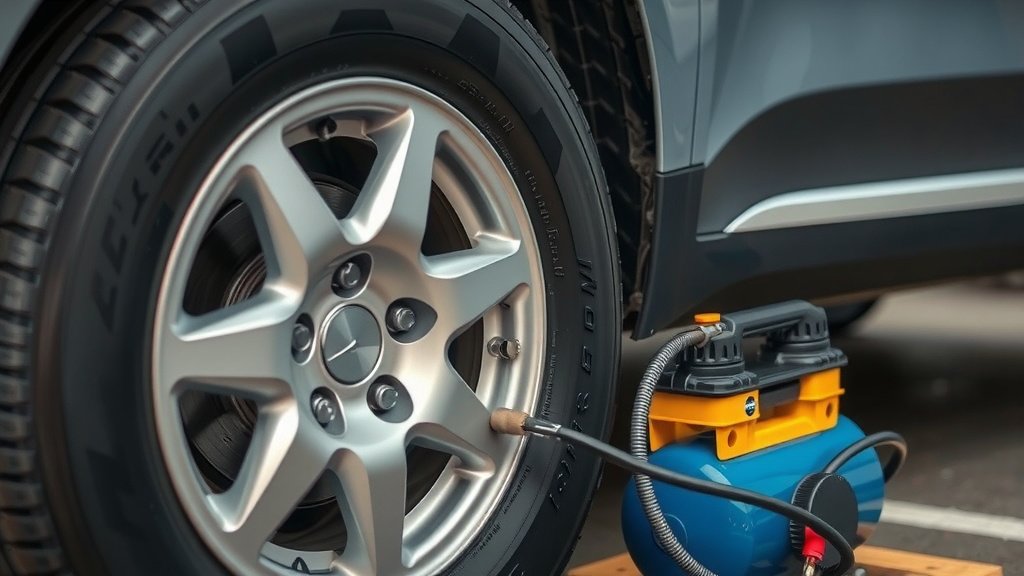
This is where the magic happens. Screw the tubeless valve adapter onto your compressor’s air hose. Then, firmly press the other end of the adapter onto your bike’s tubeless valve stem. You want a snug fit. If it wobbles, you’re likely to lose air. Some adapters have a lever, while others just push on. If yours has a removable valve core, it’s often best to remove it first for maximum airflow. This is a common trick we found that speeds things up significantly.
Removing the Valve Core (Optional but Effective)
If your adapter allows, and especially if you’re having trouble getting the tire to seat, consider removing the valve core. You can usually do this with a small valve core tool, often built into valve caps or available separately. Just be ready to screw it back in quickly after inflating, or have a plan for it.
Step 3: Inflate to Seat the Bead
This is the most exciting part! Open the valve on your air compressor. Listen for air rushing into the tire. You might hear a loud PSSSHHHH sound as the tire bead pops onto the rim. This “seating” is what creates an airtight seal. Keep watching and listening. The tire pressure will climb rapidly. You’re aiming for enough pressure to get the bead to seat all around the rim.
Tip: Sometimes, you might need to give the tire a bit of a wiggle or squeeze while inflating. This helps the bead find its proper position. If your compressor has a trigger, a short burst of air can be more effective than a continuous flow.
Step 4: Monitor Pressure and Remove Adapter
Once you hear that satisfying “pop” or “snap” as the bead seats, you’re almost done. Keep an eye on your compressor’s gauge. Don’t over-inflate! For seating, you might need higher pressure than you’d normally ride with, but always stay below the maximum PSI listed on your tire and rim. Once seated, quickly remove the adapter. If you removed the valve core, now is the time to screw it back in securely.
We found that having a plan for where to put the adapter once it’s off helps. Maybe have a rag ready to catch any drips if you have sealant in there.
Step 5: Final Inflation to Riding Pressure
With the bead seated and the adapter off (and valve core in, if removed), you can now inflate your tire to your desired riding pressure. Use your compressor or a floor pump for this final step. Check your tire sidewall for recommended PSI ranges. Remember, tubeless tires often allow for lower pressures than traditional tires, which is great for comfort and grip.
Troubleshooting Common Issues
Even with the best intentions, things don’t always go perfectly. Here are a few common hiccups and how to fix them.
Air Leaking Around the Bead
This is the most common problem. If you can’t get the tire to seal and air is escaping, double-check that your adapter is on tight. Also, make sure there’s no dirt or debris on the rim or tire bead. Sometimes, adding a bit of soapy water to the bead can help it seal. The soap acts like a lubricant.
Tire Won’t Seat
If the bead just won’t pop into place, you might need more air volume. Removing the valve core (as mentioned earlier) can help. Some people even use a tire-inflation-chamber or a compressor with a large tank for a big burst of air. Ensure your tire is compatible with your rim for tubeless use.
Pressure Dropping Quickly
If you inflate it and the pressure drops fast, it’s likely leaking from the bead or the valve stem itself. Again, inspect for debris or damage. If you have sealant, a good shake and spin of the wheel might help it find and plug the leak. We found that rotating the wheel so the valve stem is at the bottom can help sealant gather there.
Quick Checklist for Success
Keep this handy to ensure you don’t miss a beat:
- Gather your tools: Compressor, tubeless adapter, floor pump (optional).
- Prep your tire: Ensure bead is positioned correctly on the rim.
- Attach adapter securely: Make sure it’s a tight seal on the valve.
- Inflate to seat: Listen for the “pop” and watch the bead seat.
- Check PSI: Stay below max PSI for your tire and rim.
- Final inflation: Top up to your preferred riding pressure.
You’ve now successfully inflated your tubeless tires using an air compressor! It really is a straightforward process once you have the right adapter and know the steps. Enjoy that smoother ride and fewer pinch flats!
“`Conclusion
You’ve successfully learned how to use your air compressor to inflate tubeless tires. It’s a handy skill that puts you in control of your bike maintenance. Remember, the key is the right adapter and a patient approach to seating the bead. Don’t be discouraged if your first attempt isn’t perfect; a little practice makes it easy. Now you can confidently ensure your tires are properly inflated for a smoother, more reliable ride. Your next step is to try this process yourself the next time your tires need topping off!
Frequently Asked Questions
Can I use my air compressor without a special adapter?
No, a specialized tubeless valve adapter is essential. It creates the tight seal needed to get enough air into the tire quickly. Without it, air will escape around the valve, making inflation difficult or impossible.
How do I know if the tire bead is seated correctly?
You’ll usually hear a loud popping or snapping sound as the bead seats onto the rim. Visually, you should see a consistent line around the rim where the tire bead sits. If you don’t hear the pop, the bead may not be fully seated yet.
What’s the difference between seating pressure and riding pressure?
Seating pressure is the higher pressure used briefly to force the tire bead onto the rim. Riding pressure is the lower, comfortable pressure you’ll use to ride. Always check your tire and rim for their maximum PSI limits and never exceed them, especially when seating the bead.
My tubeless tire is losing air after inflation, what’s wrong?
This usually means there’s a small leak. Check the valve stem for tightness and ensure there’s no debris. The bead might also not be perfectly sealed to the rim. If you have sealant, try rotating the wheel and bouncing it to help the sealant find and plug the leak.
How often should I check my tubeless tire pressure?
It’s a good practice to check your tubeless tire pressure before every ride, just like you would with traditional tires. Tubeless setups can sometimes lose air more gradually, so regular checks ensure you’re always riding at the optimal pressure for performance and safety.