Build a High Pressure Air Compressor: Step-by-Step Guide
Building your own high pressure air compressor is definitely achievable with the right parts and knowledge. You’ll need a powerful motor, a suitable compressor pump, and a strong air tank. Many DIYers successfully create custom systems for specific needs like airbrushing or powering tools.
Getting the correct pressure and flow rate is key to a functional compressor. It’s not just about combining parts; understanding how they work together ensures safety and effectiveness. We found that careful component selection and assembly can lead to a reliable, high-performance machine.
- Choose a strong motor and pump.
- Select a durable air tank.
- Ensure proper safety features are included.
- Test thoroughly before regular use.
Let’s walk through exactly how you can build your own high pressure air compressor, step by step.
Constructing Your Own High Pressure Air Compressor
Building your own high-pressure air compressor might seem like a big undertaking. But with careful planning and the right parts, it’s a project many DIYers have successfully completed. You’re essentially creating a system to store compressed air for various tasks. Think of it like building a miniature, powerful lung for your workshop. This guide will walk you through the essential steps to get your custom compressor up and running.
Key Components for Your Compressor Build
The heart of any air compressor is its ability to build and store pressure. You’ll need to select components that can handle the demands of high-pressure air. Let’s break down the essential pieces you’ll need to source.
The Motor: Powering the Compression
Your motor is the engine that drives the entire operation. For high pressure, you’ll need a robust motor. We found that electric motors are the most common choice for DIY builds. Horsepower is a key metric here; aim for at least 2-5 HP for serious high-pressure applications. Voltage is another consideration – typically 110V or 220V. A 220V motor often provides more consistent power for demanding tasks. Researching motor duty cycles is also wise; you want one rated for continuous use if your projects require it.
The Compressor Pump: The Air’s Squeeze
This is where the magic of compression happens. You’ll need a pump designed for high-pressure output. Many DIY builders opt for a two-stage pump. This means the air is compressed in two steps, making it more efficient at reaching higher pressures. Single-stage pumps compress air once, while two-stage pumps do it twice. Researching the pump’s CFM (Cubic Feet per Minute) rating is also important. This tells you how much air it can deliver. For high pressure, you’ll want a pump that can keep up with your needs.
The Air Tank: Storing the Power
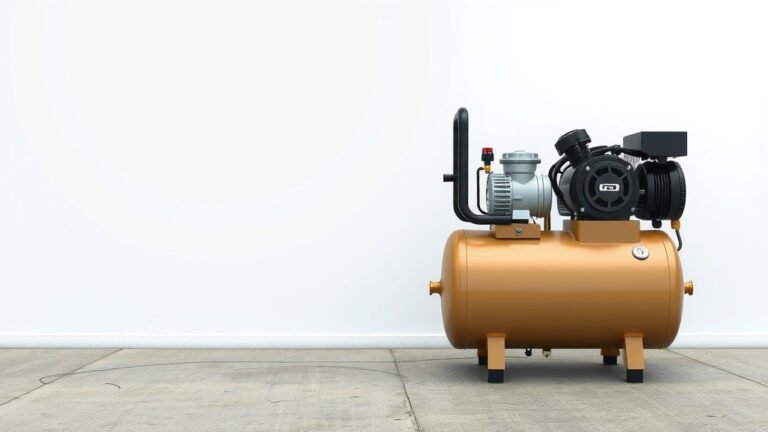
The air tank is your storage vessel. It needs to be strong enough to hold compressed air safely. You’re looking for a high-pressure rated air tank. Many builders repurpose industrial air receivers or purchase new tanks specifically designed for compressors. Ensure the tank has a sufficient volume (measured in gallons) for your intended use. A larger tank means you can draw air for longer periods without the compressor constantly running. Always check the tank’s maximum PSI rating and never exceed it. The air tank is your storage vessel, and its size is important for how long you can use air tools.
Safety Features: Non-Negotiable Additions
Working with compressed air carries inherent risks. Safety features aren’t optional; they are absolutely essential. You will need to incorporate several safety devices to prevent accidents.
Pressure Relief Valve
This is your primary safety device. A pressure relief valve (or pop-off valve) will automatically release air if the pressure in the tank exceeds a safe level. It’s a critical component for preventing tank rupture. Ensure it’s rated for a pressure slightly above your compressor’s cut-off pressure but below the tank’s maximum rated pressure. Many guidelines stress the importance of having this correctly set (OSHA).
Pressure Switch and Gauge
A pressure switch automatically turns the motor off when the tank reaches its set maximum pressure and turns it back on when the pressure drops. A pressure gauge allows you to monitor the current pressure inside the tank. These work together to regulate the compressor’s operation and keep you informed.
Check Valve
A check valve prevents air from flowing backward from the tank into the pump. This protects the pump from damage, especially during startup. It ensures that air moves in only one direction.
Assembly Steps: Putting It All Together
Once you have your components, it’s time to start assembly. Patience and precision are key here. We found that laying out all your parts and tools beforehand helps immensely.
Mounting the Motor and Pump
You’ll typically mount the motor and pump onto a sturdy base, often a metal frame or a heavy-duty cart. Alignment between the motor shaft and the pump shaft is critical. Misalignment can lead to vibration, premature wear, and inefficiency. Some setups use a belt drive, while others are direct drive. Ensure you use strong bolts and possibly rubber vibration dampeners.
Connecting the Components
Use appropriate high-pressure hoses and fittings to connect the pump’s outlet to the air tank. Ensure all connections are tight and leak-free. Thread sealant or Teflon tape is often used on pipe threads. The pressure switch, gauge, and relief valve will also need to be plumbed into the system, typically near the tank’s inlet or outlet port.
Wiring the Motor and Switch
Electrical wiring requires care. If you’re not comfortable with electrical work, it’s best to consult a qualified electrician. Ensure your wiring matches the motor’s specifications and the pressure switch’s ratings. Proper grounding is absolutely essential for safety.
Testing and Fine-Tuning Your Compressor
Before you put your new compressor to work, thorough testing is crucial. This is where you ensure everything functions as intended and, most importantly, safely.
Initial Pressure Test
Start by running the compressor for short intervals. Listen for any unusual noises. Check all connections for air leaks using soapy water – bubbles will indicate a leak. Monitor the pressure gauge as the tank fills. Ensure the pressure switch cuts off the motor at the intended PSI. Let the pressure build to the relief valve’s setting to confirm it releases air as expected.
Performance Check
Once you’re confident in the basic operation, test the compressor under a more sustained load. Does it maintain pressure while you’re using a tool? How long does it take to refill the tank? Adjusting the pressure switch settings might be necessary to find the sweet spot for your specific needs. We found that calibrating the pressure switch is a common step.
Safety Checklist
Before relying on your new compressor for regular use, run through this quick safety checklist:
- Is the pressure relief valve properly installed and set?
- Does the pressure switch reliably turn the motor off and on?
- Are all air line connections secure and leak-free?
- Is the motor properly grounded?
- Can you clearly read the pressure gauge?
- Have you tested the compressor with a low-demand tool first?
Building your own high-pressure air compressor can be a rewarding project. By selecting the right components, assembling them carefully, and prioritizing safety, you can create a powerful tool tailored to your needs.
Conclusion
You’ve learned that building your own high-pressure air compressor is a manageable project with the right focus. We found that careful selection of a robust motor, a capable two-stage pump, and a strong air tank are your foundational steps. Don’t forget that integrating essential safety features like a pressure relief valve and a reliable pressure switch is non-negotiable. Once assembled, thorough testing ensures your custom compressor is ready for action. Take the next step by gathering your chosen components and planning your build space.
Frequently Asked Questions
What’s the biggest risk when building a high pressure air compressor?
The most significant risk comes from the stored high-pressure air itself. If components are not rated correctly or safety features fail, there’s a danger of tank rupture or uncontrolled air release. Always prioritize using appropriately rated parts and meticulously checking your safety devices.
How do I know if I need a two-stage or single-stage compressor pump?
For high-pressure applications, a two-stage pump is generally recommended. We found that it compresses air more efficiently by doing it in two steps, leading to higher output pressures and less strain on the motor. A single-stage pump might suffice for lower pressure needs, but for true high-pressure builds, two-stage is the way to go.
Can I use a repurposed air tank from a different application?
While repurposing can save money, you must ensure the tank is specifically rated for high-pressure air storage. We advise checking the tank’s maximum PSI rating and comparing it to your compressor’s intended operating pressure. Always opt for tanks designed for compressed air systems to guarantee safety.
What kind of maintenance will my DIY air compressor need?
Regular maintenance is key for longevity and safety. You’ll want to periodically check for air leaks with soapy water, inspect hoses and fittings for wear, drain moisture from the tank regularly, and ensure the pressure switch and relief valve are functioning correctly. We found that a quick safety check before each use is also a good habit.
Is it cheaper to build a high pressure air compressor than to buy one?
The cost can vary widely depending on the components you source. You might save money by finding deals on motors or pumps, but high-quality, high-pressure rated parts can add up quickly. Building your own offers the advantage of customization, which can sometimes be more cost-effective than buying a pre-built unit with features you don’t need.