How to Install an Air Compressor in Your Car
Installing an air compressor in your car is a **practical modification** for any driver who needs **on-the-go tire inflation** or powering air tools. You can successfully install a portable or semi-permanent air compressor system by following a few key steps. This allows you to **avoid costly shop visits** for simple tire pressure adjustments. This guide covers the best air compressors for on-the-go tire inflation.
When setting up an air compressor, you’ll want to consider its power source and mounting location. Many drivers opt for a 12-volt compressor that plugs into their car’s accessory outlet for ease of use. For more powerful systems, you might need to run dedicated wiring to your car’s battery, ensuring a stable power supply.
- Choose between a portable or more permanent setup.
- Decide on the best power source for your needs.
- Understand the mounting options for your compressor.
- Plan for air hose and power cable routing.
- Ensure proper safety precautions are taken.
Let’s walk through exactly how to get your car’s air compressor installed, step by step.
Setting Up Your Automotive Air Compressor
You’ve decided to install an air compressor in your car, and that’s a **smart move** for convenience and self-sufficiency. Whether it’s for topping off tires before a road trip or powering a small air tool, having a compressor handy is fantastic. Let’s get this set up so you’re ready to inflate anytime, anywhere. We’ll break down the process to make it as **straightforward as possible**.
Choosing the Right Air Compressor Type
Before you start installing, knowing your options is key. The type of compressor you choose depends heavily on how you plan to use it and the power available in your vehicle. Most car owners find success with one of two main types: portable 12-volt compressors or more permanently mounted systems.
Portable 12-Volt Compressors
These are the **most common and easiest** to use. They plug directly into your car’s 12-volt accessory outlet, often called a cigarette lighter port. They are compact, lightweight, and can be easily stored in your trunk or under a seat. While convenient, their power output can be lower, meaning they might take longer to inflate larger tires.
We found that for regular tire pressure checks and minor inflations, these are **perfectly adequate**. They don’t require any permanent installation, which is a big plus if you rent your car or prefer not to modify your vehicle extensively. Many come with a set of nozzle adapters for other inflatables, like sports balls or pool toys.
Semi-Permanent or Mounted Compressors
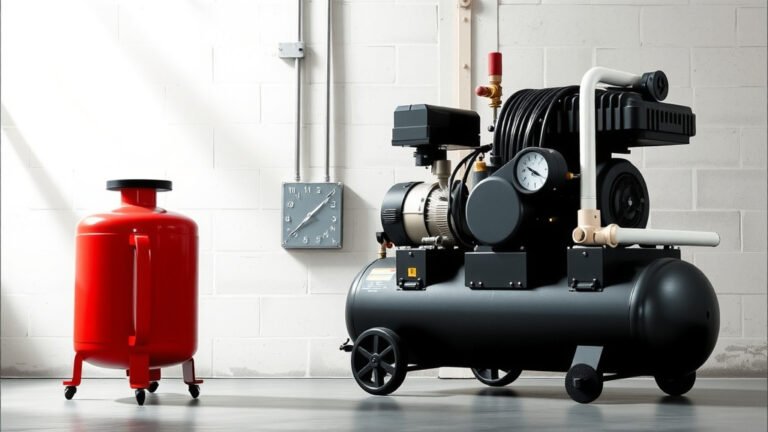
These systems offer more power and **faster inflation times**. They often require a more involved installation, as they usually need to be wired directly to your car’s battery. This provides a more stable and robust power source, especially for heavier-duty tasks. You’ll also need to consider a good mounting location, like under a seat or in the engine bay, if space allows.
While the initial setup is more work, the **performance benefits** can be significant. If you frequently use air tools or have larger vehicles like SUVs or trucks, a mounted system might be the way to go. Research indicates that direct battery connections offer less voltage drop, ensuring your compressor runs at its **optimal performance** (Auto Electrical Repair Handbook).
Planning Your Installation: Location and Power
Now that you have an idea of the type of compressor, let’s think about where it will live and how it will get its power. This planning stage is **critical for a successful setup** and ensuring your compressor works reliably.
Power Source Considerations
For portable units, the 12-volt outlet is your power source. Ensure your car’s accessory outlet can handle the **amperage draw** of the compressor. Most standard outlets are fine, but it’s always good to check the compressor’s manual and your car’s manual. Overloading an outlet can blow a fuse, leaving you without power.
If you’re opting for a mounted compressor, you’ll be connecting directly to the battery. This requires running a power cable from the battery to the compressor’s location. You’ll need to use an appropriate gauge wire, especially for longer runs, to prevent power loss. Many experts recommend using a **fused power connection** right at the battery terminal for safety (Automotive Wiring Guide).
Remember to include an inline fuse holder on the positive wire. The fuse should be rated slightly higher than the compressor’s maximum amperage draw. This is a **vital safety step** that protects your vehicle and the compressor from electrical shorts.
Mounting Location for Mounted Systems
If you’re installing a permanent compressor, finding the right spot is important. You want a location that is:
- Secure: It shouldn’t rattle around or come loose.
- Accessible: You’ll need to connect air hoses and potentially access it for maintenance.
- Ventilated: Compressors can generate heat, so good airflow is necessary.
- Protected: Keep it away from excessive moisture, dirt, and road debris.
Common spots include under a seat, in the spare tire well, or even in the engine bay if space and heat management allow. Always **consult your compressor’s manual** for specific mounting recommendations.
Installation Steps for Portable Compressors
Setting up a portable compressor is wonderfully simple. You’re basically looking at a plug-and-play operation, but a few tips can make it even smoother.
Connecting to Power
First, ensure your car’s engine is running or the ignition is in the ‘accessory’ position. Plug the compressor’s 12-volt plug into your car’s outlet. Turn the compressor on using its switch. You should see an indicator light, and the fan should start spinning.
Connecting to Your Tire
Most portable compressors come with a screw-on or clamp-on chuck for the tire valve stem. Unscrew the valve cap from your tire. Firmly attach the compressor’s chuck to the valve stem. If it’s a screw-on type, make sure it’s secure to prevent air leaks. Listen for any hissing sounds. If you hear air escaping, detach and reattach the chuck more firmly.
Inflating Your Tire
Most compressors have a built-in pressure gauge. You can also use a separate, reliable tire pressure gauge to double-check. Inflate the tire to the recommended pressure found on your driver’s side doorjamb sticker or in your owner’s manual. Periodically check the pressure as you inflate.
Pro Tip: If your compressor has a gauge, it might not be perfectly accurate. It’s best to **verify with your own gauge** for precise readings. Over-inflating can be just as bad as under-inflating!
Installation Steps for Mounted Compressors
This is where things get a bit more involved, requiring basic tools and some careful wiring. Remember, safety first!
Mounting the Compressor Unit
Choose your mounting location and secure the compressor firmly. Use the mounting brackets and hardware that came with your compressor, or purchase appropriate automotive-grade fasteners. Make sure it’s not going to vibrate loose over time. You might need to drill small holes for mounting screws, so **plan your placement carefully**.
Running the Power Wires
Disconnect the negative battery terminal first. This is **extremely important** to prevent accidental shorts and sparks. Then, connect the positive wire from the compressor to the positive battery terminal, using an inline fuse holder with the correct amperage fuse. Connect the negative wire from the compressor to a solid chassis ground point or the negative battery terminal.
Route the wires neatly along existing wiring harnesses or through firewall grommets if necessary. Use zip ties or wire loom to secure the wires and protect them from abrasion or heat. Ensure the wires are long enough to reach without being stretched tight. We found that securing wires with zip ties every 12-18 inches makes for a **clean and professional installation**.
Connecting Air Hoses and Accessories
Connect your air hose to the compressor’s outlet port. Most systems use a standard threaded fitting. Ensure it’s tightened securely. If your compressor came with an air tank, connect that next. If you plan to use air tools, you might need a regulator to control the air pressure.
Once everything is connected and secured, reconnect the negative battery terminal. Double-check all your connections. Turn on the compressor and check for any leaks in the air lines or fittings. Listen for unusual noises. Many experts recommend testing the system under a light load first to ensure everything is functioning correctly (Auto Electrician’s Best Practices).
Final Checks and Considerations
Before you consider your installation complete, a few final steps ensure everything is safe and functional. It’s like the final pat-down before a big trip – better safe than sorry!
Testing the System
Inflate a tire or two to the correct pressure. Use your trusted tire gauge to confirm the reading. If you have air tools, test them briefly. Listen to the compressor run – is it smooth? Are there any strange vibrations? Check the power cable and compressor for any signs of overheating.
Organizing Your Gear
For portable units, find a convenient storage spot. A sturdy bag or a designated cargo organizer can keep it from rolling around. For mounted systems, ensure all wires are neatly tucked away and protected. A **tidy setup** is a safe setup.
Routine Maintenance
Periodically check your air filter if your compressor has one. Keep the compressor clean and dry. For mounted systems, inspect the wiring connections every few months for corrosion or loosening. This proactive approach helps ensure **long-term reliability**.
Quick Installation Checklist:
- Confirm compressor type matches your needs.
- Choose a secure and accessible location.
- Verify power requirements and fuse ratings.
- Ensure proper wire gauge for longer runs.
- Test all connections for tightness and leaks.
- Secure all wiring neatly and safely.
Conclusion
You’ve learned how to install an air compressor in your car, whether it’s a simple portable unit or a more robust mounted system. Properly setting up your compressor means you’re ready for any tire emergency or inflating task. Remember to always prioritize safety by disconnecting power when wiring and checking your connections. You’re now equipped to handle your own air needs on the road, saving you time and money. The next step is to grab your tools and get that compressor installed so you can enjoy the peace of mind it brings.
Frequently Asked Questions
Do I need to modify my car’s electrical system for a portable air compressor?
For most portable 12-volt compressors, you simply plug them into your car’s existing accessory outlet. You don’t need to modify your car’s electrical system, as long as the outlet can handle the compressor’s power draw. Always check your compressor’s manual for its amperage requirements.
Can I use a mounted air compressor for more than just tires?
Yes, mounted compressors, especially those with air tanks, can power various air tools. This could include small impact wrenches, nail guns, or cleaning blowguns. Ensure your compressor’s CFM (cubic feet per minute) rating meets the tool’s requirements.
What’s the biggest risk when wiring a mounted compressor directly to the battery?
The biggest risk is creating an electrical short circuit, which can cause sparks, damage your vehicle’s electrical system, or even start a fire. Always disconnect the negative battery terminal first before starting any wiring and use an inline fuse.
How often should I maintain my car’s air compressor?
For portable units, a quick visual check before each use is usually sufficient. For mounted systems, inspect wiring connections every few months for corrosion or looseness, and check/clean any air filters regularly. Consult your compressor’s manual for specific maintenance schedules.
Can I install a compressor if I have a hybrid or electric vehicle?
Installing a 12-volt portable compressor is generally the same for hybrid and electric vehicles, plugging into their accessory outlets. For mounted systems, wiring directly to the main battery pack of an EV or hybrid is **not recommended** due to high voltage risks. Consult a professional for EV-specific solutions.