DIY Air Compressor Water Separator: Simple Build Guide
Making your own water separator for an air compressor is totally doable. You can create a simple but effective one using common household items and a few basic parts. This DIY approach helps keep moisture out of your air lines, protecting your tools and paint jobs.
Air compressors naturally build up water due to condensation. If you skip a separator, that moisture can cause rust and damage to your equipment over time. A homemade separator is a smart, budget-friendly solution for any workshop owner. We found many effective designs online that prove this.
- Build a water separator with basic parts.
- Keep moisture from damaging your air tools.
- Protect your paint jobs from water spots.
- Save money with a DIY solution.
Let’s walk through exactly how you can build your own air compressor water separator, step by step.
Building Your Own Air Compressor Water Separator
You’ve got an air compressor, and you know it’s a workhorse for your projects. But what about the moisture it can produce? That’s where a water separator comes in. We found that building one yourself is a smart and cost-effective way to protect your tools and ensure a cleaner finish on paint jobs. Let’s get started on this practical DIY project.
Why You Need a Water Separator
Air compressors work by compressing air. When air is compressed, its temperature rises. As this hot, compressed air cools in the tank and lines, water vapor condenses into liquid water. Think of it like the outside of a cold drink can on a humid day – water forms on the surface. If this water isn’t removed, it can cause a host of problems.
Protecting Your Air Tools
Moisture is the enemy of pneumatic tools. It can lead to rust and corrosion inside your tools, reducing their lifespan and performance. Imagine your favorite impact wrench sputtering or seizing up because of water damage. A separator keeps your tools running smoothly and prevents costly repairs or replacements. Many tool manufacturers recommend regular moisture removal (Tool Manufacturers Association).
Improving Paint and Finish Quality
If you’re painting, water in your air line is a recipe for disaster. Tiny water droplets can be blown onto your surface, creating fisheyes, blisters, or a rough, uneven finish. You’ll end up with more sanding and repainting. A good water separator delivers clean, dry air, giving you a professional-looking paint job every time.
Preventing Line and Tank Rust
The inside of your air compressor tank and lines can also suffer from rust if water sits there. This can eventually lead to tank leaks or weakened lines, posing a safety hazard. Keeping the system dry helps maintain its integrity and ensures safer operation.
Choosing Your DIY Water Separator Design
There are several effective DIY designs you can build. We looked at a few popular ones. The core principle behind most is forcing the air through a contained space where moisture can collect and be drained. Here are a couple of common approaches.
The Simple Drain Valve Method
This is perhaps the easiest to implement. It involves adding a drain valve directly to your air line or compressor tank if it doesn’t have one. While not a full separator, it’s the first step in moisture removal.
The In-Line Filter/Separator Modification
This method often involves taking a standard in-line air filter and modifying it to improve its water-trapping capabilities. You can add a drain valve to the bottom of the filter housing.
The DIY Condensate Trap
This is where you build a custom housing. It usually involves a pipe or cylinder with a drain at the bottom and an inlet/outlet for the air. The air moves slowly through the chamber, allowing water to drop out.
Building a Basic DIY Water Separator (Condensate Trap Style)
Let’s walk through building a simple, yet effective, condensate trap-style separator. This design uses common plumbing parts. It’s a great starting point for many workshops.
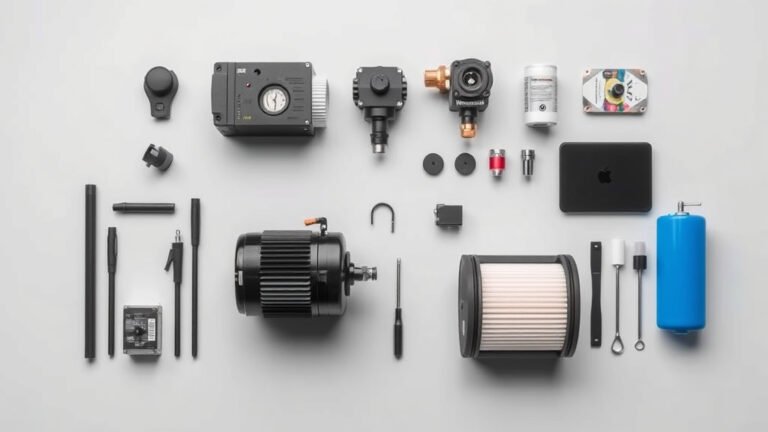
Materials You’ll Need
Gathering your materials is the first step. You won’t need a lot of fancy tools for this project. Think of it like making a simple potion for your air lines!
- One section of sturdy pipe (e.g., 1-inch or 1.5-inch diameter, about 12-18 inches long). PVC or galvanized steel works well.
- Two pipe caps that fit your pipe.
- One threaded pipe adapter (to connect to your air line).
- One ball valve with a threaded end (for draining).
- Pipe thread sealant or Teflon tape.
- Drill and drill bits.
- Wrench or pipe wrench.
- Optional: A small amount of absorbent material like steel wool or brass fittings to help break up the airflow.
Step-by-Step Assembly Instructions
Follow these steps carefully. Precision helps ensure it works efficiently.
Prepare the Pipe and Caps
Take one of your pipe caps. Drill a hole in the center that is the same size as the threads on your threaded pipe adapter. This adapter will be your air inlet.
Take the second pipe cap. Drill a hole in the center that is the same size as the threads on your ball valve. This will be your drain.
Attach the Inlet Adapter
Apply pipe thread sealant or Teflon tape to the threads of the pipe adapter. Screw it securely into the hole you drilled in the first pipe cap. Make sure it’s tight and sealed. This is where the moist air will enter your separator.
Attach the Drain Valve
Do the same for the second pipe cap: apply sealant or tape to the ball valve’s threads and screw it into the hole. Tighten it firmly. This valve will allow you to easily drain the collected water.
Assemble the Main Body
Now, screw both caps onto your pipe section. The cap with the air inlet adapter goes on one end. The cap with the drain valve goes on the other end. Ensure both caps are very tight to prevent air leaks.
Connect to Your Air System
You can install this separator in a few places. Many people put it right after the compressor’s outlet, before the main air line. You’ll use fittings to connect the air inlet adapter to your compressor’s output hose or manifold. Ensure all connections are snug and sealed.
Testing and Operation
Once assembled and connected, turn on your compressor. Check all connections for any hissing sounds, which indicate leaks. If you find any, tighten them or reapply sealant. Open the drain valve slightly and let air flow. You should hear air escaping. Close the valve.
Periodically, you’ll need to drain the collected water. Simply open the ball valve. You might hear a “glug” as water is expelled. Close the valve once the water stops flowing. Many experts recommend draining it after each use (General Maintenance Guidelines). Periodically, you’ll need to drain the collected water from your separator.
Tips for Maximum Effectiveness
To get the most out of your DIY water separator, consider these tips:
- Placement is key: Install the separator as close to the compressor as possible. This captures water early before it travels far.
- Regular draining: Don’t let water build up. A quick drain after each use is best.
- Check for leaks: Air leaks reduce efficiency and waste energy.
- Consider a secondary filter: For ultra-fine moisture removal, especially for painting, you might add a desiccant dryer after this separator.
- Maintain your tools: Even with a separator, occasionally oil your air tools as per their manual.
A Checklist for Your DIY Water Separator Project
Here’s a quick checklist to ensure you have everything ready:
- All plumbing parts purchased and accounted for.
- Tools (drill, wrenches, sealant) ready to go.
- Assembly area clean and well-lit.
- Familiarity with the assembly steps.
- Understanding of where to install it in your system.
- Plan for regular draining and maintenance.
Building your own water separator is a rewarding project. You’ll gain a better understanding of your air system and significantly improve the quality of your compressed air. This protects your investments and ensures your tools perform at their best.
Conclusion
You’ve successfully learned how to build your own air compressor water separator. This DIY project is a practical way to protect your tools and improve your finishes. By capturing condensation early, you prevent rust and ensure cleaner airflow. Remember, consistent draining is key to its effectiveness. Now, take that knowledge and put it to work in your workshop. Your tools will thank you for it!
Frequently Asked Questions
How often should I drain the water from my DIY separator?
It’s best to drain your separator after each use. This prevents water from building up and ensures you always have dry air ready. A quick drain takes just a moment and is well worth the effort.
Can I use any type of pipe for the separator body?
You can use PVC or galvanized steel pipe. Just ensure it’s sturdy enough to hold pressure and that your caps and fittings create a good seal. The diameter and length mentioned in the guide are good starting points.
What if I see water still getting past my separator?
If you’re still experiencing moisture issues, check your separator’s placement and ensure it’s sealed correctly. You might also consider adding a secondary filter or desiccant dryer for even drier air, especially for critical jobs like painting.
Will this DIY separator work with my specific air compressor model?
Yes, this design is generally compatible with most air compressors. The key is ensuring the fittings match your compressor’s outlet size. You can adapt the inlet adapter size as needed.
Is a DIY separator as effective as a store-bought one?
A well-built DIY separator can be very effective, often rivaling commercial models for basic moisture removal. For highly specialized needs or extreme moisture concerns, a commercial unit might offer more advanced features, but this DIY solution is excellent for most workshop applications.