Build a Pressure Washer with an Air Compressor
You absolutely can make a pressure washer using an air compressor, and it’s a surprisingly effective DIY project. While it won’t match the raw power of a gas-powered unit, a homemade air compressor pressure washer can be great for lighter cleaning tasks around your home.
Many homeowners are looking for ways to clean decks, siding, and vehicles without buying expensive equipment. Turning your existing air compressor into a pressure washer is a smart way to get more use out of your tools. We found that with a few common attachments, you can easily boost your cleaning capabilities. It’s a fantastic option for tackling stubborn grime.
- You can convert an air compressor into a pressure washer.
- It’s a DIY project for lighter cleaning jobs.
- Requires a few simple attachments.
- Great for decks, siding, and vehicles.
- A cost-effective cleaning solution.
Let’s walk through exactly how you can set up your own air compressor pressure washer step by step and get those cleaning projects done!
Turning Your Air Compressor into a Pressure Washer
You’re probably wondering if you can really turn your air compressor into a pressure washer. The short answer is yes! It’s a clever way to add cleaning power without buying a whole new machine. This setup is perfect for tackling dirt and grime on surfaces around your home. You’ll be surprised at how effective it can be for tasks that don’t require a commercial-grade machine.
Understanding the Basics: Air vs. Water Pressure
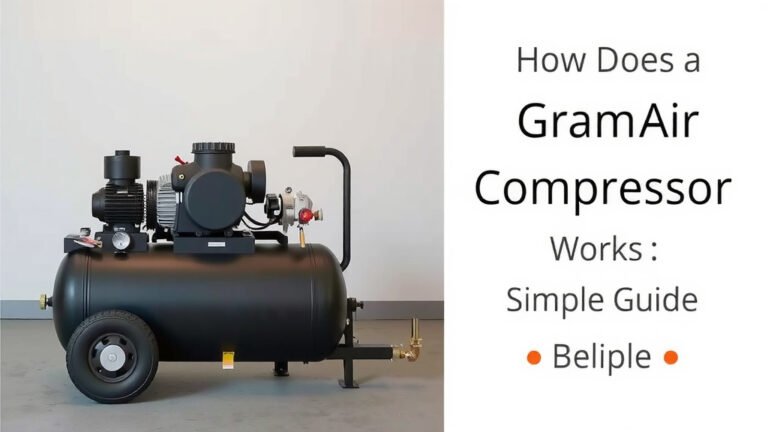
It’s important to understand the difference between how an air compressor works and how a traditional pressure washer operates. An air compressor uses a motor to compress air, storing it in a tank. This compressed air is then released to power tools. A pressure washer, on the other hand, uses a pump to force water through a hose at high pressure.
When you convert an air compressor, you’re not actually making it *pressurize water* like a real pressure washer. Instead, you’re using the air pressure to propel a liquid (like water or a cleaning solution) out of a nozzle. Think of it like a super-powered spray bottle. We found that this method is surprisingly effective for light to medium cleaning jobs.
What You’ll Need: Gathering Your Supplies
Before you start, let’s make sure you have all the right parts. You likely already own some of these items. Having everything ready makes the process much smoother. You don’t want to get halfway through and realize you’re missing a key piece!
Essential Components
You’ll need a few key attachments to make this work. The most important piece is a specialized nozzle that can handle both air and liquid input. These are often called “air-powered sprayers” or “sandblasting guns” that can be adapted for liquid.
- Air Compressor: The heart of your setup. Make sure it has a decent tank size and PSI output for your needs.
- Air Hose: A standard air hose to connect your compressor to the sprayer.
- Liquid Container: A bucket or tank to hold your cleaning solution or water.
- Suction Tube: A flexible tube that will draw liquid from your container to the sprayer.
- Air-Powered Sprayer/Gun: This is the crucial part. Look for one designed to draw liquid and spray it using air pressure.
- Hose Clamps: To secure all your hose connections.
Optional, But Helpful Items
Some extra items can make the job easier or more effective:
- Pressure Regulator: To control the air pressure going into your sprayer.
- Filters: To keep debris out of your liquid or air lines.
- Safety Gear: Goggles, gloves, and sturdy clothing are a must.
Step-by-Step Assembly Guide
Now, let’s put it all together. We found that careful assembly ensures better performance and safety. Take your time with each step.
Connecting the Air System
First, you’ll connect your air compressor to the sprayer gun. Attach one end of your air hose to the compressor’s outlet. Connect the other end to the air inlet on your chosen sprayer gun. Use a hose clamp to ensure a tight seal. This connection delivers the air that will power the spray. Learn how to connect your air hose securely to the compressor and sprayer.
Setting Up the Liquid Intake
Next, focus on the liquid part. Your sprayer gun should have a port for a suction tube. Attach the flexible suction tube to this port. Make sure it fits snugly. You might need a small hose clamp here too.
Preparing Your Cleaning Solution
Fill your bucket or container with water or your preferred cleaning solution. Many experts recommend a mild detergent for most tasks. You can find cleaning guides from sources like the Environmental Protection Agency (EPA) for safe cleaning practices. Place the other end of the suction tube into the liquid. Ensure the end of the tube is submerged, but not touching the bottom of the container. This prevents it from sucking up any sediment.
Testing and Adjusting Pressure
Before you start spraying, it’s time to test it out. Turn on your air compressor and let it fill its tank. Set the regulator (if you have one) to a moderate pressure. We suggest starting low, perhaps around 30-40 PSI. You can always increase it later. Many air-powered sprayers work well in this range. Connect the air hose to your sprayer gun and briefly squeeze the trigger. You should see liquid being drawn up and sprayed out. If it’s not spraying, check your connections and ensure the suction tube is fully submerged. Our guide explains how to adjust the air pressure for optimal performance.
How to Use Your DIY Pressure Washer Effectively
You’ve built it, now it’s time to use it! Remember, this isn’t a heavy-duty machine, so managing your expectations is key. It’s designed for lighter jobs.
Choosing the Right Cleaning Task
This setup is fantastic for cleaning outdoor furniture, washing cars, rinsing off patio surfaces, or removing light dirt from siding. For tough jobs like thick mildew or caked-on mud, you might need more power. We found that for general dusting and rinsing, it works wonderfully.
Technique for Best Results
Hold the sprayer at a consistent distance from the surface. Moving too far away will reduce its effectiveness. Keep the nozzle moving to avoid concentrating the spray on one spot. This prevents potential damage to softer surfaces. Think of it like painting; you want even coverage. Many professionals recommend a sweeping motion for consistent results.
Safety First! Always Protect Yourself
Safety cannot be stressed enough. Always wear eye protection. The spray can be strong, and you don’t want any liquid or debris in your eyes. Gloves are also a good idea, especially if you’re using cleaning chemicals. Ensure you’re in a well-ventilated area. Read any instructions that came with your sprayer gun for specific safety warnings. Remember, even low-pressure spray can surprise you!
Maintaining Your Air Compressor Pressure Washer Setup
Just like any tool, a little maintenance goes a long way. Keeping your setup in good condition ensures it lasts longer and performs better.
Cleaning After Use
After each use, it’s best to flush the system with clean water. Run plain water through the suction tube for a minute or two. This clears out any remaining cleaning solution or debris. It prevents clogs and corrosion. Many sources suggest flushing thoroughly after every use.
Checking Connections and Hoses
Periodically inspect all your hose connections and clamps. Look for any signs of wear or leaks. A loose connection can reduce pressure or cause it to fail entirely. Check your air compressor’s oil and air filter according to its manual. Keeping the compressor itself in good shape is vital.
Storing Your Equipment
When you’re done, disconnect everything and store the parts in a clean, dry place. Make sure the suction tube is clean and dry before storing. This simple routine will keep your DIY pressure washer ready for your next cleaning project.
Troubleshooting Common Issues
Sometimes, things don’t work perfectly the first time. Don’t get discouraged! Most issues are easily fixed.
Not Spraying Enough Water
If you’re not getting a good spray, check these things first: Is the suction tube fully submerged? Is the air pressure set high enough? Are there any kinks in the suction tube? Sometimes, the nozzle can get partially clogged. We found that a quick clean of the nozzle often does the trick.
Weak Spray Pressure
A weak spray might be due to low air pressure from your compressor. Ensure the compressor tank is full and the regulator is set appropriately. Leaks in the air hose or connections will also reduce pressure. Double-check all your seals. A dirty nozzle can also restrict flow. You might need to disassemble and clean the nozzle tip.
Sprayer Leaking
Leaks usually occur at the connection points. Ensure all hose clamps are tight and securely fastened. If the leak is from the sprayer gun itself, it might be a worn-out seal within the gun. Consult the manufacturer’s instructions for your specific sprayer gun model.
A Quick Checklist for Success
Here’s a handy checklist to keep you on track:
- Gather all necessary tools and attachments.
- Ensure your air compressor is in good working order.
- Connect air and liquid lines securely with clamps.
- Test pressure at a low setting first.
- Wear appropriate safety gear at all times.
- Flush the system with clean water after each use.
Conclusion
You’ve successfully learned how to transform your air compressor into a functional pressure washer for lighter cleaning tasks. We’ve covered the essential components and the step-by-step assembly process. Remember, this DIY solution is perfect for refreshing your deck, washing your car, or rinsing off patio furniture. Always prioritize safety by wearing protective gear and testing your setup at a lower pressure. With proper use and a little maintenance, your air compressor will be a more versatile tool for keeping your home looking its best. Now, go ahead and tackle those cleaning projects with your new, powerful setup!
Frequently Asked Questions
How much air pressure do I need for this DIY pressure washer?
We found that most air-powered sprayers work well between 30-40 PSI. It’s best to start with a lower setting and gradually increase it if needed. Always refer to the specifications of your specific sprayer gun for recommended pressure ranges. Too much pressure could damage the sprayer or the surface you’re cleaning.
Can I use stronger cleaning chemicals with this setup?
You can use mild cleaning solutions, but be cautious with harsh chemicals. Always check if your air-powered sprayer gun is compatible with the cleaner you plan to use. Some chemicals can damage the seals or internal components of the sprayer. We recommend rinsing thoroughly with clean water after using any cleaning agent.
Why isn’t my DIY pressure washer spraying any water?
If you’re not getting any water, first check that your suction tube is fully submerged in the cleaning solution and not drawing in air. Also, ensure there are no kinks in the suction tube. Verify that your air compressor is providing adequate pressure to the sprayer gun. A clogged nozzle can also prevent spraying.
Is this DIY pressure washer safe for delicate surfaces like painted wood?
This setup is best suited for tougher surfaces. For delicate materials like painted wood or certain types of siding, we recommend using a very low air pressure setting and keeping the nozzle a good distance away. Always test on an inconspicuous area first to ensure you won’t cause damage. You might find that a good old-fashioned scrub brush is safer for very delicate items.
How often should I clean the air-powered sprayer gun?
It’s a good practice to flush the system with clean water after every use to remove any residual cleaning solution or debris. This helps prevent clogs and corrosion. Periodically, you may need to disassemble and clean the nozzle tip itself, especially if you notice reduced spray performance or a weaker stream.