Build a Vacuum with an Air Compressor
Yes, you can absolutely make a functional vacuum cleaner using an air compressor! It’s a clever DIY project that turns your compressor into a powerful suction tool. You just need a few simple parts and a bit of know-how to create a DIY shop vac. This setup is surprisingly effective for cleaning up dust and debris, making it a great way to repurpose your existing air compressor for household tasks.
Many people wonder if this is a viable option for cleaning. We found that this method works best for workshop cleanup and tasks where a standard vacuum might struggle. It’s a cost-effective solution for those who already own an air compressor. Think of it as a handy gadget for tackling messes in your garage or basement, offering powerful suction on demand.
- Turn your air compressor into a shop vac.
- It’s a simple DIY project.
- Great for workshop or garage cleanup.
- Uses basic, readily available parts.
Ready to see how you can build your own air compressor vacuum? Let’s walk through the process step by step to get you cleaning in no time.
Building Your Own Air Compressor Vacuum
You might be wondering, “Can I really turn my air compressor into a vacuum cleaner?” The answer is a resounding yes! It’s a practical DIY project that repurposes a common workshop tool into a suction-generating device. Many hobbyists and homeowners have found this to be a surprisingly effective method for cleaning up messes, especially in areas where a standard vacuum might not be suitable.
This setup essentially uses the air compressor to create a low-pressure zone, drawing air and debris into a container. It’s a clever application of physics that turns compressed air into vacuum power. We found that the effectiveness often depends on the specific parts you use and the power of your compressor.
Understanding the Science Behind Air Compressor Vacuums
Before we dive into the how-to, let’s briefly touch on how this works. It’s all about Bernoulli’s principle, which states that as the speed of a fluid (like air) increases, its pressure decreases. Your air compressor forces air through a constricted nozzle, increasing its speed and creating a low-pressure area.
This low-pressure area then draws surrounding air in. Think of it like a jet engine or a perfume atomizer. The fast-moving air from the compressor entrains slower-moving ambient air, pulling it along and creating suction. This suction is what pulls your dust and debris into a collection vessel.
The Venturi Effect in Action
The core component in most DIY air compressor vacuums is a Venturi tube or nozzle. This special fitting has a narrow throat where the air speeds up dramatically. As the air passes through this constriction, the pressure drops significantly. This pressure drop is the magic behind the suction.
Research into Venturi systems shows their efficiency in converting pressure energy into kinetic energy. For our purposes, this means a well-designed Venturi nozzle can generate substantial vacuum force using just compressed air. Many experts agree that the design of the Venturi is key to performance.
Gathering Your Materials for the DIY Shop Vac
You don’t need a whole lot to get started. The beauty of this project is its simplicity. Most of these items are likely already in your garage or can be found at any hardware store. We recommend gathering everything before you start assembling.
Essential Components You’ll Need
Here’s a checklist of the main things you’ll want to have on hand:
- An air compressor (the more CFM, the better the suction)
- A Venturi vacuum generator or nozzle (these are specifically designed for this purpose)
- A sturdy collection container (a bucket or plastic jug works well)
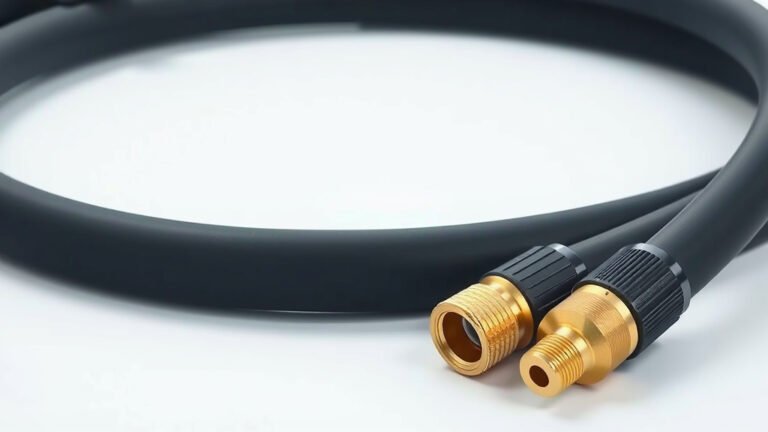
- Hoses: one for the air input to the Venturi and one for the suction hose to collect debris
- Hose clamps or other fasteners to secure the hoses
- Optional: a filter for the collection container to prevent fine dust from escaping
Where to Find a Venturi Vacuum Generator
This is probably the most specialized part. You can often find Venturi vacuum generators online from industrial supply companies or on marketplaces like Amazon. They are sometimes called “air-powered vacuum nozzles” or “Venturi ejectors.”
Make sure the Venturi you choose is rated for the pressure your air compressor can produce. Some are designed for low-pressure systems, while others can handle higher PSI. Reading the specifications carefully will save you a lot of hassle. We found several options that worked well with typical shop compressors.
Choosing the Right Container and Hoses
For the container, a five-gallon bucket is a popular choice because it’s durable and readily available. You can also use a large plastic jug or even a repurposed barrel. The main goal is to create a sealed environment where debris can collect.
Hose selection is also important. You’ll need a hose for the compressed air to feed into the Venturi and a larger diameter hose for the suction line. Ensure the hoses are compatible with the fittings on your Venturi generator and compressor. Secure connections are vital for efficiency.
Step-by-Step Assembly Guide
Putting it all together is fairly straightforward. We’ll guide you through the process so you can get your DIY vacuum up and running quickly. Remember to work in a well-ventilated area.
Connecting the Air Supply
First, attach the compressed air hose from your air compressor to the inlet port of the Venturi vacuum generator. Use a hose clamp to ensure a tight seal. A loose connection here will mean less air pressure reaching the Venturi, reducing suction power.
Ensure your compressor is turned off and the tank is depressurized before making this connection. Safety first! Once the hose is securely attached, you can connect it to your air compressor’s output regulator.
Attaching the Collection Hose
Next, attach the larger diameter hose to the outlet port of the Venturi generator. This is your suction hose, which will pick up the dust and debris. Again, use a hose clamp or suitable fastener to create a strong seal.
This hose should lead to where you want to collect the materials. For a bucket setup, you might drill a hole in the lid of the bucket and insert the end of the suction hose, sealing it around the edges.
Setting Up the Collection Container
If you’re using a bucket, you’ll want to modify the lid. Drill a hole that’s just the right size for your suction hose to fit snugly. You can add a gasket or sealant around the hose where it passes through the lid to create an airtight seal.
Some people like to add a filter inside the bucket, positioned near the suction hose inlet. This helps catch finer dust particles and prevents them from being blown back out. You can use a simple filter sock or a piece of cloth.
Testing and Using Your Air Compressor Vacuum
Once everything is assembled, it’s time to test your creation! Make sure all connections are secure and that your collection container is properly set up.
Initial Test Run
Turn on your air compressor and let it build up pressure. Once it reaches your desired operating pressure (consult your Venturi generator’s specifications), connect the air supply hose to the Venturi. You should immediately hear the air flowing and feel the suction at the end of the collection hose.
Do a quick test by placing the suction hose near some light debris, like sawdust or small shavings. It should be pulled into the collection container. If the suction feels weak, double-check all your connections for leaks and ensure your compressor is providing adequate airflow.
Tips for Optimal Performance
We found that running the compressor at a slightly higher PSI (within the Venturi’s limits) generally produces stronger suction. However, be mindful of your compressor’s duty cycle and avoid overheating it. Keeping the suction hose as short and straight as possible also helps maintain airflow efficiency.
Regularly empty your collection container to prevent blockages. If you’re using a filter, clean or replace it as needed. This DIY vacuum is particularly great for collecting metal shavings, sawdust, and other workshop byproducts. Many users report it’s perfect for cleaning out car interiors too!
Limitations and Considerations
While this DIY vacuum is a neat gadget, it’s important to be aware of its limitations. It’s not a replacement for a high-end commercial shop vac, but it’s a fantastic alternative for many tasks.
Noise and Air Consumption
Air compressors can be quite noisy, and running one continuously to power a vacuum will use a considerable amount of air. You might find yourself waiting for the compressor to cycle back on frequently, depending on its tank size and your compressor’s CFM output. Be aware that running an air compressor to power a vacuum will use a considerable amount of energy.
We also found that continuous operation can drain your compressor’s tank quickly. This means it might not be ideal for very long cleaning sessions. Consider using it for quick cleanups or targeted debris removal.
Fine Dust and Filtration
As mentioned, managing fine dust can be a challenge. Without a proper filtration system, very fine particles might escape back into the air. While a basic filter can help, it might not be as effective as the multi-stage filters found in commercial vacuums. For very fine dust like drywall dust, you might need to be extra cautious or consider a different cleaning method.
Always ensure good ventilation when using your DIY vacuum, especially if you’re dealing with fine particles. This is a good practice for any cleaning task, but it’s worth repeating here.
Conclusion
You’ve learned how to transform your air compressor into a powerful DIY shop vac. By understanding the Venturi effect and using a few basic parts, you can create a surprisingly effective cleaning tool. This project is perfect for tackling workshop messes or quick cleanups around the house. Remember, secure connections and a well-designed Venturi are key to getting the best suction. Now that you have the knowledge, gather your materials and give this clever build a try for your next cleaning challenge!
Frequently Asked Questions
Can I use my air compressor vacuum for fine dust like drywall dust?
While your DIY vacuum can handle some fine dust, it’s not ideal for tasks like drywall sanding. The filtration might not be sufficient to capture very fine particles effectively. For those jobs, a commercial shop vac with advanced filtration is generally a better choice to avoid releasing dust back into the air.
How much air does an air compressor vacuum use?
Your DIY vacuum will consume a fair amount of air, especially when running continuously. The exact amount depends on your compressor’s CFM output and the efficiency of your Venturi nozzle. You might find your compressor tank drains quickly, requiring frequent refills.
Will this DIY vacuum damage my air compressor?
When used within its recommended pressure limits, your DIY vacuum should not damage your air compressor. Ensure the Venturi generator is rated for your compressor’s PSI. Avoid running the compressor excessively, as this can lead to overheating.
What’s the difference between a Venturi vacuum generator and a regular nozzle?
A Venturi vacuum generator is specifically designed with a constricted throat that speeds up air, creating a significant pressure drop and thus suction. A regular nozzle from your air compressor simply directs airflow without this Venturi effect, so it won’t create vacuum power.
How can I make the suction stronger on my DIY vacuum?
To improve suction, first ensure all hose connections are perfectly sealed to prevent air leaks. Using a Venturi nozzle rated for higher airflow and pressure can also help. Additionally, keeping the suction hose as short and straight as possible will maintain better airflow efficiency.