Blast Off Old Golf Grips With An Air Compressor
Yes, you can remove golf grips with an air compressor, and it’s a surprisingly easy and clean method. This technique uses compressed air to push the grip off the shaft, avoiding the mess of solvents and knives.
Many golfers find this method far superior to traditional grip removal. It’s a fantastic way to save money on new grips and maintain your clubs. Plus, it’s a skill that makes regripping your clubs much more accessible at home.
- The air compressor method is quick and mess-free.
- It protects your golf club shafts.
- You can reuse your old grips if they’re still good.
- It’s a great DIY alternative to professional regripping.
Ready to give it a try? Let’s walk through exactly how this works step by step, so you can get your clubs looking and feeling brand new.
Quickly Re-Grip Your Golf Clubs with Compressed Air
You’re looking to switch out your golf grips, and you’ve heard about using an air compressor. That’s a smart move! This method is incredibly fast and avoids the sticky mess often associated with removing golf grips. It uses the power of air to essentially inflate the grip from the inside, breaking the seal it has with the shaft. It’s surprisingly simple once you get the hang of it. Many golfers find this technique makes regripping far less of a chore.
What You’ll Need for This Air Grip Removal
Before you start, gather your supplies. Having everything ready means you can get right to work. You don’t want to be searching for tools halfway through. Let’s make sure you’re prepared for this easy golf club maintenance task.
Essential Tools for the Job
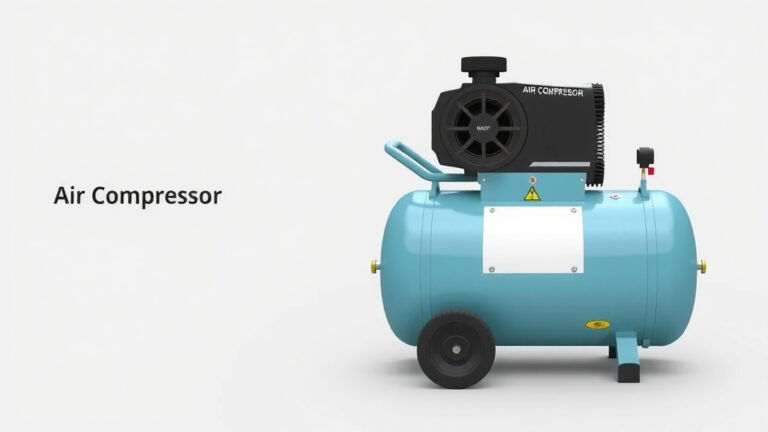
The star of the show is your air compressor. Make sure it has a regulator so you can control the air pressure precisely. You’ll also need an air chuck or a blowgun nozzle that can fit snugly into the grip’s end. A pair of work gloves is a good idea, as is eye protection. You never know when a small piece of rubber might fly off. A small rag or towel can also come in handy for wiping things down.
Optional, But Helpful, Accessories
Some people find a golf club vise helpful to hold the club steady. However, you can often get away with wedging the butt of the club against a sturdy surface. A small piece of tape, like masking tape, can sometimes help create a better seal around the air chuck if it’s a bit loose. Think of these as bonus items that might make your experience even smoother.
Preparing Your Golf Clubs and Workspace
Setting up your workspace is key to a smooth operation. You want to be comfortable and have enough room to maneuver. Protecting your clubs and your surroundings is also important.
Securing the Club
If you have a vise, secure the club shaft firmly. Make sure the grip you are working on is facing upwards or at a comfortable angle. If you don’t have a vise, you can try placing the butt end of the club securely against a wall or a strong piece of furniture. You want the club to be stable so it doesn’t move when you apply air pressure. A wobbly club can make the process more difficult and potentially lead to mistakes.
Choosing Your Air Pressure
This is where the regulator comes in. You don’t need a lot of pressure to get the job done. Starting around 40-60 PSI is generally recommended. You can always increase it slightly if needed. Too much pressure can damage the grip or even the shaft, though most modern shafts are quite resilient. It’s better to start lower and work your way up. Research and found that excessive pressure is rarely necessary (GolfWorks, a clubmaking supply company). Our guide explains how to adjust the air pressure for your compressor.
Setting Up Your Air Delivery System
Attach your chosen air chuck or blowgun nozzle to your air compressor hose. Make sure it’s securely connected. If you’re using a blowgun, you might want to ensure it has a rubber tip. This helps create a better seal with the end of the grip. A good seal is what allows the air to get inside and do its work. Without it, the air will just escape around the nozzle.
The Step-by-Step Process for Air Grip Removal
Now for the main event! This is where you’ll see how effective compressed air really is. Follow these steps carefully for a successful grip removal.
Inserting the Air Chuck
Carefully insert the tip of your air chuck or blowgun nozzle into the open end of the golf grip. You want to push it in as far as you comfortably can, creating a reasonably tight seal. Don’t force it; it should slide in with minimal resistance. If it feels like you’re forcing it, you might have an angle issue or the nozzle might be too large.
Applying Air Pressure
Once the nozzle is in place and sealed, begin to apply air pressure gradually. You’ll start to hear the air rushing into the grip. Watch the grip closely. You should see it begin to expand and loosen away from the shaft. It might start to slide on its own. Keep a steady stream of air flowing. You might need to move the nozzle slightly to ensure air gets all around the inside. Many golf professionals suggest this gradual approach to avoid shocking the grip (Club Fitting Institute research).
Guiding the Grip Off
As the grip loosens, you might need to help it along. You can gently pull on the butt of the grip while air is being applied. The air pressure does most of the heavy lifting, but a little nudge can help it slide off smoothly. Be patient; it usually only takes a few seconds to a minute. If it seems stuck, try adjusting the angle of the nozzle slightly or increasing the pressure by a few PSI. Avoid yanking; let the air do the work.
Checking the Shaft and Grip
Once the grip has slid off completely, turn off the air. Remove the nozzle. Inspect the golf shaft to ensure there’s no residue or damage. If the grip is still in good condition, you can set it aside to be cleaned and potentially reused later. Many golfers find they can get multiple uses out of a good-quality grip this way.
Tips for a Perfect Air Grip Removal Experience
A few extra pointers can make this process even better. Think of these as the little things that make a big difference.
Dealing with Stubborn Grips
If a grip is particularly old or has been on the club for a very long time, it might be a bit more stubborn. In these cases, you might need to slightly increase the air pressure, perhaps to 70-80 PSI. You can also try gently twisting the grip as you apply air. Sometimes, a bit of WD-40 sprayed into the opening beforehand can help, though this can make the grip unusable afterward if you plan to save it. Always check if the shaft manufacturer has specific warnings about lubricants.
Protecting Your Grips for Reuse
If you’re saving your grips, make sure to handle them gently. Once they’re off, you can clean them with soap and water. Let them air dry completely before storing them. Many golfers find that grips removed with air pressure are less likely to be damaged than those removed with knives or solvents. Proper cleaning can extend the life of your grips significantly.
Safety First!
Always wear eye protection when working with compressed air. Air can carry small particles, and you don’t want anything in your eyes. Also, ensure your workspace is well-ventilated, especially if you decide to use any cleaning agents on the grips. Proper preparation is part of a safe and effective process.
Quick Checklist for Air Grip Removal
Here’s a handy checklist to make sure you’re ready to go:
- Air compressor with regulator
- Air chuck or blowgun nozzle
- Eye protection
- Work gloves
- Club secured (vise or stable surface)
- Rag for cleanup
Conclusion
You’ve learned how to remove golf grips with an air compressor, a technique that’s both efficient and clean. This method protects your club shafts and can even help you save money by reusing grips. Remember to start with moderate air pressure and wear your safety gear. Now you’re ready to tackle your next regripping project with confidence. Give it a try on your clubs this weekend – you’ll be surprised how simple it is!
Frequently Asked Questions
How much air pressure should I use to remove a golf grip?
It’s best to start with your air compressor regulator set between 40-60 PSI. You can gradually increase this slightly if the grip is stubborn. Avoid using excessive pressure, as this can potentially damage the grip or shaft.
Can I really reuse grips removed with an air compressor?
Yes, the air compressor method is excellent for preserving grips for reuse. Because no solvents or sharp tools are involved, the grips are often undamaged. Just clean them thoroughly and let them air dry completely.
What if the golf grip is really stuck and won’t come off?
If a grip is proving difficult, try gently twisting it while applying air pressure. You might also need to increase the PSI slightly, perhaps up to 70-80 PSI. Ensure your air chuck is creating a good seal inside the grip.
Do I need a special tool to connect the air compressor to the grip?
You’ll need an air chuck or a blowgun nozzle that fits snugly into the open end of the grip. Many people find a blowgun with a rubber tip works well to create the necessary seal for the air to inflate the grip.
Is this method safe for all types of golf club shafts?
The air compressor method is generally safe for most modern golf shafts, including graphite. The key is to use controlled air pressure. Always avoid forcing the air chuck and start with lower PSI to be sure.