How to Adjust Your Air Compressor Pressure Switch
Adjusting your air compressor switch is usually a straightforward process. You can easily adjust the cut-in and cut-out pressure settings by turning screws on the pressure switch. This lets you control when your compressor turns on and off. It’s a common maintenance task for many air compressor owners.
Knowing how to correctly set your air compressor switch helps ensure optimal performance and tool longevity. The wrong settings can lead to the compressor running too much or not enough. We’ve found that understanding these settings can prevent premature wear and tear on your equipment.
- Adjusting the switch controls compressor on/off points.
- Turn screws on the pressure switch to change settings.
- Proper settings ensure efficient operation.
- This prevents unnecessary wear on your compressor.
- It also protects the tools you use.
Let’s walk through exactly how to adjust your air compressor switch step by step so you can get it working perfectly for your needs.
How to Set Your Air Compressor Pressure Switch
Adjusting your air compressor’s pressure switch is a key task for keeping your tools running smoothly. It controls when your compressor kicks on and off. This means you can fine-tune its operation for different jobs. We’ll walk you through the steps to adjust these settings. This guide will help you get the most out of your air compressor.
Understanding the Pressure Switch Components
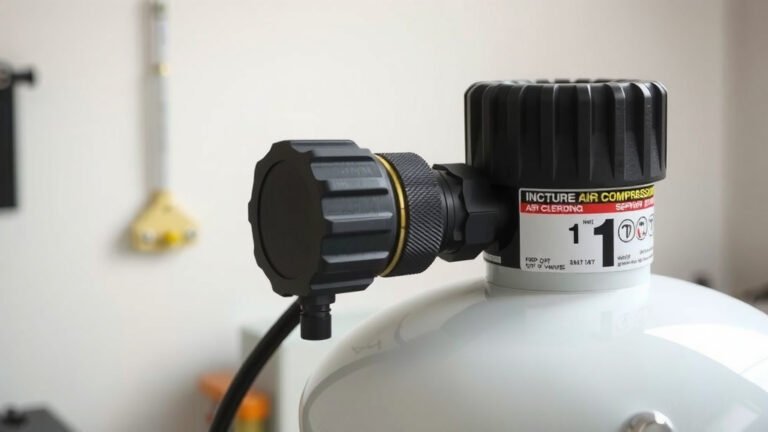
Before you start making adjustments, it’s helpful to know what you’re looking at. The pressure switch is usually mounted near the air tank. It has a simple design. You’ll typically see a few main parts. These include the tank and the cut-in/cut-out pressure settings. We’ve found that understanding these basics makes the adjustment process much clearer.
The Role of Cut-In and Cut-Out Pressures
The cut-in pressure is the point at which your compressor will start to build pressure again. Think of it as the ‘on’ switch for your compressor motor. The cut-out pressure is the point at which the compressor will shut off once it reaches a certain psi (pounds per square inch). It’s the ‘off’ switch. The difference between these two is called the ‘cut-out differential’ or ‘cut-out range.’ A smaller difference means the compressor cycles more frequently. A larger difference means it runs longer.
Locating the Pressure Adjustment Screws
Most pressure switches have two screws for adjustment. One controls the cut-out pressure, and the other controls the cut-in pressure. They are usually clearly marked or located on either side of a central lever or spring mechanism. Sometimes, a third screw might adjust the differential. We found that the exact placement can vary slightly by manufacturer. Always check your compressor’s manual if you’re unsure.
Safety First: Preparing for the Adjustment
Safety is always the top priority when working with any machinery. Air compressors store air under pressure. This can be dangerous if not handled properly. We always recommend taking a few precautions before you begin.
Disconnecting Power
The absolute first step is to unplug your air compressor from the power source. For electric models, pull the plug from the wall outlet. For gas models, turn off the engine and disconnect the spark plug wire. This prevents the motor from accidentally starting while you’re working. Many experts say this is the most critical safety step (OSHA).
Releasing Tank Pressure
Next, you need to release all the air pressure from the tank. Open the drain valve at the bottom of the tank. Let all the air escape. You should hear it hissing out. It’s important that there is no residual pressure in the tank. This ensures your adjustments are made from a zero-pressure starting point. We found this prevents unexpected pressure surges later.
Gathering Your Tools
You’ll likely need a few basic tools. A screwdriver is essential for turning the adjustment screws. You might need a flathead or a Phillips head, depending on the screws. A wrench might be needed if there are any retaining nuts. Also, have a way to measure pressure. Your compressor likely has a built-in gauge. It’s also good to have a separate, reliable gauge handy. We recommend having a tire pressure gauge or a digital gauge.
Making the Pressure Switch Adjustments
Now for the main event! Adjusting the settings is usually quite simple once you’ve located the screws. Remember, we’re aiming for the right balance between having enough air pressure and not overworking the compressor.
Adjusting the Cut-Out Pressure
Start with the cut-out pressure. This is usually the screw that affects the higher pressure setting. To increase the cut-out pressure, you typically turn the screw clockwise. To decrease it, turn the screw counter-clockwise. Make small adjustments, perhaps a quarter turn at a time. After each adjustment, you’ll need to plug the compressor back in, let it build pressure, and observe the cut-out point on the gauge. You’re looking for the psi where the motor stops. We found that repeating this cycle allows for precise tuning.
Adjusting the Cut-In Pressure
Once you’re happy with the cut-out pressure, move to the cut-in pressure. This screw affects the lower pressure setting. To raise the cut-in pressure, turn the screw clockwise. To lower it, turn it counter-clockwise. Again, make small adjustments. After each change, plug in the compressor and let the pressure drop. Observe the psi where the motor turns back on. Many users find it helpful to set the cut-in pressure a specific amount below the cut-out pressure. This prevents the compressor from cycling too rapidly.
Understanding the Differential
The differential is the gap between the cut-out and cut-in pressures. A common recommendation is a differential of 20-30 psi. For example, if your cut-out is 120 psi, your cut-in might be 90-100 psi. A smaller differential means the compressor will cycle more often. This can be good if you need consistent pressure. However, it can also lead to more wear and tear on the motor and pump. A larger differential means fewer cycles. This can reduce wear but might result in pressure drops between cycles. We found that the ideal differential often depends on the application.
| Application | Typical Cut-Out Pressure (psi) | Typical Cut-In Pressure (psi) | Typical Differential (psi) |
|---|---|---|---|
| Home Garage / DIY Projects | 120 – 150 | 90 – 120 | 20 – 30 |
| Automotive Repair | 135 – 175 | 105 – 145 | 30 – 30 |
| Industrial Use | 150 – 200+ | 120 – 170+ | 30 – 50 |
Testing and Fine-Tuning
After making your initial adjustments, it’s time to test. Plug the compressor back in and let it fill the tank. Note the cut-out pressure. Then, use an air tool to bleed off pressure and note the cut-in pressure. Does it feel right? Are your tools getting enough air? Is the compressor cycling too often or not often enough? You might need to repeat the adjustment process a few times to get it perfect. We found that patience is key here. Don’t be afraid to make small tweaks until you’re satisfied.
Troubleshooting Common Issues
Sometimes, things don’t go exactly as planned. If you’re encountering problems, here are a few common things to check.
Compressor Not Turning On or Off
If the compressor motor doesn’t turn on at the cut-in pressure or doesn’t turn off at the cut-out pressure, double-check your adjustments. Ensure the screws are turned properly. Sometimes, the switch itself can fail. If the settings are correct and it’s still not working, the switch might need replacement. Many repair guides suggest checking the wiring connections to the switch as well (National Electrical Code).
Pressure Fluctuations
If you notice significant pressure drops when using tools, your cut-in pressure might be set too low, or your differential is too wide. Adjust the cut-in screw to be closer to the cut-out pressure. Conversely, if the compressor cycles very frequently, you might need to widen the differential or lower the cut-out pressure slightly. Finding the right balance is key for consistent performance.
Quick Checklist for Adjusting Your Air Compressor Switch
Want a quick summary? Follow these steps:
- Confirm safety: Unplug the compressor and release all tank pressure.
- Identify screws: Locate the cut-in and cut-out adjustment screws on the switch.
- Adjust cut-out: Turn screws for the desired ‘off’ pressure, test, and repeat.
- Adjust cut-in: Set the desired ‘on’ pressure, test, and fine-tune.
- Check differential: Ensure the gap between on/off points is appropriate.
- Test with tools: Use your air tools to verify performance.
Conclusion
You’ve now learned how to adjust your air compressor’s pressure switch for better performance. Remember, adjusting the cut-in and cut-out pressures helps protect your compressor and the tools you use. It ensures you have the right air pressure when you need it, without overworking the motor. Always prioritize safety by unplugging the unit and releasing pressure before making any changes. Take your time with the small adjustments, test your settings, and you’ll have your compressor running efficiently in no time. Get started by checking your current settings and making those necessary tweaks!
Frequently Asked Questions
What is the typical pressure range for most air compressors?
For home garage use, a common cut-out pressure is between 120 and 150 psi, with a cut-in pressure around 90 to 120 psi. This gives you a differential of about 20-30 psi. These ranges can vary, so always check your compressor’s manual.
Can adjusting the pressure switch void my warranty?
Generally, making authorized adjustments to the pressure switch according to the manual will not void your warranty. However, if you cause damage through improper adjustment or modification, it might affect your coverage. It’s best to follow your manufacturer’s guidelines.
What happens if my pressure switch fails?
If your pressure switch fails, your compressor might not turn on or off at the correct pressure points. It could run continuously or fail to start altogether. In such cases, the switch itself may need to be replaced by a qualified technician.
How often should I check my air compressor switch settings?
It’s a good idea to check your settings periodically, especially if you notice changes in performance or your tools aren’t operating as expected. A quick check every six months to a year is usually sufficient for most users.
Is it safe to adjust the pressure switch if I’m not experienced?
Yes, with the safety precautions outlined (unplugging, releasing pressure) and careful attention to the steps, it is a manageable task for many DIYers. If you feel uncomfortable at any point, consulting your manual or a professional is always a wise choice.