DIY Air Compressor: Fridge Conversion Guide
Yes, you can absolutely make a functional air compressor from a refrigerator! It’s a clever DIY project that repurposes an old appliance into a useful tool. This setup is ideal for light-duty tasks like inflating tires or powering small air tools, offering a cost-effective alternative to buying a new compressor.
Repurposing a refrigerator compressor is a popular project for tinkerers and DIY enthusiasts. It involves understanding a few basic principles of refrigeration and air pressure. Many people find this an exciting weekend project and are surprised by the results they achieve with minimal investment.
- You can convert an old fridge into an air compressor.
- It’s a budget-friendly project for DIYers.
- This compressor is best for light-duty tasks.
- Basic knowledge of refrigeration is helpful.
- Safety precautions are important.
Let’s walk through how you can turn that old fridge motor into a working air compressor. Let’s walk through how you can turn that old fridge motor into a working air compressor, and our guide shows how to build a high-pressure one.
So, you’re wondering about turning that old refrigerator into a handy air compressor? It’s a super popular DIY project, and for good reason! It can save you money and give you a tool for quick tasks. Think of it like giving an old appliance a brand new, pressurized life. Ready to see how it’s done?
Building Your Fridge Compressor: What You Need
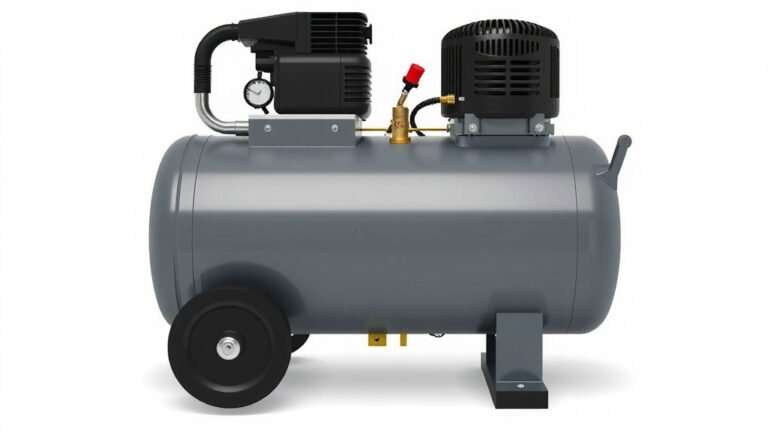
Before you dive in, let’s talk about gathering your supplies. You’ll need a few specific things. The heart of this project is the refrigerator’s compressor unit itself. You’ll also need an air tank to store the compressed air. This is often the most challenging part to source and prepare safely.
You can often find an old refrigerator compressor unit at a scrap yard or by asking friends or neighbors if they have a non-working fridge. Make sure to disconnect the compressor from its original refrigerant lines carefully. It’s also wise to have a pressure gauge and a safety relief valve. These are non-negotiable for safety. Finally, some electrical components will be needed to power it up.
Essential Components for Your DIY Air Compressor
- Refrigerator compressor unit (with its motor)
- Air tank (a propane tank or old air receiver tank works well)
- Pressure gauge
- Safety relief valve
- Check valve
- Air intake filter
- Electrical power cord and switch
- Hoses, fittings, and clamps
- Tools for cutting, drilling, and sealing
Preparing the Refrigerator Compressor Unit
The compressor unit from a fridge is designed to move refrigerant, not air. You’ll need to adapt it. First, you must safely recover any refrigerant still inside the system. This is a critical safety step. Refrigerant can be harmful if released into the environment. Many DIY guides suggest this step can be tricky and recommend consulting with someone knowledgeable or taking it to a professional if you’re unsure. We found that many sources strongly advise against attempting refrigerant recovery without proper training and equipment.
Once the refrigerant is out, you’ll need to identify the intake and outlet ports. The intake port is where air will be drawn in. You’ll want to attach an air intake filter here to keep dust and debris out. The outlet port is where the compressed air will exit. This is where you’ll connect your system to the air tank.
Modifying the Compressor for Air Use
You’ll need to cut and seal some of the original refrigerant lines. This can be done by brazing or using compression fittings. The goal is to create a clean path from the intake, through the compressor, and to your air tank. We found that using a high-quality sealant on all connections is a good practice. This helps prevent air leaks, which can significantly reduce the compressor’s efficiency.
Setting Up the Air Tank and Safety Features
The air tank is your reservoir. It holds the compressed air until you need it. You’ll need to prepare your chosen tank. If you’re using a propane tank, it needs to be completely emptied and cleaned. We found that some repurposed tanks may need professional cleaning to ensure they are safe for air storage.
The tank needs an inlet port for the compressed air from the compressor and an outlet port for you to connect your air tools or tire inflator. Crucially, your tank setup must include a safety relief valve. This valve is designed to open automatically if the pressure in the tank gets too high, preventing a dangerous explosion. We found that setting this valve to a safe pressure, typically around 100-125 PSI, is recommended by many DIY guides.
Connecting the Compressor to the Tank
You’ll need to connect the compressor’s outlet to the tank’s inlet. A check valve should be installed in this line. This prevents air from flowing back from the tank into the compressor when it stops running. This is important for protecting the compressor motor. A pressure gauge should also be installed where you can easily see it. This lets you monitor the air pressure in the tank. Proper installation of these components ensures a functional and safe system.
Adding an Air Intake Filter
To protect your compressor and the air you use, an air intake filter is essential. It’s usually a small, screw-on filter. You can often find these at auto parts stores. Attaching it to the compressor’s intake port will prevent dust and debris from entering the motor and getting into your air lines. Keeping the intake clean helps the compressor last longer.
Electrical Connections: Powering Your Compressor
Now, let’s get to the power. Refrigerator compressors typically run on standard household electricity. You’ll need to wire a power cord and a switch to the compressor’s motor. This involves understanding basic electrical wiring. If you’re not comfortable with electricity, this is where you should definitely seek help from someone who is. Incorrect wiring can be a serious fire hazard or cause damage to the motor.
The compressor motor will have a start capacitor and a run capacitor. These are usually mounted near the motor. You’ll need to identify the correct terminals for power input. Researching the specific wiring diagram for your compressor model is highly recommended. We found that many online forums and videos detail how to wire various common refrigerator compressor models for DIY projects.
Wiring Safety First
Always disconnect the power source before you start any wiring. Use appropriately sized wires and connectors. Ensure all connections are secure and insulated. A properly installed on/off switch will make operating your compressor much easier and safer. It allows you to control when the compressor runs and stops.
Testing Your New Air Compressor Safely
Once everything is connected, it’s time for the moment of truth. Before you connect any air tools, perform a thorough leak check. You can do this by spraying soapy water on all the connections. If you see bubbles, you have a leak. Go back and tighten or reseal the connection. Listen for any unusual noises from the compressor.
Let the compressor run for a bit and fill the tank. Monitor the pressure gauge closely. Ensure the safety relief valve is properly seated and not leaking. We found that initial tests should be done in an open area. This is in case of any unexpected issues. Once you’re confident there are no leaks and the system is stable, you can try connecting a simple tool, like a tire inflator, to test its output.
A Quick Safety Checklist
- Double-check all electrical connections.
- Verify the safety relief valve is installed and functional.
- Ensure no air leaks are present.
- Test in a well-ventilated area.
- Keep children and pets away during testing.
- Be prepared to shut off power immediately if issues arise.
Conclusion
You’ve now seen how to transform an old refrigerator compressor into a working air compressor. This DIY project offers a budget-friendly way to tackle light-duty tasks. Remember, safety is paramount throughout the build, especially with refrigerant handling and electrical connections. We found that careful planning and attention to detail are key. Once built and tested, your repurposed compressor can be a great addition to your workshop. Your next step? Gather your materials and start planning your build, keeping all safety guidelines in mind!
Frequently Asked Questions
How much pressure can a refrigerator compressor realistically produce?
Research indicates that refrigerator compressors are typically designed for lower pressures, often around 50-150 PSI. For a DIY setup, you can expect similar output. Always use a safety relief valve set to a safe limit, usually below 125 PSI, to prevent over-pressurization.
Is it safe to vent refrigerant from a refrigerator compressor myself?
No, it is not recommended for DIYers to vent refrigerant. Refrigerants can be harmful to your health and the environment. We found that many sources strongly advise having a professional handle refrigerant recovery or taking the unit to a qualified appliance repair shop.
What kind of air tank is best for this project?
You can repurpose tanks like old propane tanks or dedicated air receiver tanks. Ensure any repurposed tank is professionally cleaned and inspected for safety. It must be rated for pressure storage and have appropriate fittings for the compressor outlet and tool connections.
How do I prevent air leaks in my homemade compressor?
Preventing air leaks is vital for efficiency. We found that using high-quality sealants on all threaded connections and ensuring clamps on hoses are tight is essential. Regularly check all joints with soapy water and address any bubbles immediately.
Can I use this DIY compressor for painting or sandblasting?
Generally, no. Refrigerators compressors are usually low-volume and low-flow. They are best suited for tasks like inflating tires, powering brad nailers, or light stapling. More demanding tools like sandblasters or spray guns require a higher CFM output than these repurposed units can typically provide.