DIY Air Compressor Water Pump: A Step-by-Step Guide
You can definitely make an air compressor water pump yourself. It’s a DIY project that can save you money. You’ll need a few basic parts and some careful assembly. This guide will show you how to create a reliable water pump using your air compressor.
This setup uses the pressure from your air compressor to push water out. It’s a clever way to repurpose your tool for different tasks. Many people have found this method to be surprisingly effective and affordable. You can use it for small-scale irrigation or draining flooded areas.
- Understand the basic principle: air pressure pushes water.
- Gather your necessary components like a tank and fittings.
- Assemble the parts securely to prevent leaks.
- Test the pump carefully before relying on it.
Ready to build your own air compressor water pump? Let’s walk through the steps to get you set up with this handy device.
Building Your Own Air Compressor Water Pump
You can absolutely build your own water pump using an air compressor. It’s a smart DIY project that uses air pressure to move water. This guide will walk you through the process step-by-step.
Understanding the Basic Principle
How does this work? It’s quite simple, really. Your air compressor builds up air pressure inside a sealed container. This pressure then forces water out of the container through a hose. Think of it like squeezing a water bottle; the pressure you apply pushes the water out.
This method is a fantastic way to repurpose tools you already own. You don’t need a complex electric pump for many tasks. A well-built air compressor pump can be surprisingly effective for draining small areas or even for light irrigation.
Gathering Your Necessary Components
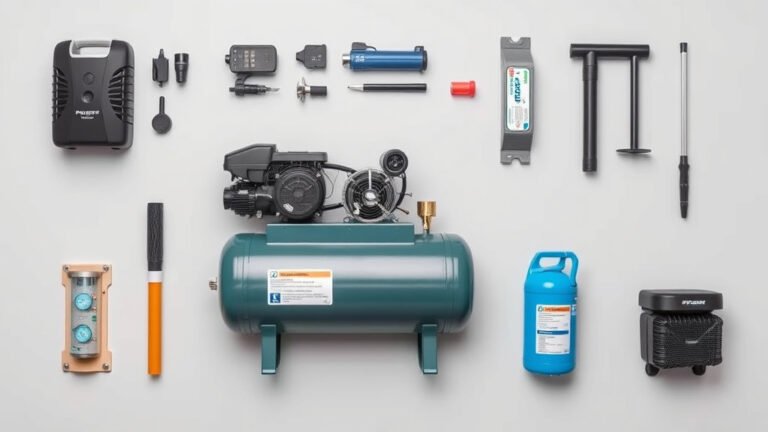
Before you start building, you’ll need a few key parts. The quality of these parts will affect how well your pump works. Make sure you have the following items on hand:
The Container (Pressure Tank)
You need a sturdy, sealable container to hold the water and withstand air pressure. A small, used propane tank or a repurposed air compressor tank works well. Ensure it’s thoroughly cleaned and safe for use. It must be able to hold pressure without leaking.
Air Compressor and Hose
You’ll obviously need an air compressor. Make sure it can deliver enough pressure for your needs. You’ll also need an air hose with the correct fittings to connect your compressor to the tank.
Water Fittings and Hoses
You’ll need an inlet fitting for the water to enter the tank and an outlet fitting for the water to be pumped out. Standard garden hose fittings or plumbing connectors can work. Choose fittings that match the size of your container’s openings. You’ll also need short lengths of hose for the inlet and outlet.
Valves and Connectors
You’ll need a few valves. A check valve is essential on the air inlet to prevent water from backing up into your compressor. Ball valves are useful for controlling the flow of air and water. You’ll also need various adapters and connectors to link everything together securely.
Sealant and Tools
Pipe thread sealant (like Teflon tape or pipe dope) is crucial for creating watertight and airtight seals. You’ll also need basic tools like wrenches, a drill, and possibly a metal file.
Assembling Your Air Compressor Water Pump
Now comes the fun part: putting it all together! Safety first, always. Ensure your air compressor is unplugged and depressurized before you begin. Wear safety glasses throughout the assembly process.
Preparing the Tank
Clean your chosen tank thoroughly. If it previously held hazardous materials, ensure it’s completely purged and safe. Drill holes for your fittings if necessary. One hole will be for the air inlet, another for the water outlet, and potentially one for a drain valve.
Installing the Air Inlet Fitting
Screw the air inlet fitting into its designated hole. Apply pipe thread sealant liberally to the threads. Install the check valve here, ensuring it’s oriented correctly to allow air in but not out. Connect your air hose from the compressor to this fitting. A check valve on the air inlet is crucial to prevent water from backing up into your compressor.
Installing the Water Outlet Fitting
Attach your water outlet fitting. Use plenty of sealant. This is where your water will be pumped out. You can attach a hose here to direct the water where you want it to go. Some designs include a ball valve here to control water flow.
Installing a Water Inlet Fitting (Optional but Recommended)
For easier filling, you might want a dedicated water inlet fitting. This can be a simple threaded port where you can attach a garden hose. Some people opt to simply pour water into the tank through an open valve, but an inlet fitting is more convenient.
Securing All Connections
Go over every connection. Tighten all fittings securely. Use wrenches to ensure they are snug. Leaks are your enemy here, both for air and water. A good seal means your pump will work efficiently.
Adding a Drain Valve (Optional)
Consider adding a drain valve at the lowest point of the tank. This makes it much easier to empty the tank for maintenance or when you’re done using it. A simple ball valve works perfectly for this.
Testing Your New Water Pump
Before you rely on your pump for any serious task, you must test it thoroughly. This is where you catch any mistakes or weak points.
Initial Air Pressure Test
With the water outlet closed off, connect your air compressor. Slowly introduce a small amount of air pressure. Listen carefully for any hissing sounds. Check all fittings for leaks. If you find any, turn off the air, release pressure, and reseal the connection.
Water Pumping Test
Once you’re confident there are no air leaks, it’s time for a water test. Fill the tank about halfway with water. Close the air inlet valve. Open the water outlet. Now, slowly add air pressure from your compressor. You should see water start to flow from the outlet hose. Observe the pressure gauge on your compressor; it should drop as the air pressure is used to push the water. Many experts recommend not exceeding 30-40 PSI for most DIY setups to maintain safety (National Fire Protection Association). To ensure the pump works, you need to know how to build air compressor pressure.
Troubleshooting Common Issues
What if it doesn’t work? If no water comes out, check if your air pressure is high enough. Ensure the check valve on the air inlet is working correctly. If water leaks from the air inlet, the check valve is likely faulty. If air leaks from the water outlet, ensure that valve is fully closed before adding air.
A Checklist for Success
Here’s a quick rundown to make sure you’re on the right track:
- Gather all your parts before starting.
- Clean your tank thoroughly.
- Use pipe sealant on all threaded connections.
- Install a check valve on the air inlet.
- Test for air leaks before adding water.
- Perform a water test at low pressure first.
Considerations for Different Needs
The size of your tank and the power of your air compressor will determine how much water you can pump and how quickly. For larger jobs, you’ll need a bigger tank and a more robust compressor. For small tasks, a smaller setup is perfectly adequate.
Think about the material you’re pumping. If it’s just clean water, standard fittings will be fine. If you plan to pump water with debris, you might need more rugged components. Many DIYers find this method best suited for occasional, light-duty pumping tasks.
Conclusion
You’ve now learned the core principles and practical steps to build your own air compressor water pump. By repurposing common materials and using your air compressor’s power, you can create a functional tool for various needs. Remember, careful assembly and thorough testing are key to a safe and effective pump. Don’t be afraid to start small and adapt your design. Your next step is to gather your components and begin assembling your personalized water pumping solution. Enjoy the satisfaction of this cost-effective DIY project!
Frequently Asked Questions
What’s the safest pressure to use for a DIY air compressor water pump?
For most DIY setups, experts and safety guidelines suggest not exceeding 30-40 PSI. Higher pressures increase the risk of leaks or tank failure. Always monitor your compressor’s gauge and start with lower pressures during testing.
Can I use any type of tank for this project?
It’s best to use a tank designed to hold pressure, like a small propane tank or an old air compressor tank. Ensure it’s thoroughly cleaned and free from any hazardous residues. Avoid tanks not rated for pressure, as they could rupture.
What happens if water gets into my air compressor?
Water entering your air compressor can cause rust and damage its internal components over time. This is why installing a check valve on the air inlet line is absolutely essential to prevent backflow.
How long will a DIY air compressor water pump run?
The run time depends on your air compressor’s tank size and how quickly it cycles. You’ll need to periodically repressurize the tank as water is pumped out. For continuous pumping, you’d need an automated system or a very large compressor tank.
Can this pump handle water with debris or mud?
This type of pump is generally best for clear water. Pumping water with significant debris can clog the outlet hose or fittings. If you need to pump dirty water, consider adding a strainer to the inlet or using more rugged, larger-diameter plumbing.