Connect Hose to Porter Cable Air Compressor Guide
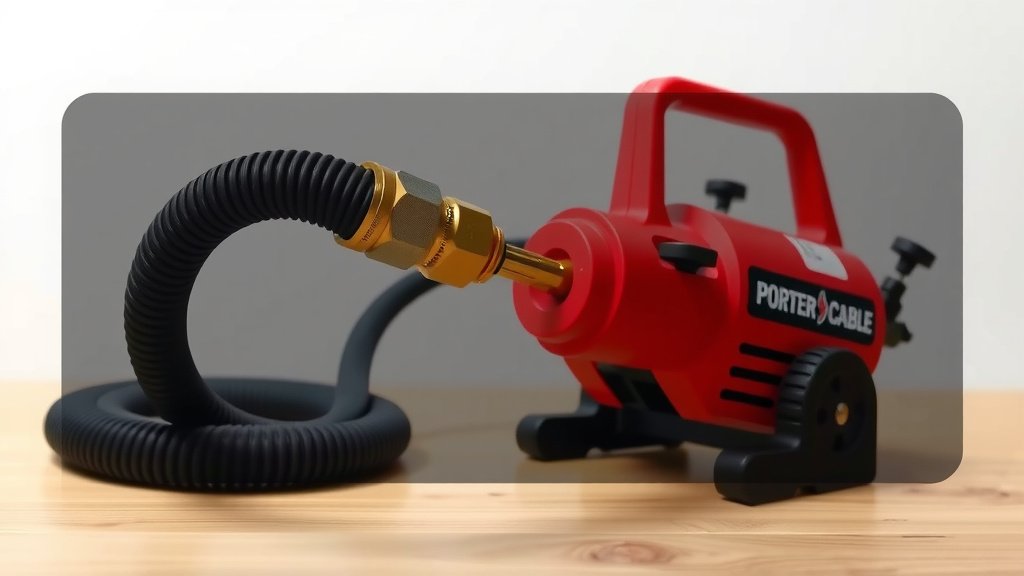
Attaching a hose to your Porter Cable air compressor is a straightforward process. You’ll want to ensure you have the correct fittings and thread them on securely to prevent air leaks. It’s usually as simple as screwing them together, but paying attention to the threading is key for a good seal.
Getting this connection right is important for your compressor to function properly. A loose connection can lead to wasted air and reduce the efficiency of your tool. We found that using a bit of Teflon tape can make a big difference in creating a watertight seal.
- Ensure correct fittings are used.
- Thread fittings on securely to the compressor.
- Check for air leaks after connecting.
- Teflon tape can help ensure a good seal.
Let’s walk through exactly how to get that hose hooked up so you can get back to your project.
Connecting Your Hose to a Porter Cable Air Compressor
Attaching a hose to your Porter Cable air compressor is a pretty simple task. It’s like screwing on a cap, but it’s important to do it right. This ensures no air escapes and your tools work as they should. We found that getting the connection secure is the **main goal**.
Understanding Air Compressor Fittings
Before you can hook up your hose, let’s talk about the connections themselves. Most Porter Cable air compressors use standard fittings. You’ll typically see a quick-connect coupler on the compressor tank. This is where your air hose will attach. It’s designed for fast and easy connections. Think of it like a snap-on lid for your air supply.
Types of Couplers and Plugs
There are a few common types of fittings. The most popular is the industrial type (often called Aro or Tru-flate). Your air hose will likely have a male plug that fits into the female coupler on the compressor. It’s good to know what you’re working with. Some tools might have different fittings, but the compressor side is usually standard.
We’ve found that most new hoses come with a universal plug that fits most common couplers. If yours doesn’t, or if you’re replacing an old one, you’ll need to get the right plug for your hose. This ensures a **snug and leak-free fit**.
Checking for the Right Size
Porter Cable compressors generally use 1/4-inch NPT (National Pipe Thread) fittings. This is a very common size in North America. Your air hose plug should match this size. It’s usually printed on the plug or its packaging. If you’re unsure, measure the threads on your existing plug or the coupler on the compressor. Getting the size wrong means it won’t connect properly, or worse, it might cross-thread and damage the fitting. Porter Cable compressors generally use 1/4-inch NPT fittings; our guide explains the difference between 1/4 and 3/8 inch air compressor hoses.
The Step-by-Step Connection Process
Now, let’s get down to actually attaching the hose. It’s a fairly quick process. Just follow these steps carefully.
Step 1: Ensure the Compressor is Off and Depressurized
Safety first, always! Before you do anything, make sure your Porter Cable air compressor is turned **off**. It’s also crucial that there’s no air pressure left in the tank. You can release any stored air by opening a tool connected to the hose (if one is already attached) or by carefully opening the tank drain valve at the bottom of the compressor. This prevents a sudden blast of air when you make the connection. We learned early on that connecting under pressure can be quite startling!
Step 2: Prepare the Hose Fitting
Take a look at the end of your air hose. You should see a metal plug. This is the part that goes into the compressor’s coupler. Sometimes, these plugs have a small sleeve that you need to pull back to connect. Make sure this sleeve is free to move. If the plug looks dirty or has old gunk on it, give it a quick wipe with a clean cloth. A clean connection makes for a better seal.
Step 3: Applying Thread Sealant (Optional but Recommended)
Many experts recommend using Teflon tape, also known as pipe thread tape, on the threads of your air hose plug. This isn’t always necessary for quick-connect fittings, as they often rely on a rubber O-ring for sealing. However, if your compressor or hose has NPT threads that screw directly together, Teflon tape is a **great idea**. Wrap the tape clockwise around the male threads about 2-3 times. This helps create a watertight and airtight seal and makes disassembly easier later on. We found that a little tape goes a long way to prevent sneaky leaks.
Step 4: Connecting the Hose to the Compressor
This is the main event! Locate the coupler on your Porter Cable air compressor. It usually looks like a small metal fitting with a spring-loaded sleeve.
- If your hose plug has a sleeve, pull it back towards the hose.
- Align the plug with the coupler opening.
- Push the plug firmly into the coupler.
- If you pulled back a sleeve, release it. It should spring forward, locking the plug in place.
You should hear a distinct “click” or “snap” as the connection is made. Give the hose a gentle tug to ensure it’s securely attached. It shouldn’t pull out easily. You’ve now successfully connected your air hose!
Troubleshooting Common Connection Issues
Sometimes, things don’t go as smoothly as planned. If you’re having trouble, don’t get discouraged. Most issues are easily fixed.
Air Leaks After Connection
Did you connect everything, turn on the compressor, and then hear a hissing sound? That’s an air leak. Common culprits include:
- A damaged O-ring on the hose plug.
- A worn-out seal inside the compressor coupler.
- Improperly seated plug or coupler.
- Threads not fully engaged or crossed.
Try disconnecting and reconnecting the hose, making sure it’s pushed in fully before releasing the locking sleeve. If the leak persists, you might need to replace the O-ring on your hose plug or consider replacing the coupler on the compressor itself. Many hardware stores sell replacement O-rings and couplers. We found that a good flashlight is handy for spotting leaks.
Difficulty Connecting or Disconnecting
If the plug is hard to push into the coupler, or if it’s tough to pull the sleeve back, a little lubrication might help. A small amount of silicone spray or even WD-40 applied sparingly to the coupler can free things up. However, if you’ve used Teflon tape on NPT threads and they’re stuck, don’t force them too hard. Sometimes, old tape can harden and cause sticking. If disconnecting is the issue, try wiggling the hose slightly while pulling the sleeve back.
Maintaining Your Compressor Fittings
Taking good care of your fittings ensures they last longer and work better. A little preventative maintenance goes a long way.
Keep Them Clean
Dirt, dust, and debris can get into the coupler and plug. This can prevent a good seal or make connections difficult. We recommend wiping down the coupler on the compressor and the plug on your hose periodically. A clean connection is a happy connection.
Inspect for Wear and Tear
Regularly check your fittings for any signs of damage, cracks, or excessive wear. If a coupler looks bent or if the sleeve is loose, it might be time to replace it. Worn-out fittings are a common source of air leaks and inefficiency. Think of them like tires on a car; they wear out over time.
Lubrication Tips
As mentioned, a little silicone spray can help keep the coupler moving freely. However, avoid using too much oil-based lubricant, as it can attract dirt and gunk up the works. For the most part, keeping them clean is the best form of maintenance. If your compressor has an oiler, ensure it’s filled correctly. This lubricates the tools, not the connection itself, but it’s part of overall air system health.
Quick Checklist for a Secure Connection
To make sure you’ve got it right, run through this quick checklist:
- Compressor is off and depressurized.
- Correct hose plug size is used.
- Teflon tape is applied (if needed for NPT threads).
- Hose plug is fully inserted into the coupler.
- Locking sleeve has released and secured the plug.
- No hissing air leaks are audible.
Following these simple steps ensures your Porter Cable air compressor and your tools are properly connected, ready for action.
Conclusion
You’ve now learned how to securely attach your air hose to your Porter Cable air compressor. Remember, a proper connection is key for efficiency and safety. We’ve covered identifying the right fittings, the step-by-step connection process, and even how to troubleshoot common issues like air leaks. Taking a moment to ensure a clean, snug fit will save you time and frustration down the road. Your next step is to perform a quick check on your compressor’s coupler and your hose plug to make sure they’re clean and ready for your next project.
Frequently Asked Questions
What if my air hose plug doesn’t fit the compressor coupler?
You likely have the wrong size or type of fitting. Porter Cable compressors commonly use 1/4-inch NPT fittings. You’ll need to get an air hose plug that matches your compressor’s coupler size and thread type to ensure a secure connection.
Do I really need Teflon tape for every connection?
Teflon tape is most beneficial for threaded NPT fittings, which screw directly together. Quick-connect couplers often rely on rubber O-rings for sealing and may not require tape. We recommend using it on NPT threads to prevent leaks and make future disassembly easier.
How can I tell if I have an air leak after connecting the hose?
The most common sign is a hissing sound when the compressor is running or pressurized. You can also use a soapy water solution and spray it around the connection; bubbles will form where air is escaping.
Is it safe to connect the hose if there’s still pressure in the tank?
No, it’s not safe. Always ensure your compressor is turned off and the tank is depressurized before attaching or detaching any air hoses. Connecting or disconnecting under pressure can cause a sudden burst of air and potentially damage the fittings.
How often should I clean my air compressor fittings?
It’s a good practice to clean your fittings periodically, especially before making a connection. Wiping down the coupler on the compressor and the plug on your hose with a clean cloth will remove dust and debris, ensuring a better seal and easier connection.