How to Hook Up Your 60 Gallon Air Compressor Safely
Hooking up a 60-gallon air compressor is a manageable DIY project. You’ll need to connect the air hose from the compressor tank to your tool’s coupler and ensure a secure electrical connection. Many find this setup simpler than they expect with a few basic steps.
Getting your compressor ready involves more than just plugging it in. We’ve found that checking the oil level and ensuring the pressure regulator is set correctly are key preliminary steps. Proper setup means your tools get the air they need, when they need it.
- Securely attach your air hose.
- Verify the electrical power source is correct.
- Check compressor oil and set air pressure.
- Test for leaks before heavy use.
Let’s walk through exactly how to get your 60-gallon air compressor hooked up and ready to go.
Getting Your 60-Gallon Air Compressor Ready
Hooking up a 60-gallon air compressor doesn’t have to be a headache. We’ve broken down the process into simple steps. You’ll be powering your tools in no time. Let’s make sure you have everything set up right for safe and effective use.
Choosing the Right Spot for Your Compressor
Finding the perfect home for your compressor is key. It needs a stable, level surface. Avoid placing it in damp or dusty areas if possible. Good ventilation helps keep the unit cool during operation. We found that a spot with easy access to your electrical outlet is also a plus. Make sure there’s enough room around it to work comfortably. You don’t want to feel cramped while making connections.
Understanding Your Compressor’s Components
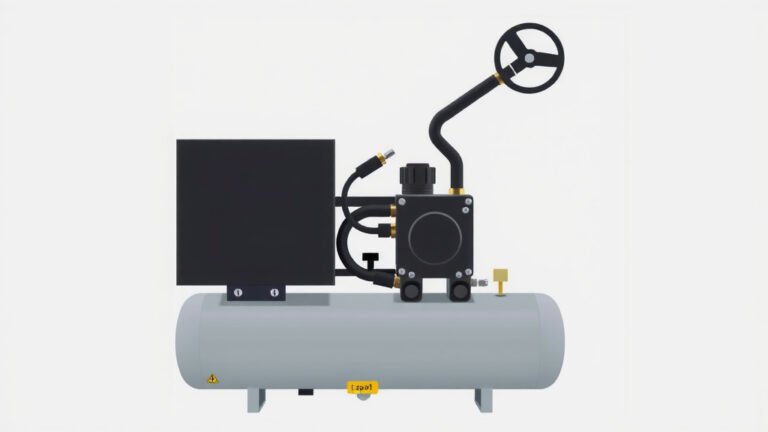
Before you connect anything, it’s wise to know your compressor’s parts. You’ll typically see a large tank, a motor, and an air outlet with a pressure gauge. There’s usually a pressure relief valve, too. This is a critical safety feature. We also found that checking the oil level is a must. Many 60-gallon models require oil for lubrication. Refer to your owner’s manual for the exact type and amount.
Checking the Oil Level
Most oil-lubricated compressors have a dipstick or a sight glass. For a dipstick, pull it out, wipe it clean, reinsert it fully, and pull it out again. You’re looking for the oil to be between the “add” and “full” marks. If using a sight glass, the oil should fill about two-thirds of the window. We learned that overfilling can cause issues. Always use the recommended oil type as specified by the manufacturer.
The Pressure Regulator and Gauges
Your compressor will have at least one gauge showing tank pressure. It might also have a second gauge for regulated output pressure. The regulator allows you to set the air pressure delivered to your tools. Many tools have specific pressure requirements for optimal performance and to prevent damage. Always consult your tool’s manual for its recommended operating pressure. Setting the correct air pressure is crucial for your tools’ performance.
Making the Electrical Connection
This is where many people pause, but it’s usually straightforward. First, confirm your compressor’s voltage requirements. Most 60-gallon models run on 120V or 240V power. You’ll need to match this with your home’s electrical supply. Check the compressor’s plug and compare it to your outlet. If they don’t match, you’ll need an adapter or possibly have an electrician modify your outlet. Safety first is the mantra here; don’t force a connection that doesn’t fit.
Voltage and Amperage Considerations
A 60-gallon compressor often draws a significant amount of power. Ensure the circuit you plan to use is rated for the compressor’s amperage. A dedicated circuit is often recommended to avoid tripping breakers. We found that using an extension cord can sometimes cause voltage drop, reducing performance. If you must use one, opt for a heavy-gauge cord (shorter is better).
Plugging It In Safely
Once you’ve confirmed the electrical match and circuit capacity, plug the compressor in. Before you turn it on, double-check that the power switch is in the “off” position. It’s easy to overlook this simple step. We recommend having the air drain valve closed too, so the tank can build pressure.
Connecting Your Air Hose and Tools
Now for the exciting part: connecting your tools! You’ll need an air hose. The type of connector on your hose needs to match the outlet on your compressor. Common types include industrial, ARO, and universal quick-connect couplers. Make sure you have the correct fittings. A leaky connection here will waste air and reduce efficiency.
Attaching the Air Hose to the Compressor
Most compressors have a threaded fitting where you attach the hose. You might need a quick-connect fitting or a hose clamp, depending on your setup. Ensure a tight seal to prevent leaks. We found that using plumber’s tape on threaded connections can help create a better seal. Avoid overtightening, which can damage the threads.
Setting the Regulator for Your Tools
Before you connect a tool, set the regulator to the lowest possible pressure. Then, connect your tool to the air hose’s coupler. Gradually increase the regulated pressure until it matches your tool’s requirement. Watch the second gauge (if present) to see the output pressure. Many experts suggest setting it slightly higher than the minimum required, but not too high.
Testing for Leaks and Initial Run
It’s important to check for leaks before diving into heavy work. Once you’ve connected everything, turn the compressor on. Let it fill the tank and build pressure. Listen carefully for any hissing sounds around the tank, fittings, or hose connections. A simple soapy water solution can help identify small leaks; bubbles will appear where air is escaping.
What to Do About Leaks
If you find a leak, turn off the compressor and relieve the tank pressure. Tighten the fitting or connection. If it persists, you might need to replace a faulty washer or O-ring. We found that a leak at the tank valve or relief valve might require more involved repair or replacement.
The First Run and Pressure Check
After ensuring there are no major leaks, let the compressor run through a full cycle. It should automatically shut off when it reaches its maximum tank pressure. Let it sit for a while. If it cycles on again soon after shutting off, you likely have a small leak. Your 60-gallon air compressor is now nearly ready for action!
Here’s a quick checklist to keep you on track:
- Confirm electrical compatibility (voltage/amperage).
- Check and fill compressor oil if needed.
- Ensure the air drain valve is closed.
- Connect the air hose securely to the compressor outlet.
- Set the pressure regulator for your specific tool.
- Test all connections for air leaks.
Conclusion
You’ve successfully navigated the setup for your 60-gallon air compressor. Remember, a stable location, proper oil checks, and a secure electrical connection are your foundations for success. Double-checking your air hose fittings and pressure regulator settings ensures your tools perform optimally and safely. We found that taking these preparatory steps prevents frustration down the road. Your next step is to put your compressor to work on that first project and enjoy the power it brings!
Frequently Asked Questions
Do I need a dedicated circuit for my 60-gallon air compressor?
For most 60-gallon compressors, a dedicated circuit is highly recommended. These units can draw a lot of power, and sharing a circuit might cause breakers to trip frequently. Check your compressor’s amperage rating against your home’s electrical panel capabilities.
Can I use an extension cord with my air compressor?
Using an extension cord is generally discouraged, as it can lead to voltage drop and reduced compressor performance. If you must use one, choose a heavy-gauge, short cord specifically rated for high-amperage tools to minimize issues.
What kind of oil does a 60-gallon air compressor typically use?
Most oil-lubricated 60-gallon compressors use a standard compressor oil, often SAE 30 or 10W-30, but always consult your owner’s manual. Using the manufacturer’s recommended oil type is critical for proper lubrication and longevity.
How do I know if I have an air leak?
The best way to check for leaks is to listen for hissing sounds when the compressor is pressurized and shut off. You can also spray a soapy water solution on connections; bubbles will form at any leak points.
What’s the difference between tank pressure and regulated pressure?
Tank pressure is the maximum air pressure stored in the compressor’s tank. The regulated pressure is the adjustable output pressure that you set using the regulator knob, which delivers the correct air volume to your specific tool.